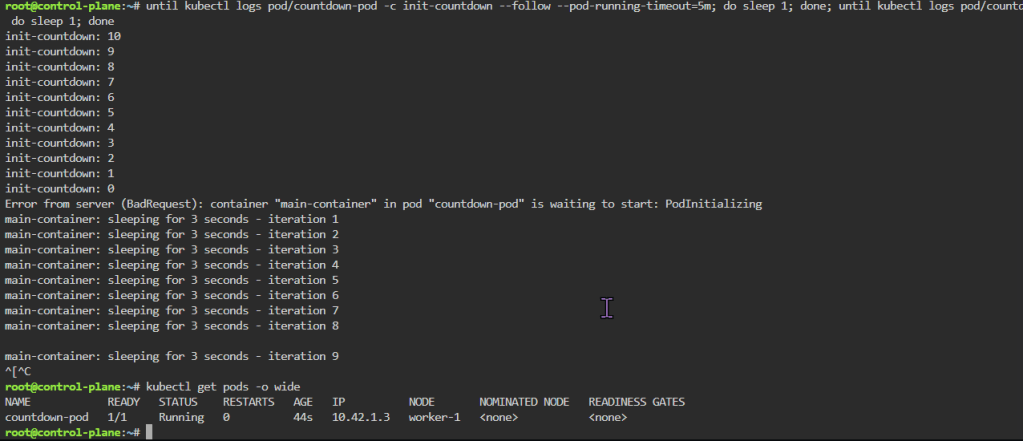
until kubectl logs pod/countdown-pod -c init-countdown --follow --pod-running-timeout=5m; do sleep 1; done; until kubectl logs pod/countdown-pod -c main-container --follow --pod-running-timeout=5m; do sleep 1; done
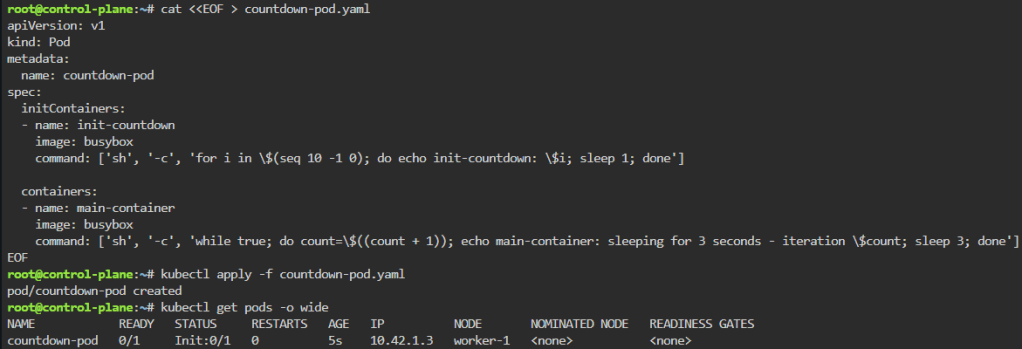
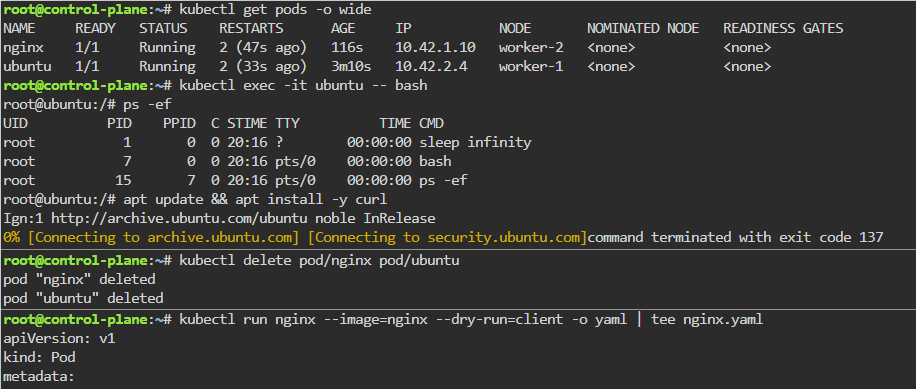
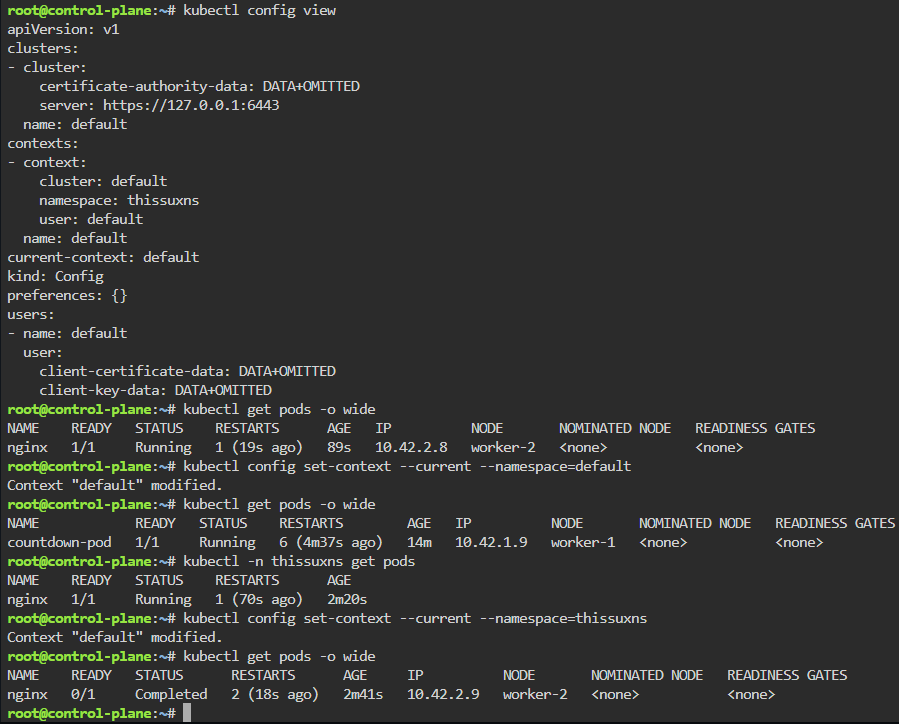
kubectl get pods -o wide
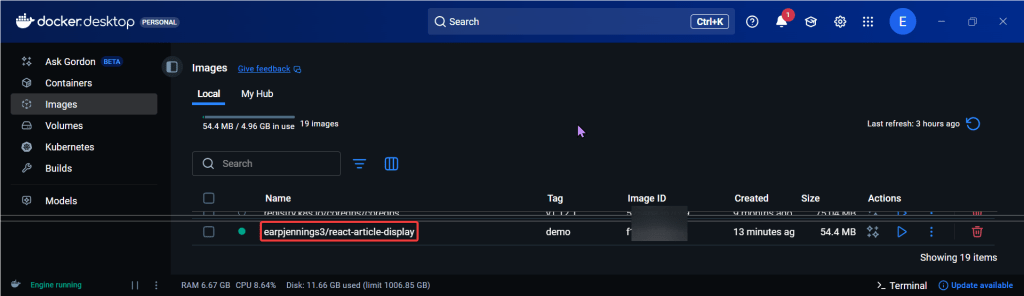
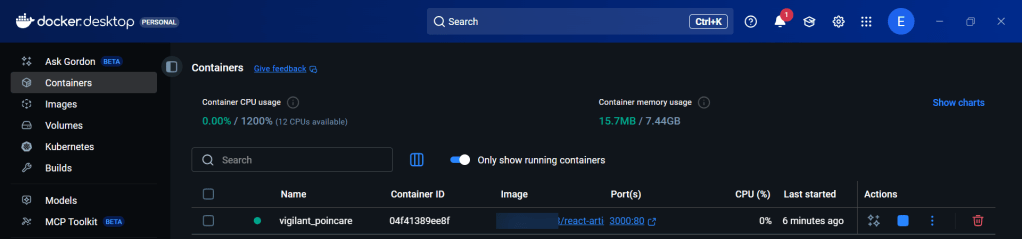
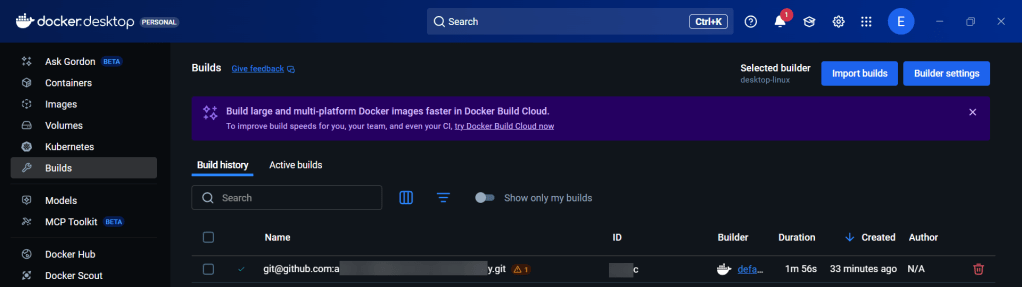
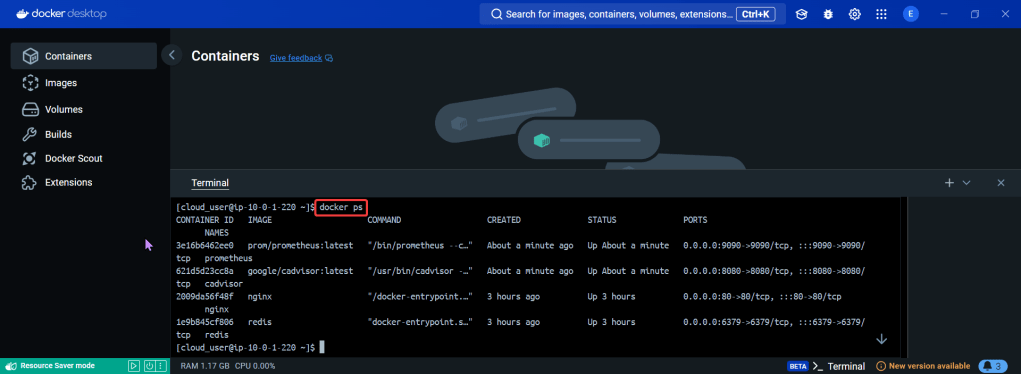
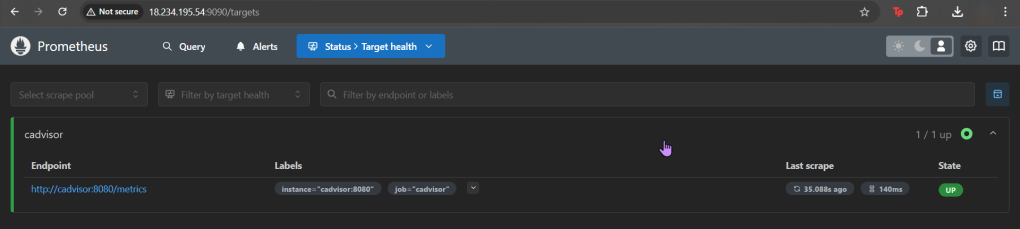
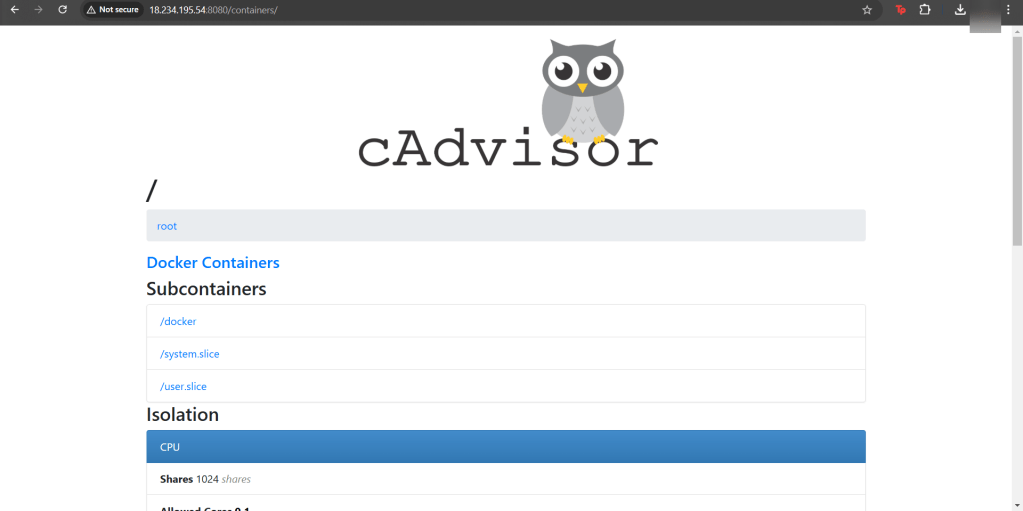
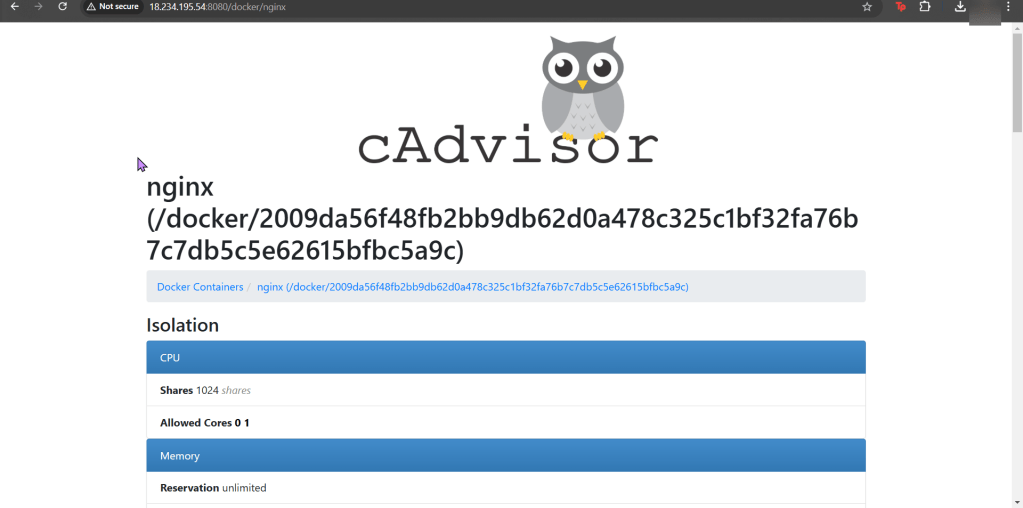
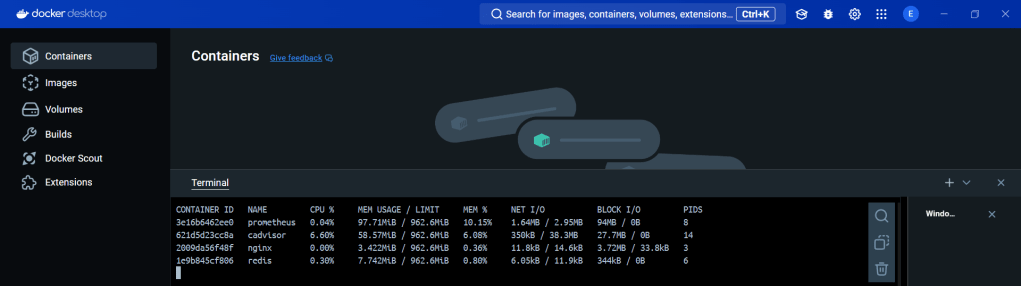
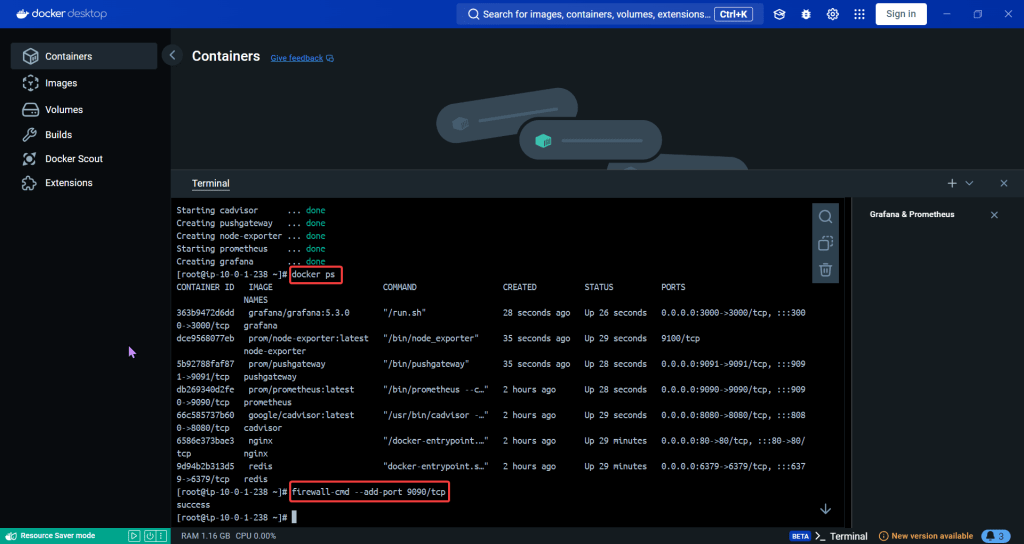
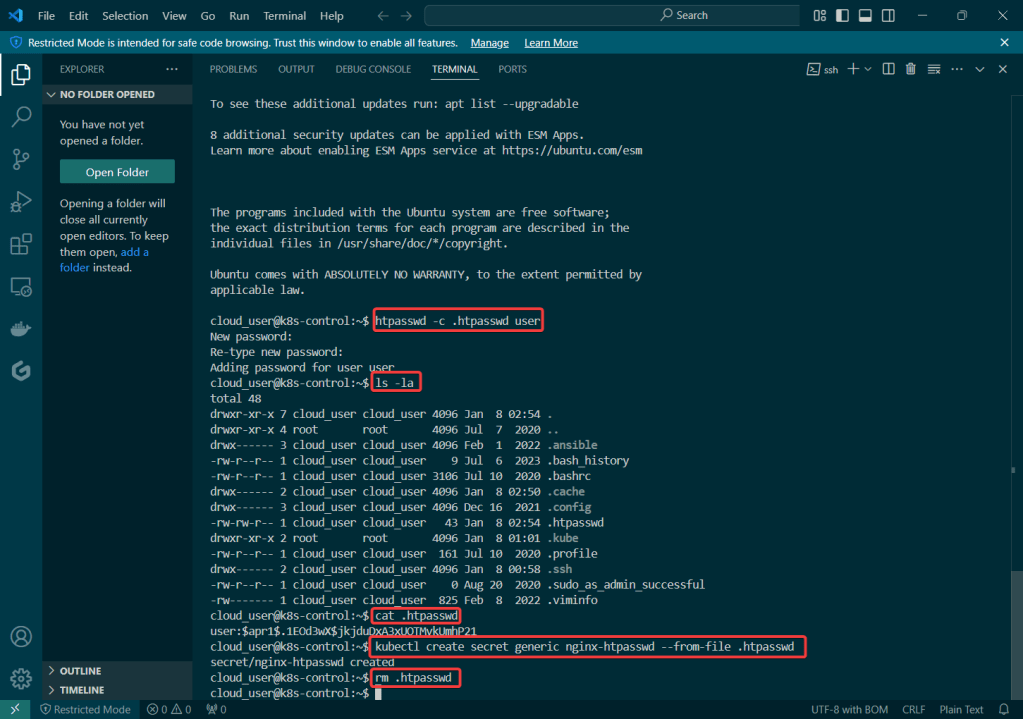
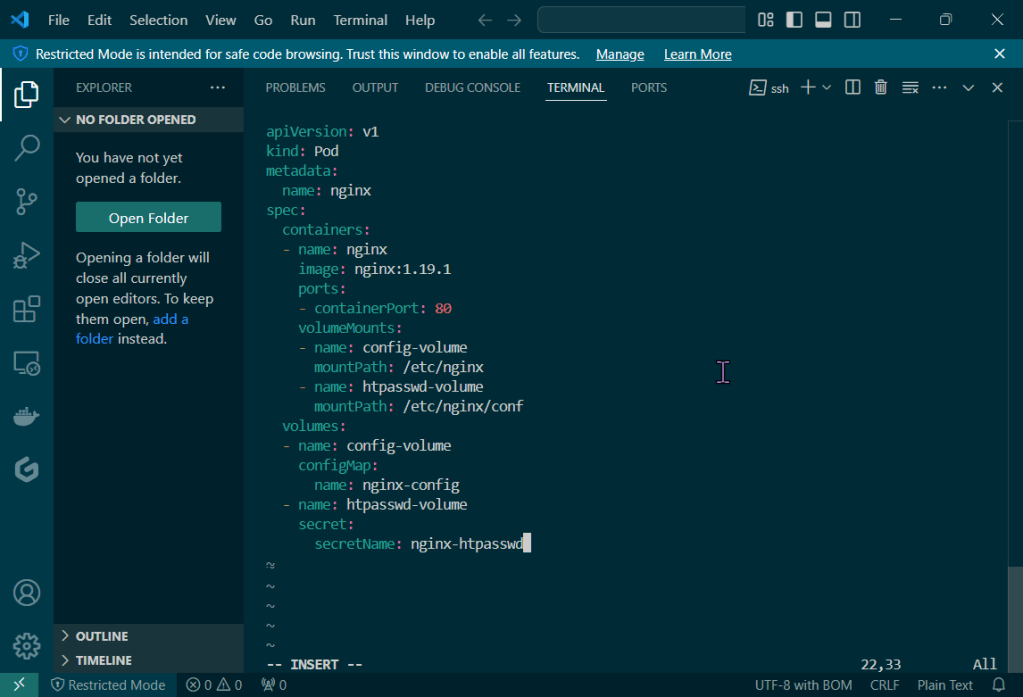
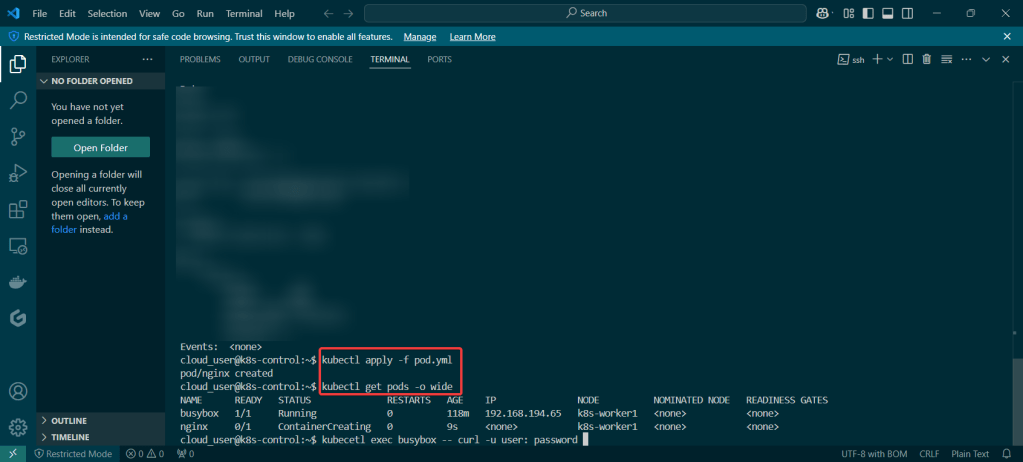
K8 Pods: create image, port forward, curl/shell into pod, create another yaml file image combined as sidecar, & output sidecar response of pod containers
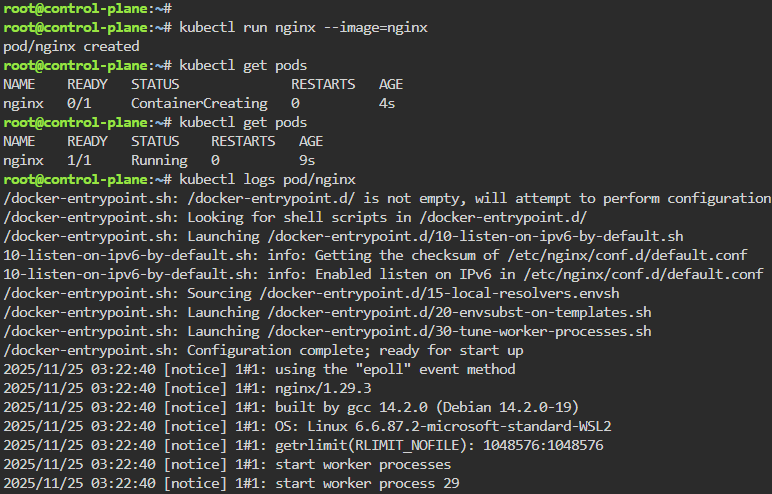
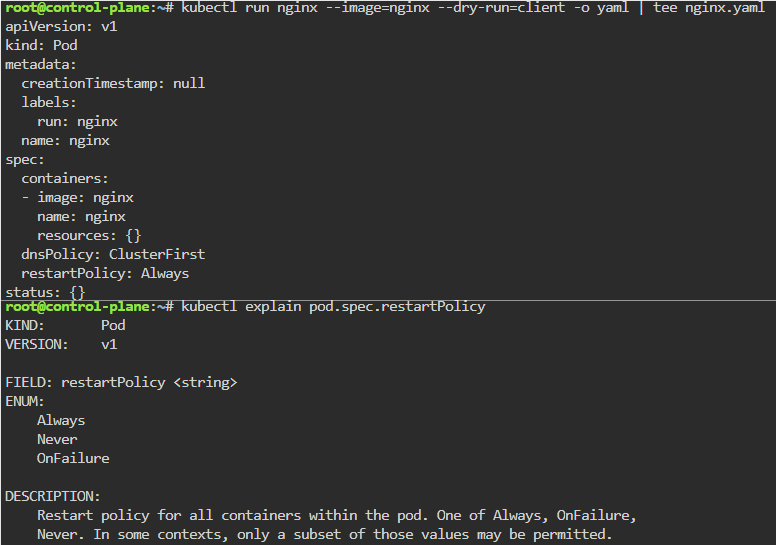
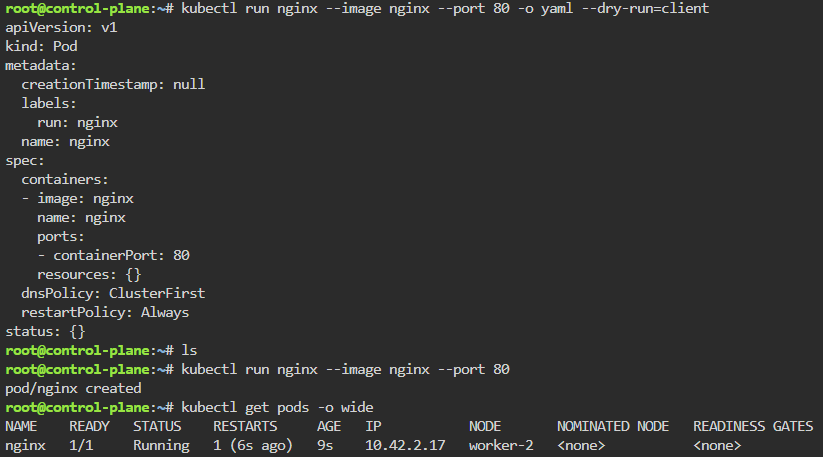
kubectl run nginx --image=nginx
kubectl get pods
kubectl logs pod/nginx
kubectl get pods -o wide
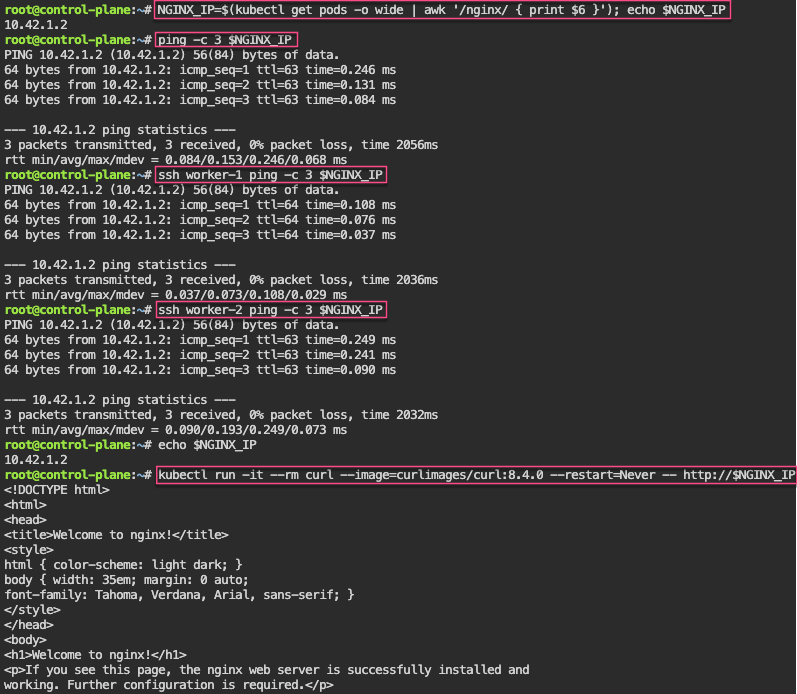
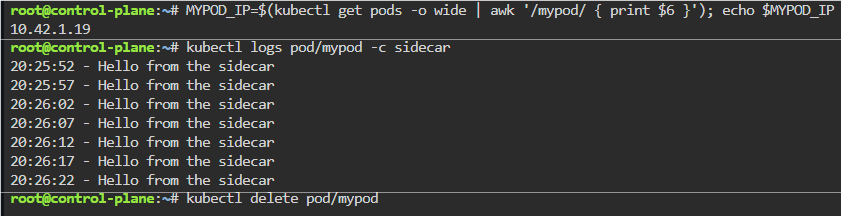
NGINX_IP=$(kubectl get pods -o wide | awk '/nginx/ { print $6 }'); echo $NGINX_IP
kubectl get pods -o wide
kubectl config set-context --current --namespace=default
kubectl get pods -o wide
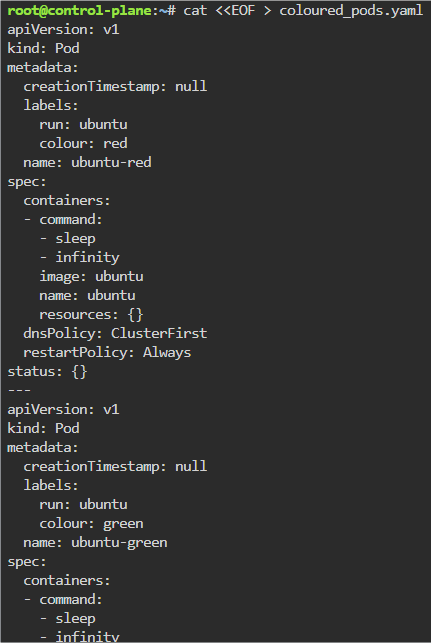
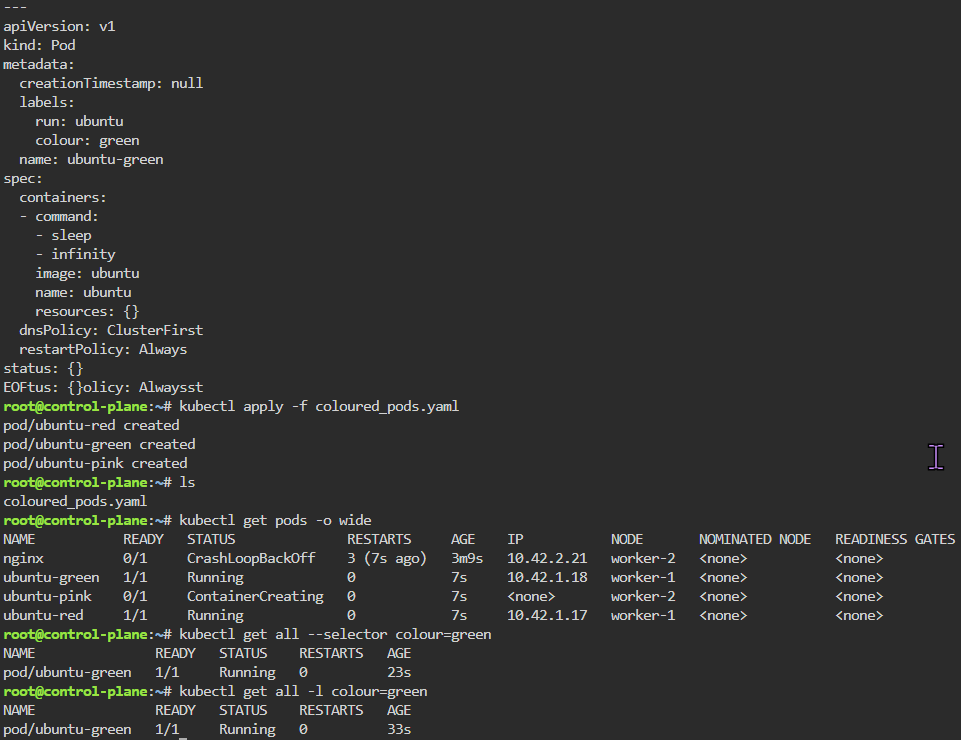
Labels: starting pod on port 80, utilize selector label, apply new yaml file of 3 options for selector label, & then get pods for just that particular label selector
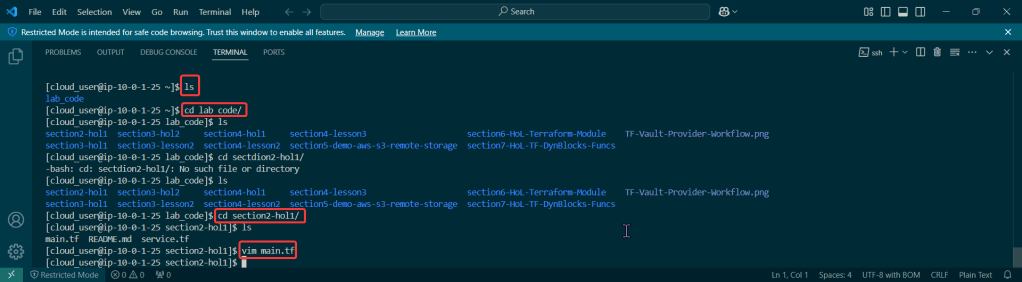
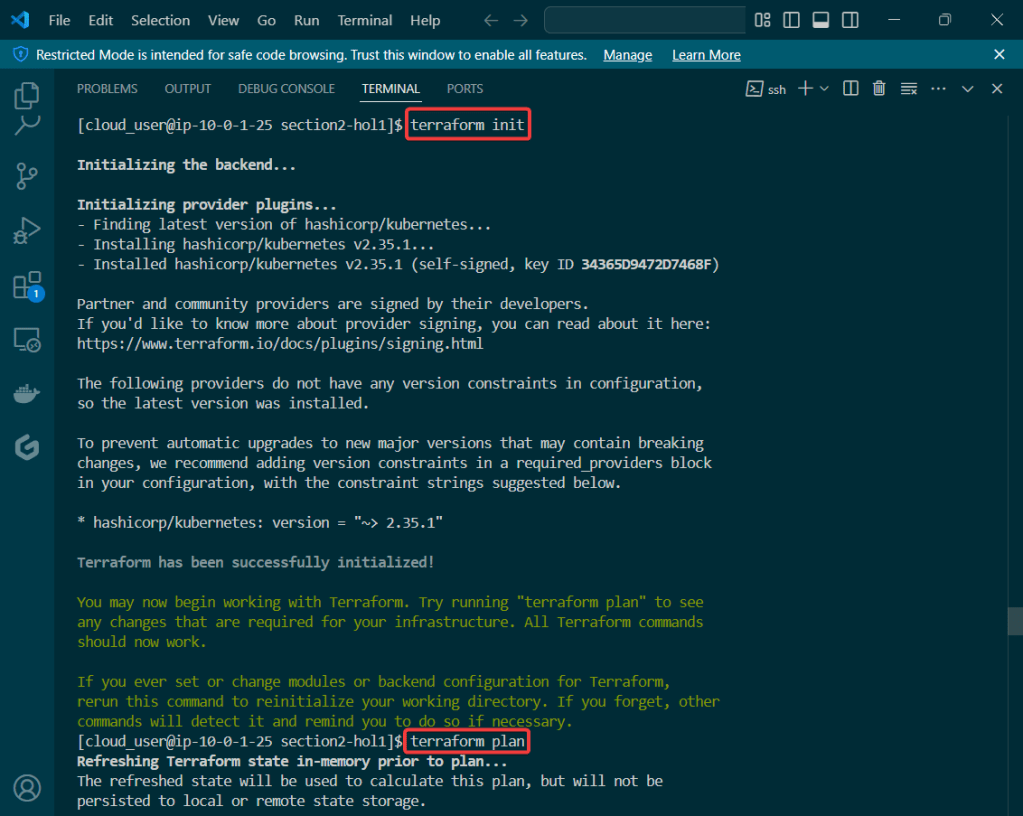
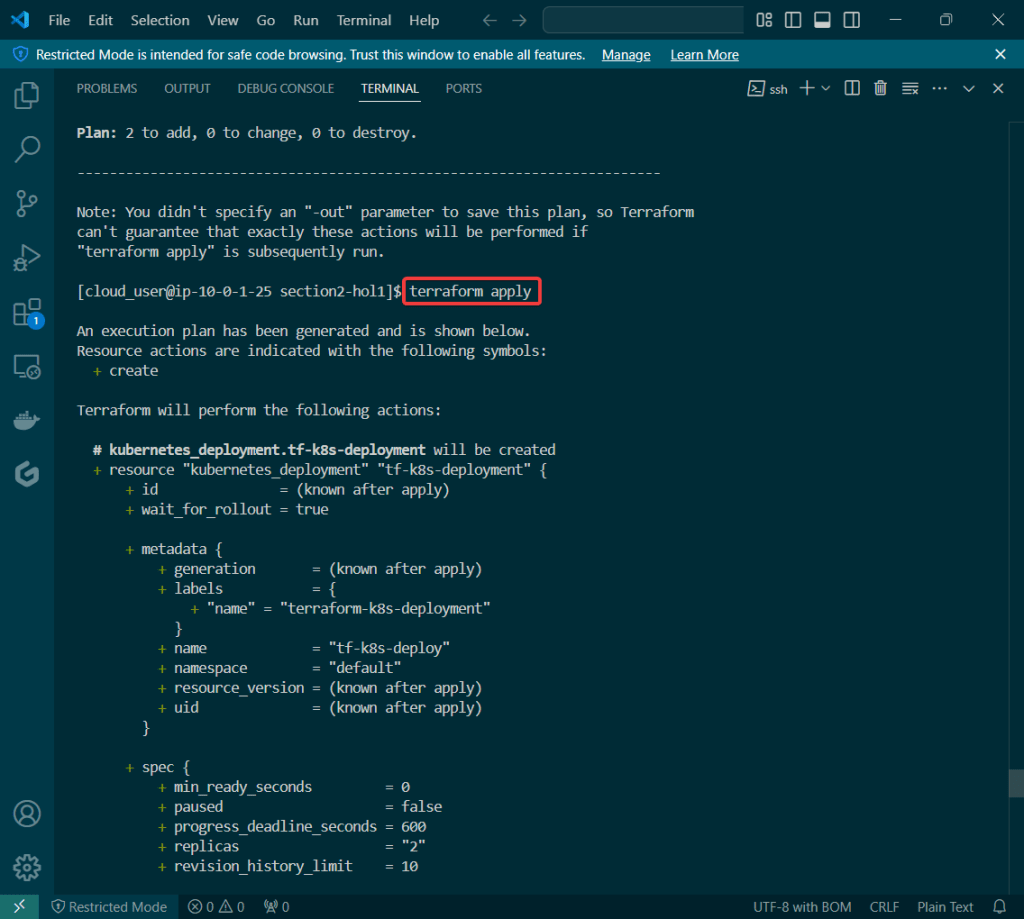
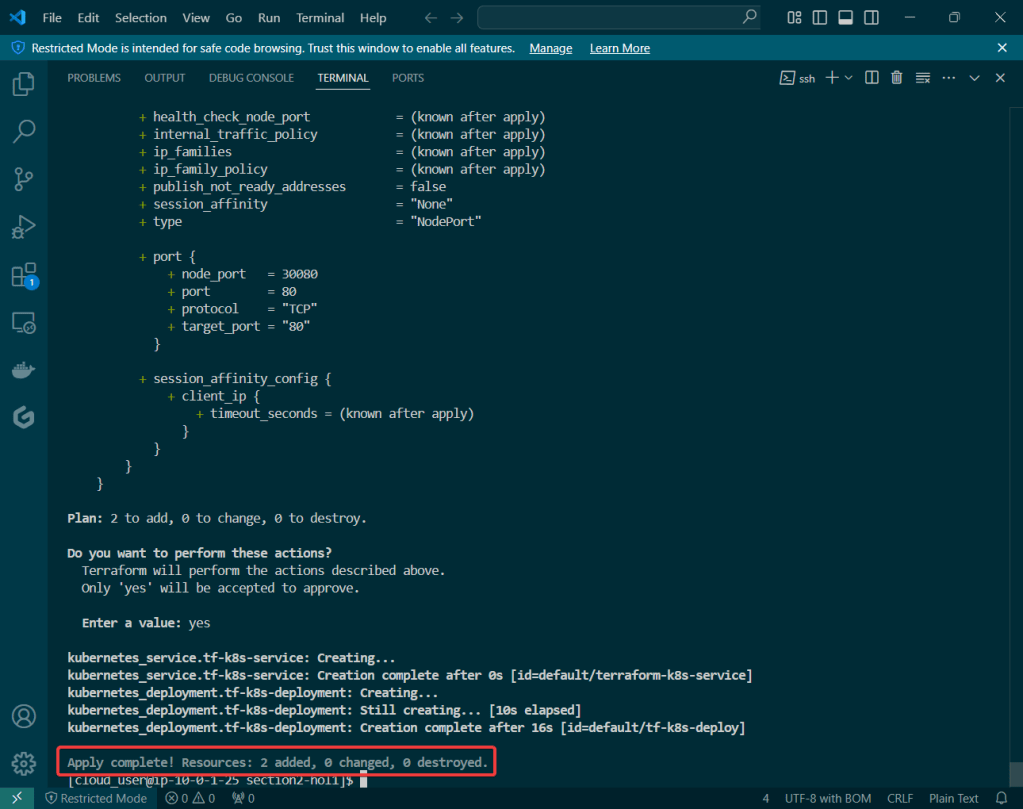
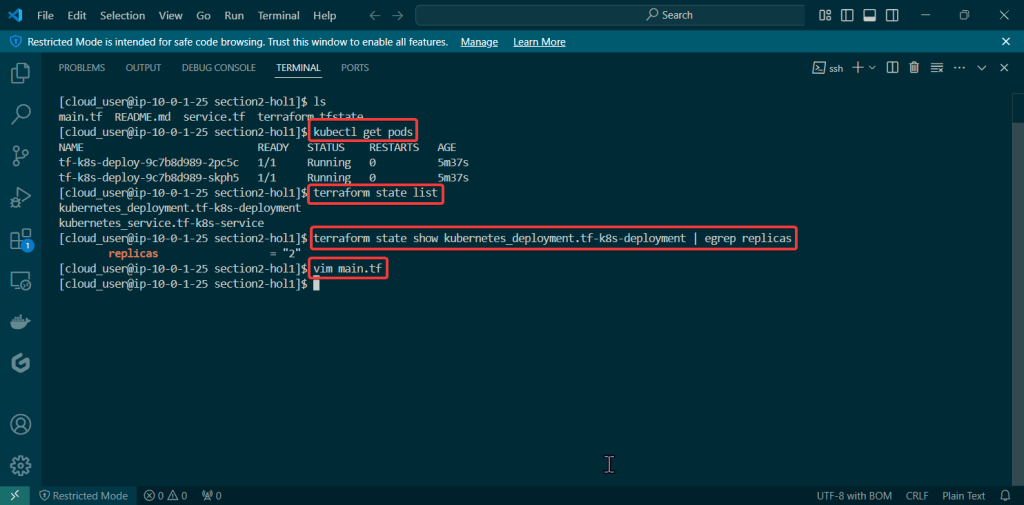
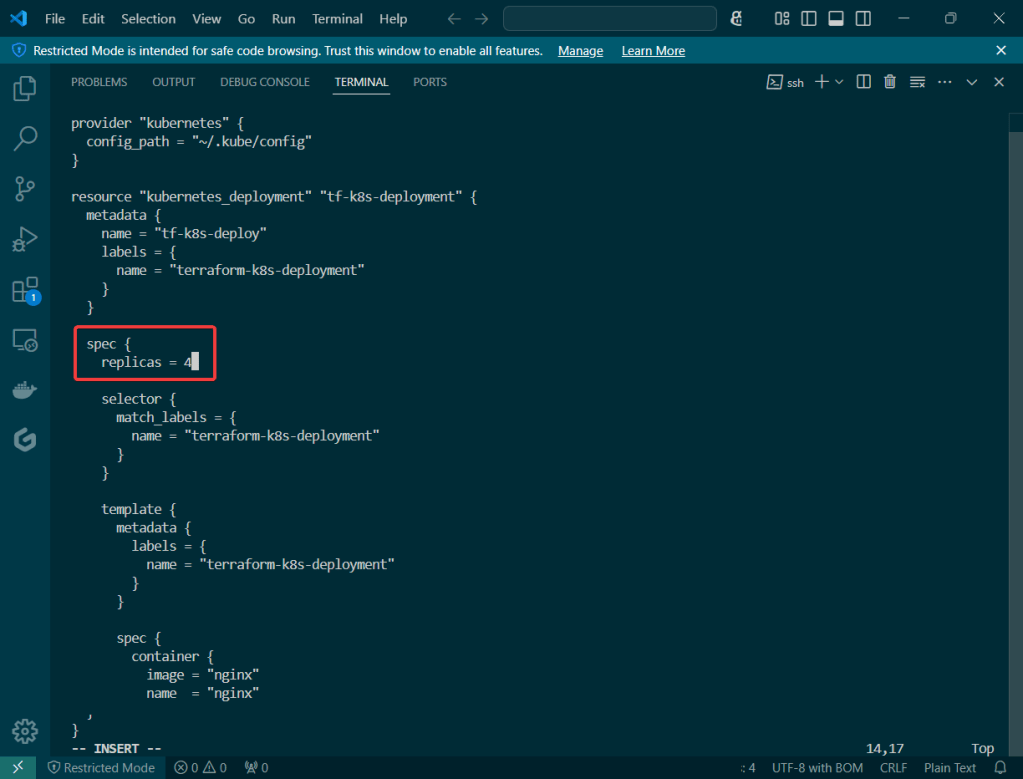
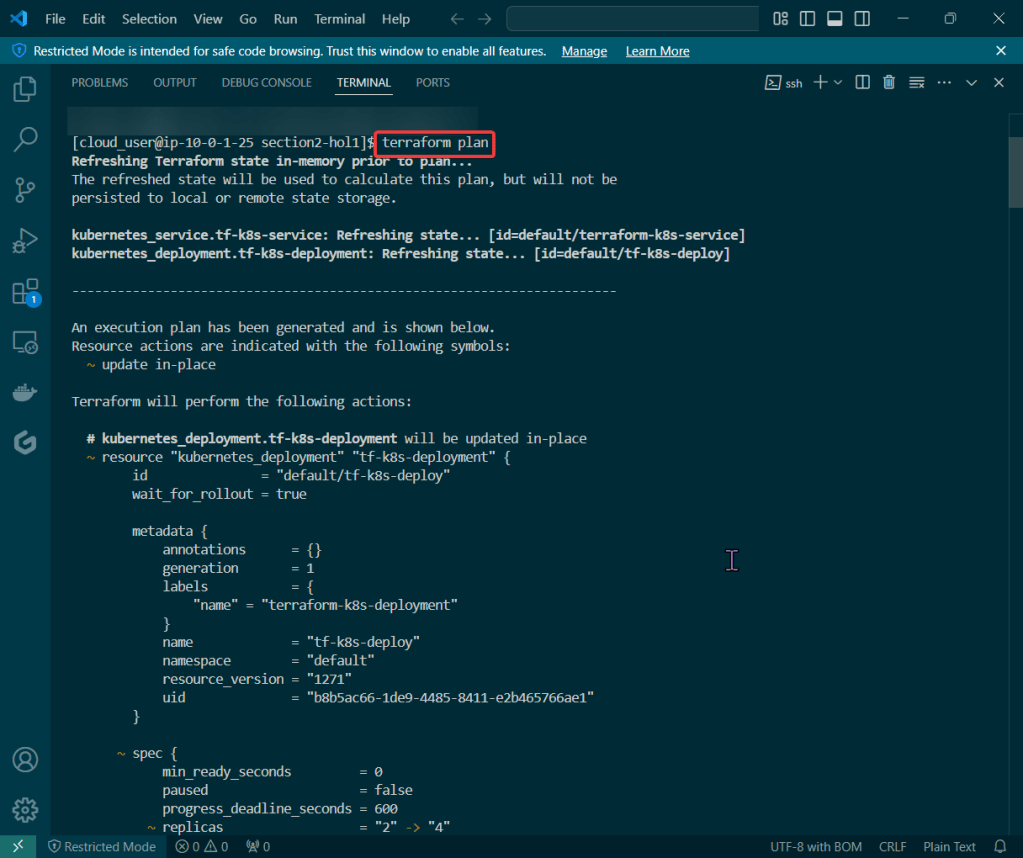
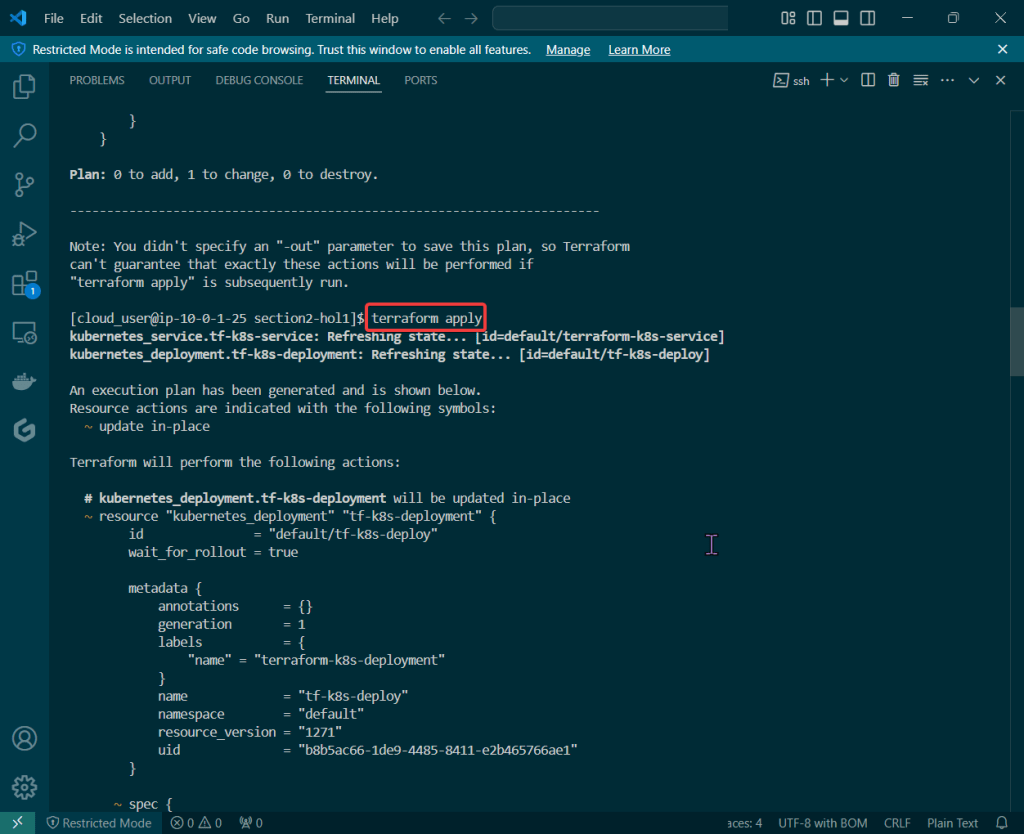
Let’s blend some pimp tools together & launch something into space – cyber space that is. Below is an example to show useful it is to understand Terraform state, deploy resources w/Kubernetes, & see how Terraform maintains the state file to track all your changes along w/deploying containers!
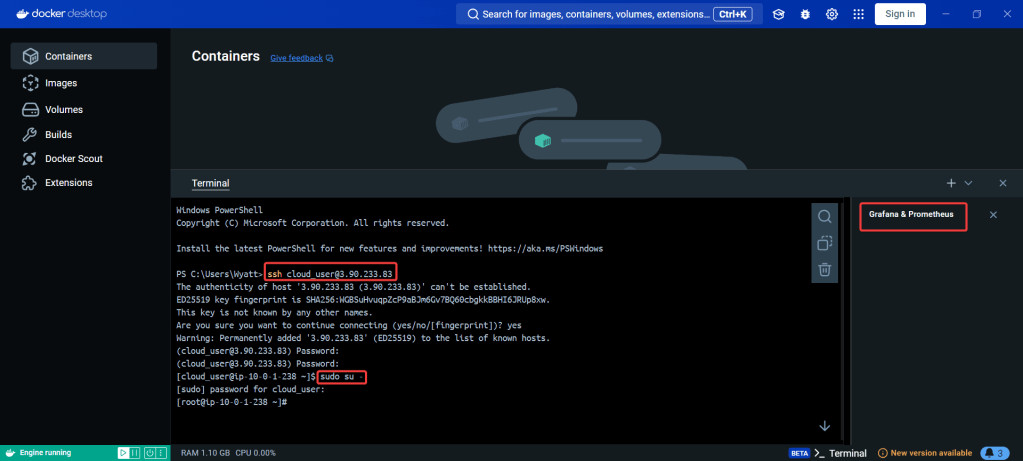
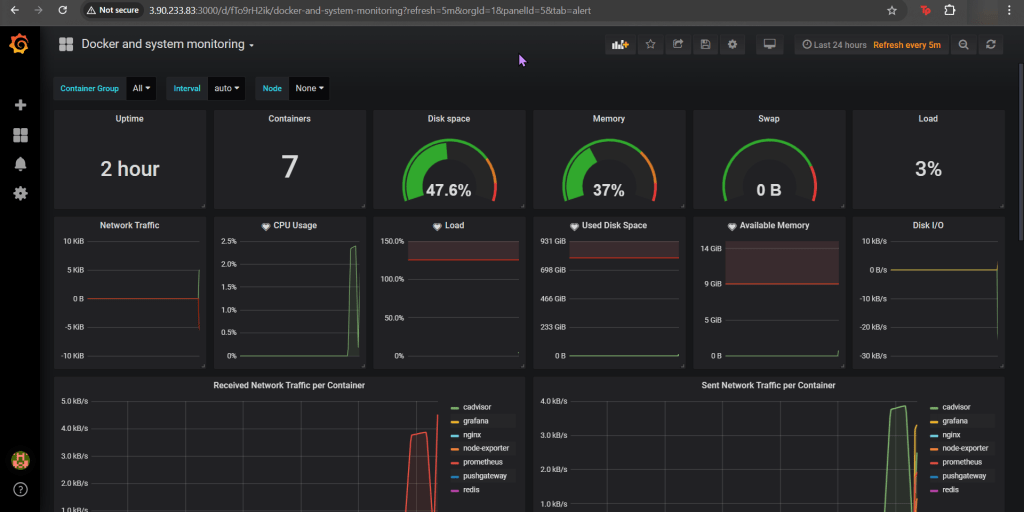
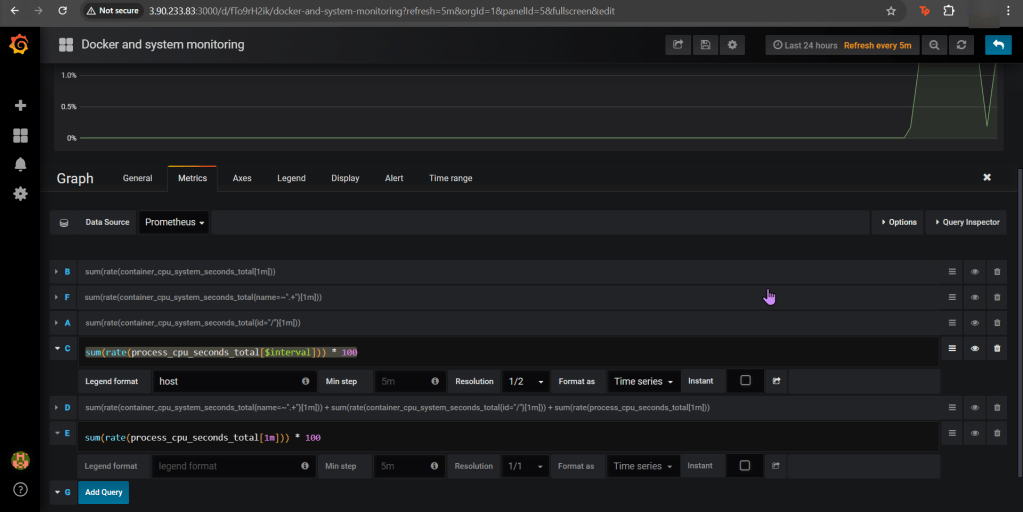
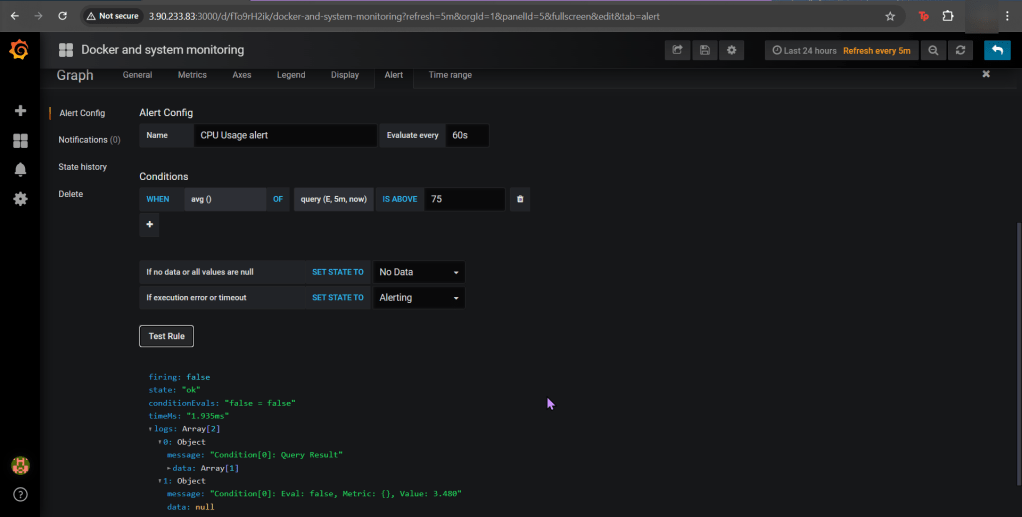
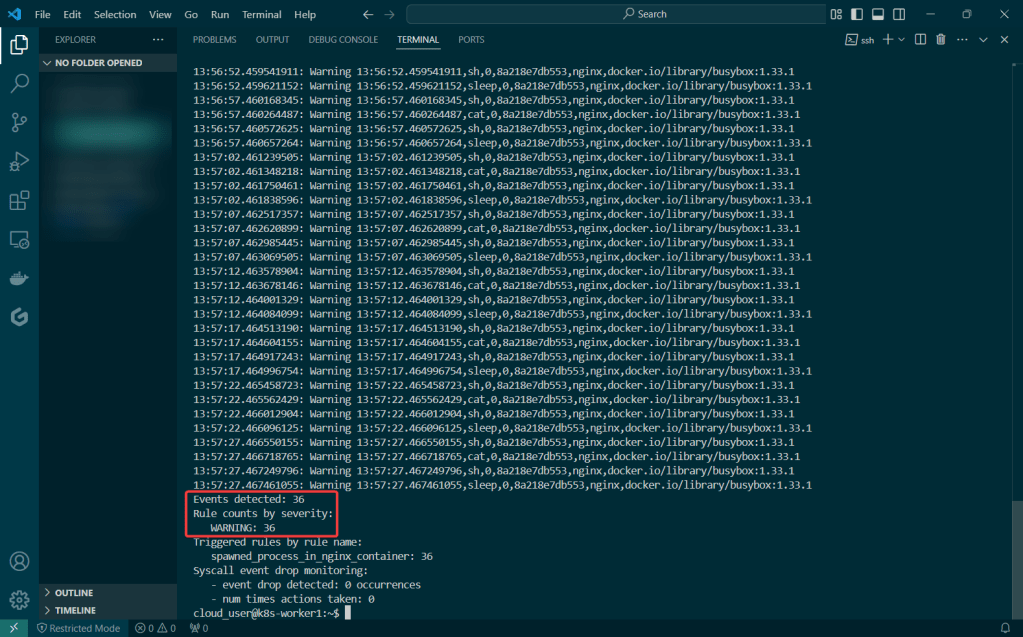
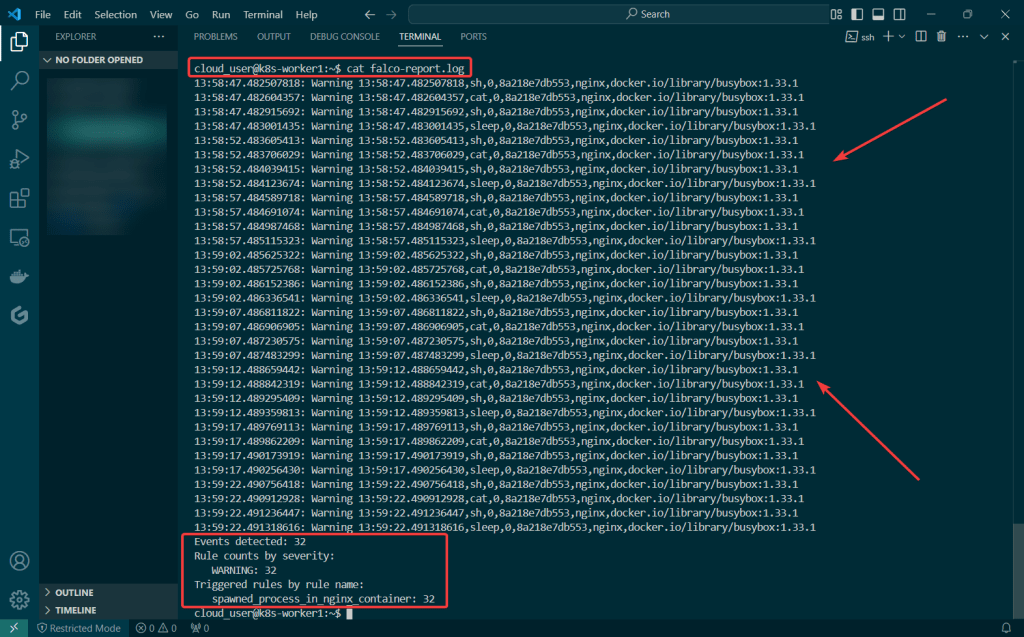
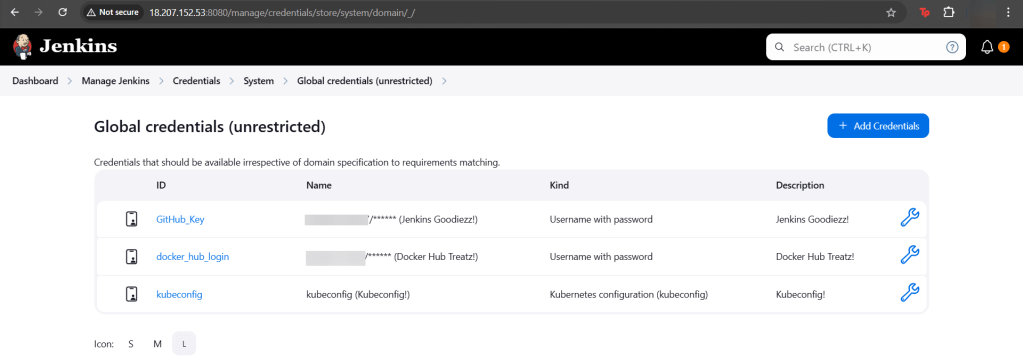
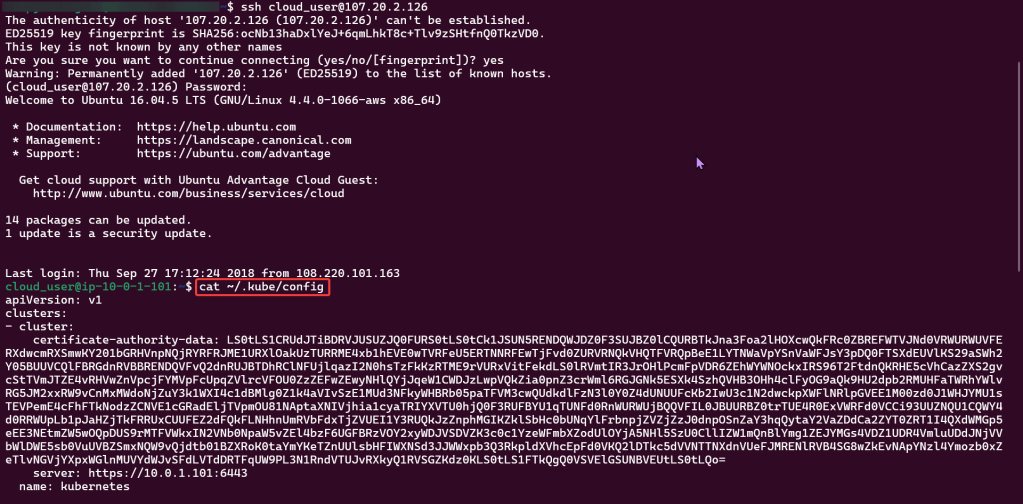
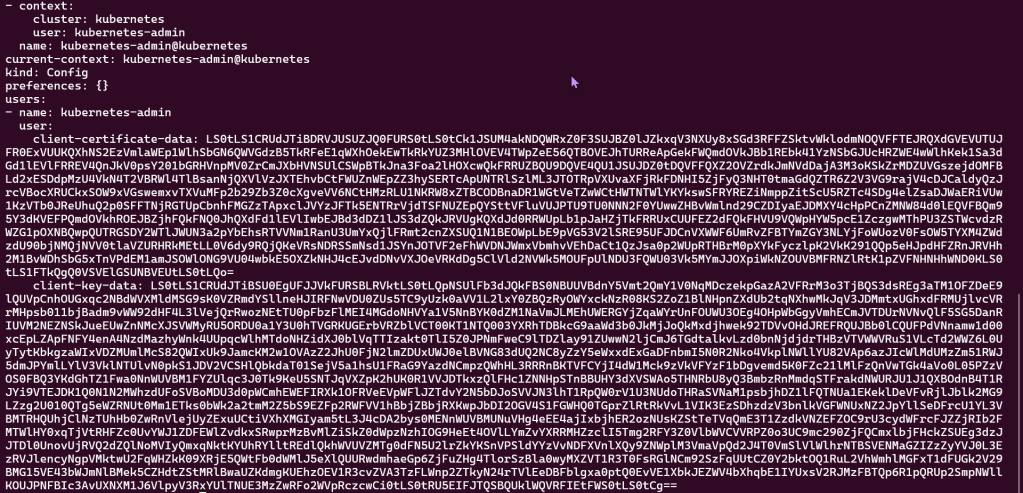
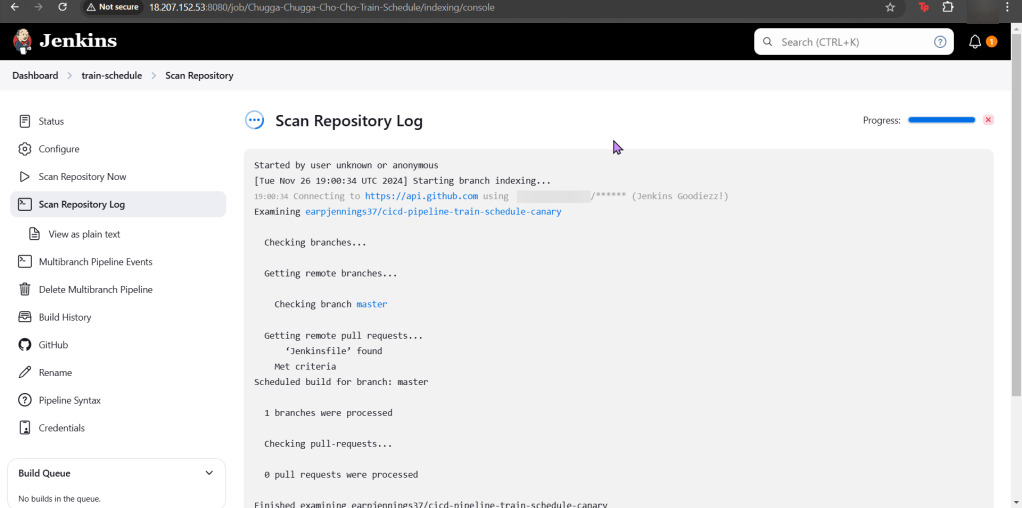
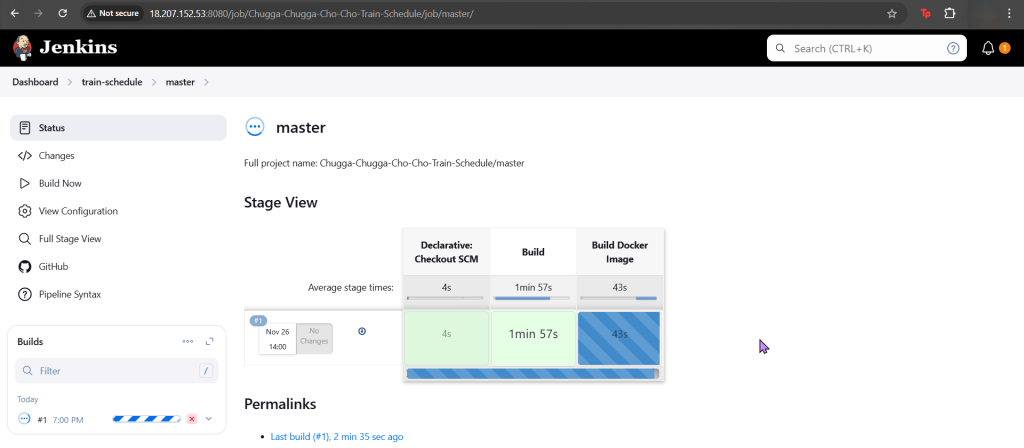
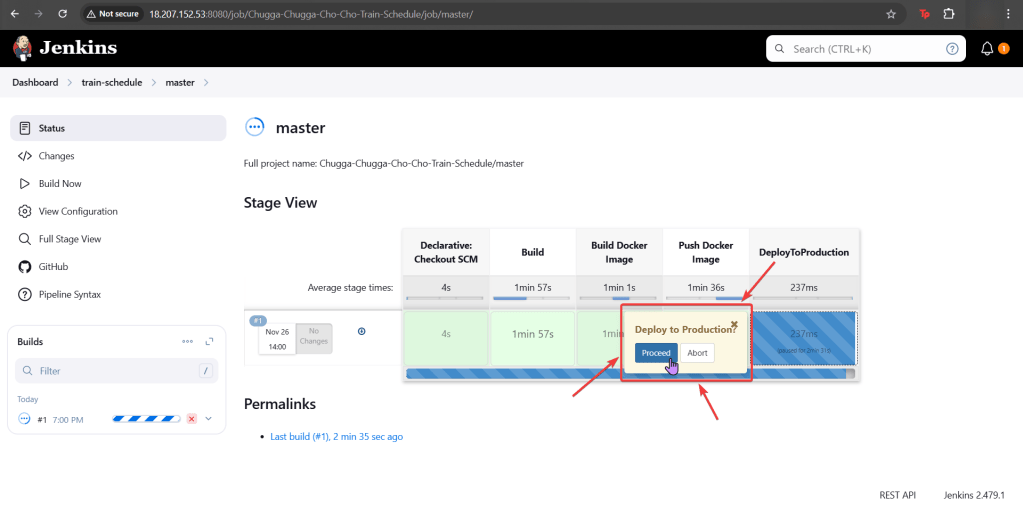
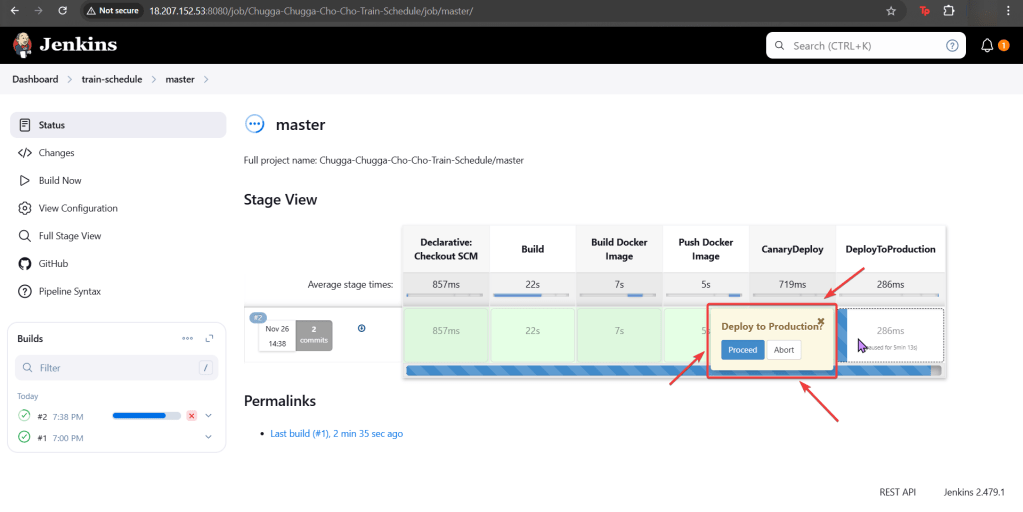
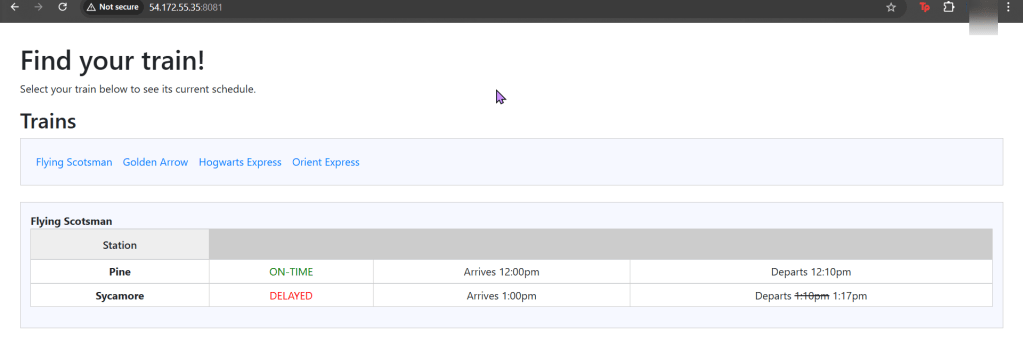
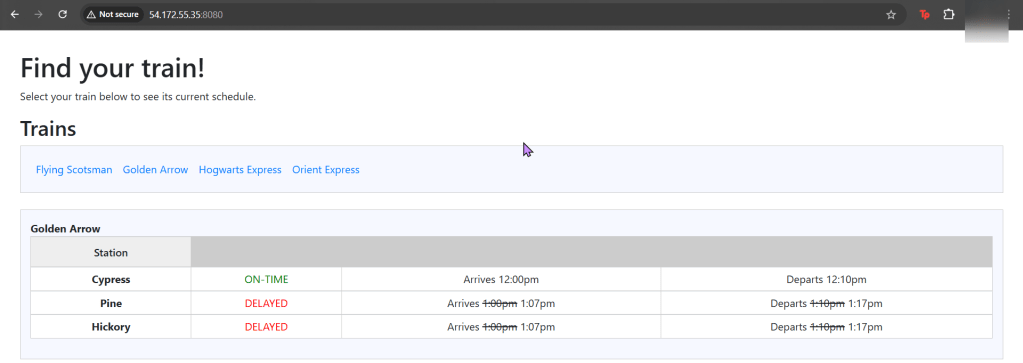
Our coal mine (CICD pipeline) is struggling, so lets use canary deployments to monitor a Kubernetes cluster under a Jenkins pipeline. Alright, lets level set here…
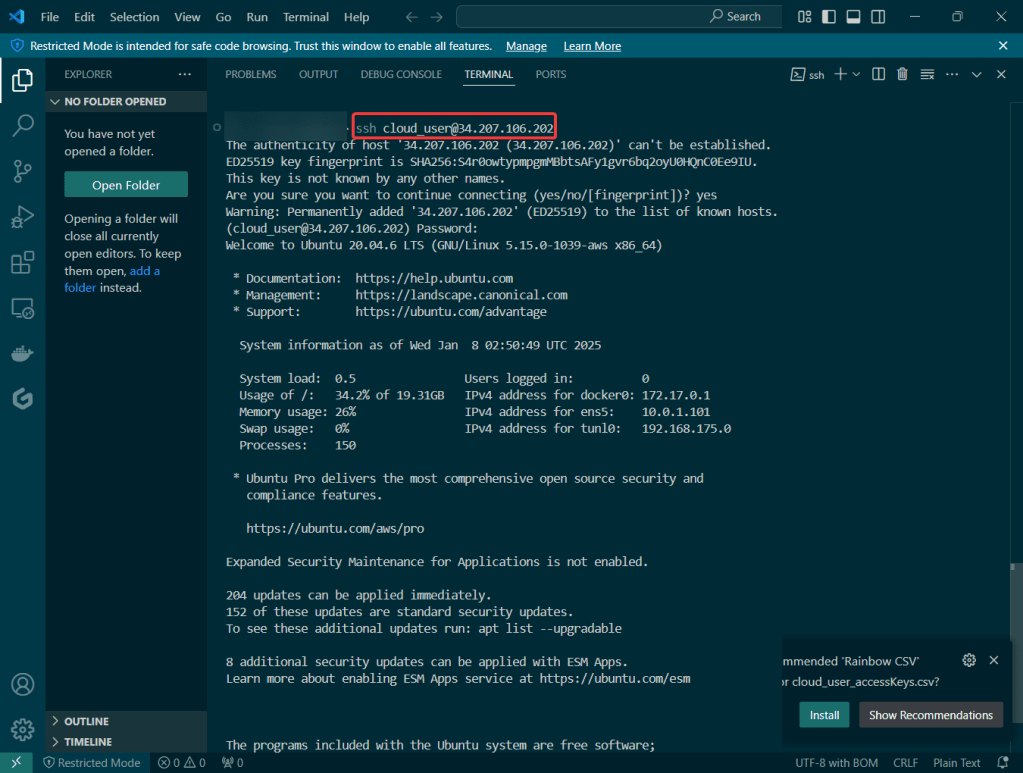
You got a Kubernetes cluster, mmmmkay?
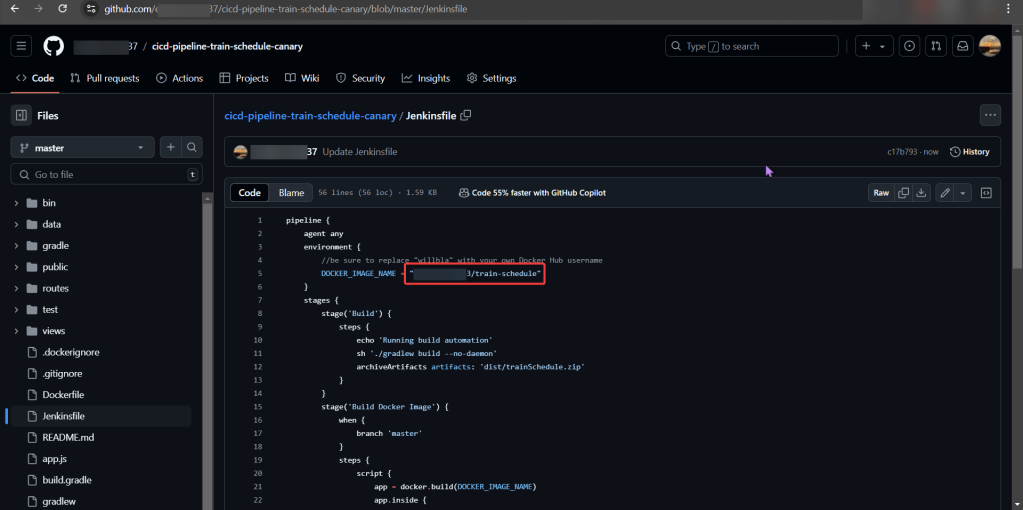
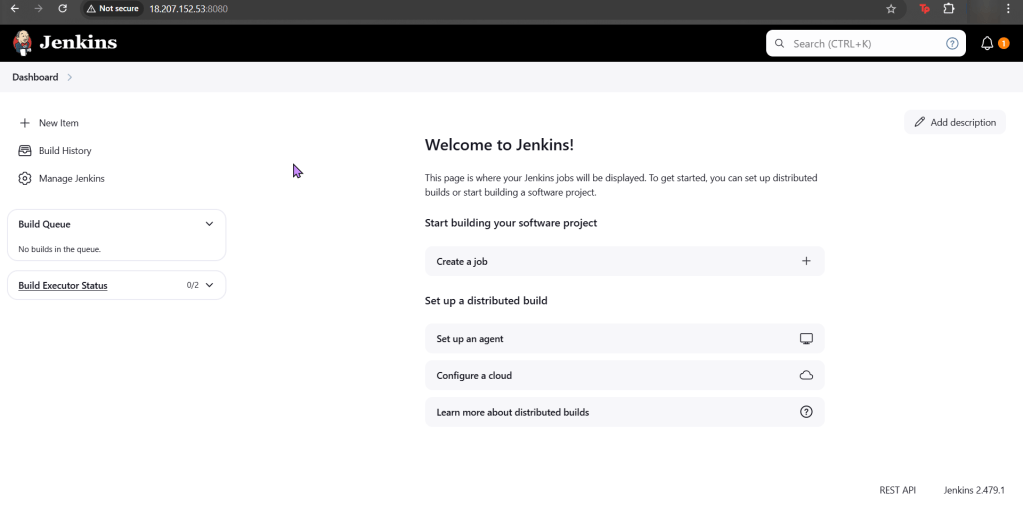
A pipeline from Jenkins leads to CICD deployments, yeah?
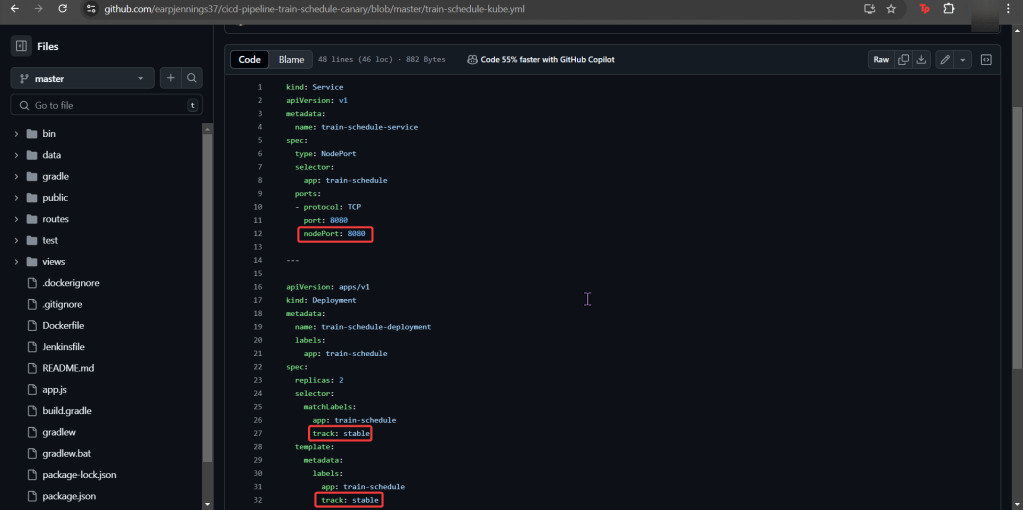
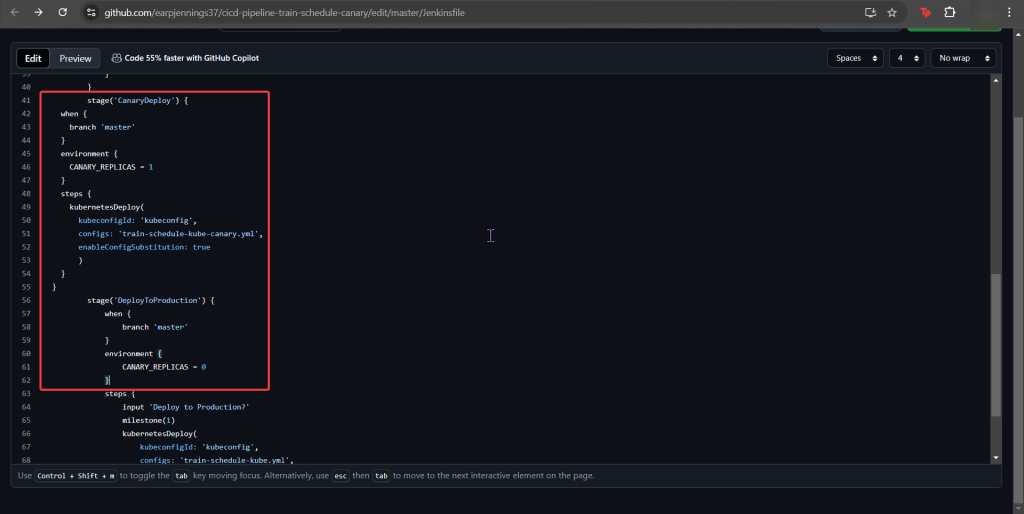
Now we must add the deetz (details) to get canary to deploy