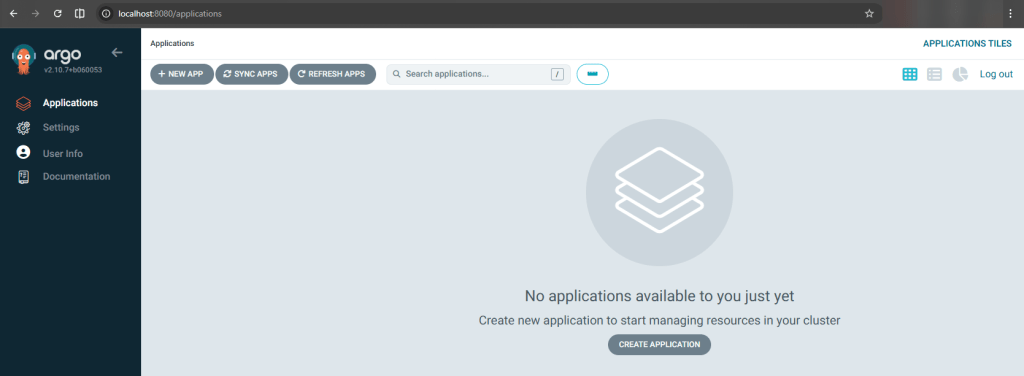
Series of blog posts show progress of updating/adding to EKS Cluster
Below are links for details:
- Github Repo:
- Terraform:
- AWS:


Series of blog posts show progress of updating/adding to EKS Cluster
Below are links for details:

Goal:
DO YOU HAVE A KUBERNETES CLUSTER! IS IT INSECURE!? …. I’m out of breath & getting dizzy, Idk how those commercials bring that outside voice & energy – – its exhausting!
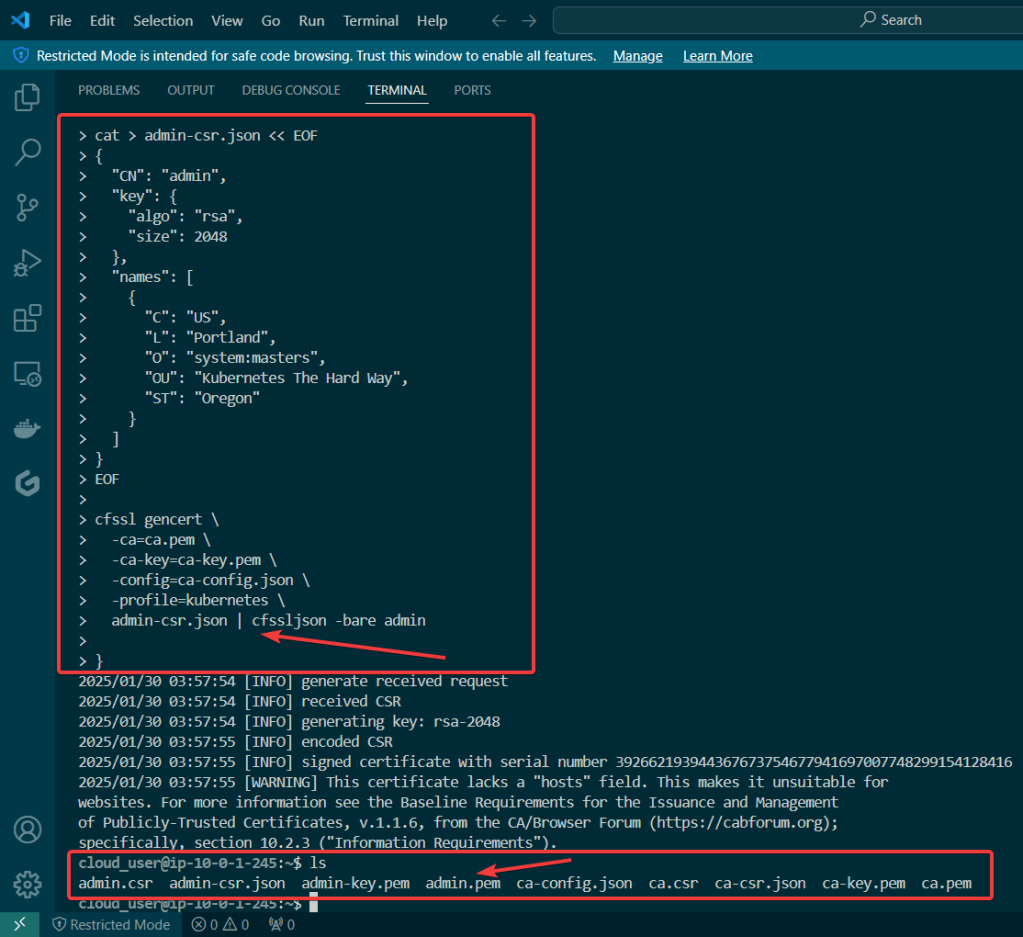
Alright, I’m back – all this will show you is how to secure your cluster. Below you can see how one can authenticate w/one another’s Kubernetes after you have a certificate & attach a certificate authority (CA) by creating certificate’s to bootstrap your Kubernetes cluster.
Lessons Learned:

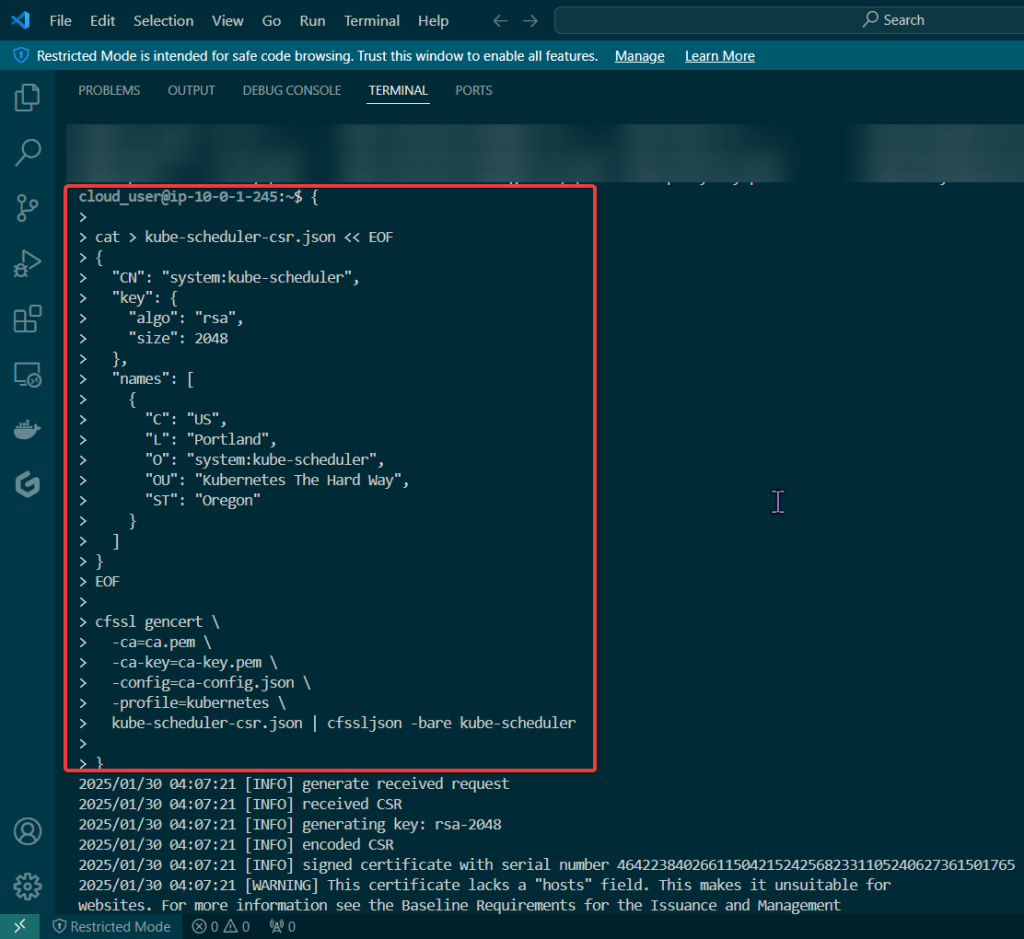
Permit/Provision CA:

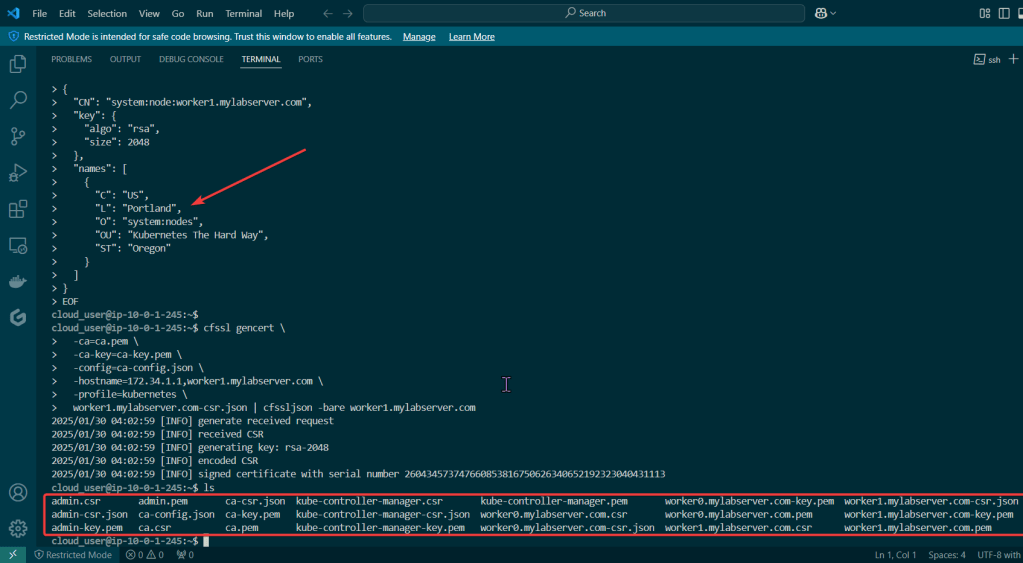
Create Kubernetes client certs & kubelet client certs for two (2) nodes:
Admin Client Certificate:
Kubelet Client Certificate:
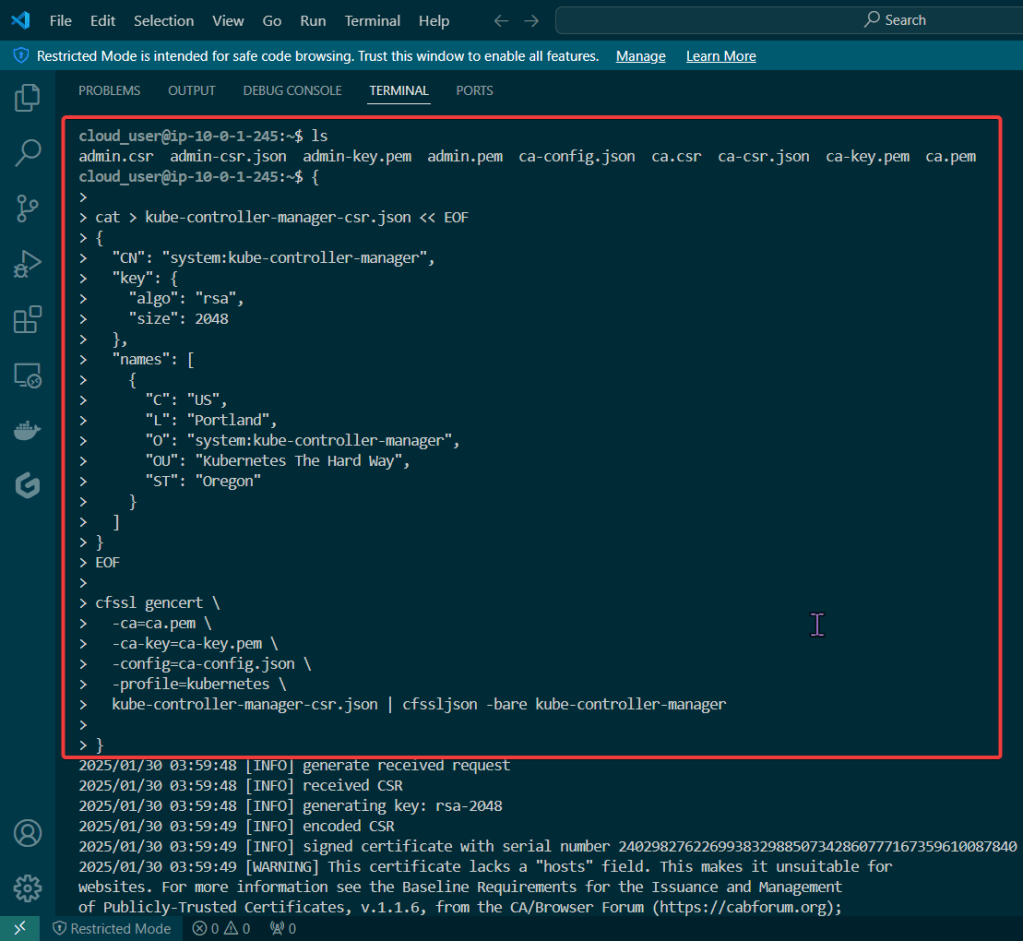
Manager Client Cert:
Kube-Proxy Client Certificate:

Kube-Scheduler Client Certificate:

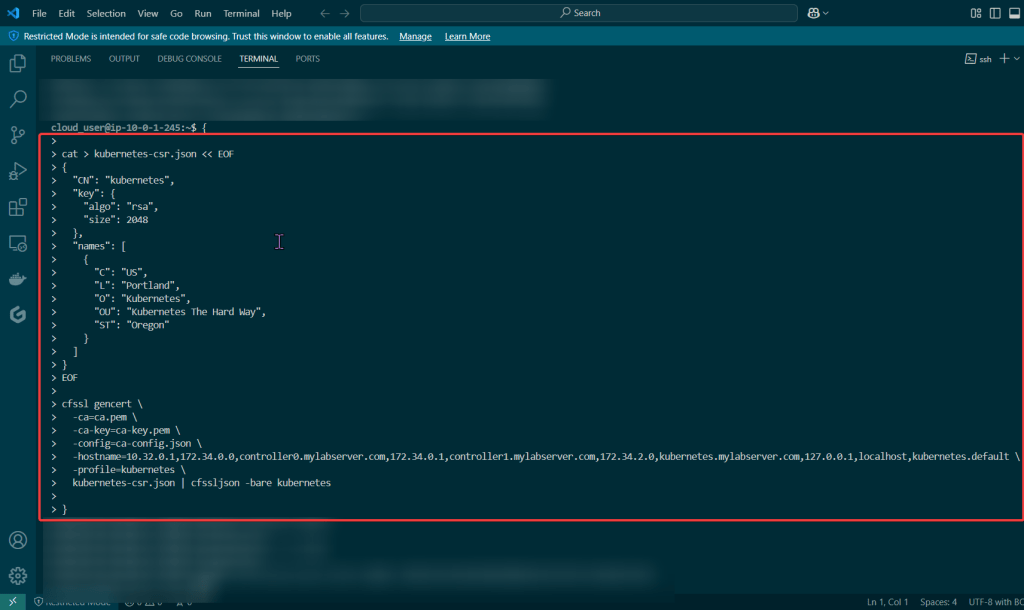
Create Kubernetes API server certificate:
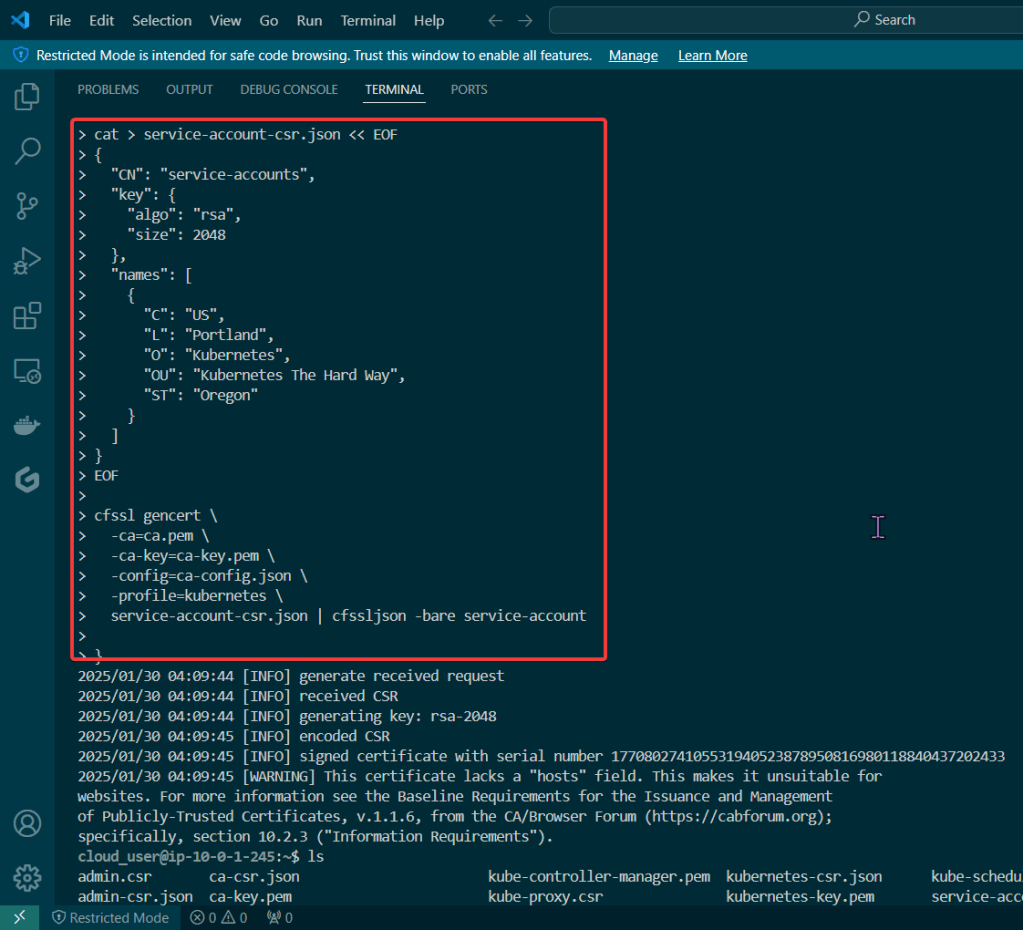
Create Kubernetes service account key pair:

Goal:
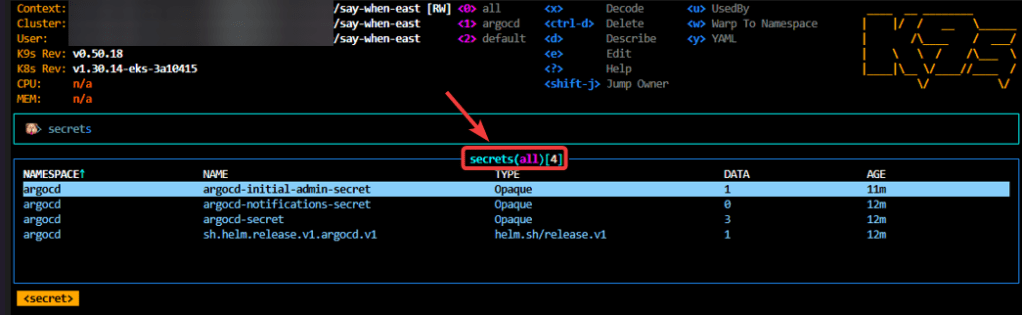
Stuff happen, so when it does – it is good to know what to do w/your Kubernetes cluster. The answer is – drum roll please… smoke testing, tahhh-dahhh! This is useful not just when stuff hits the fan, but to see if the known vulnerable features are working properly becuase the goal is to verify the health of the cluster.
Example of smoke tests of the Kubernetes cluster conducted will contain:
Lessons Learned:
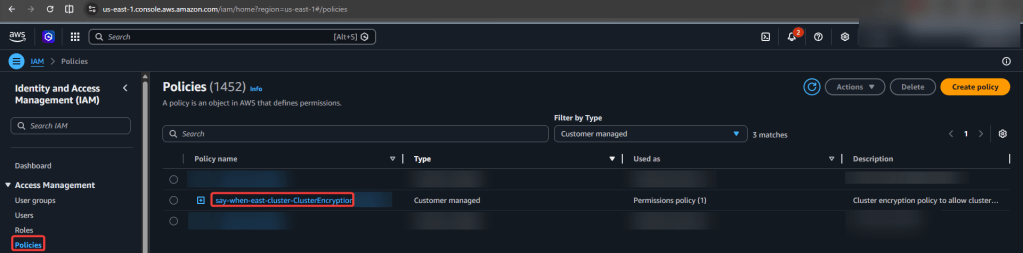
Cluster Data Encryption:

Deployments Work:

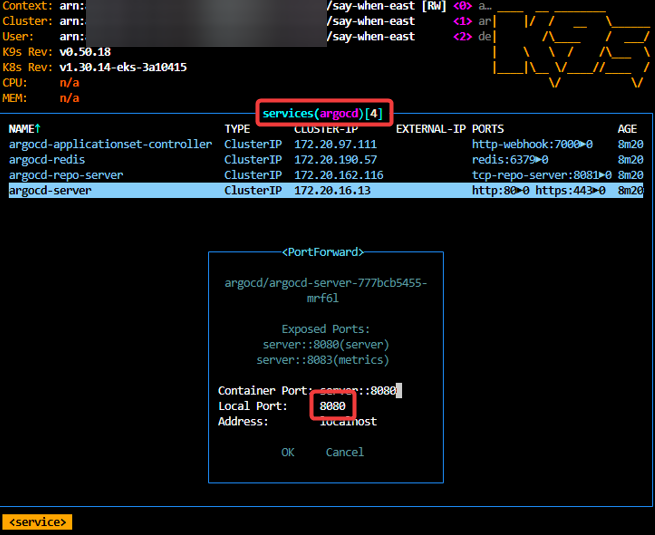
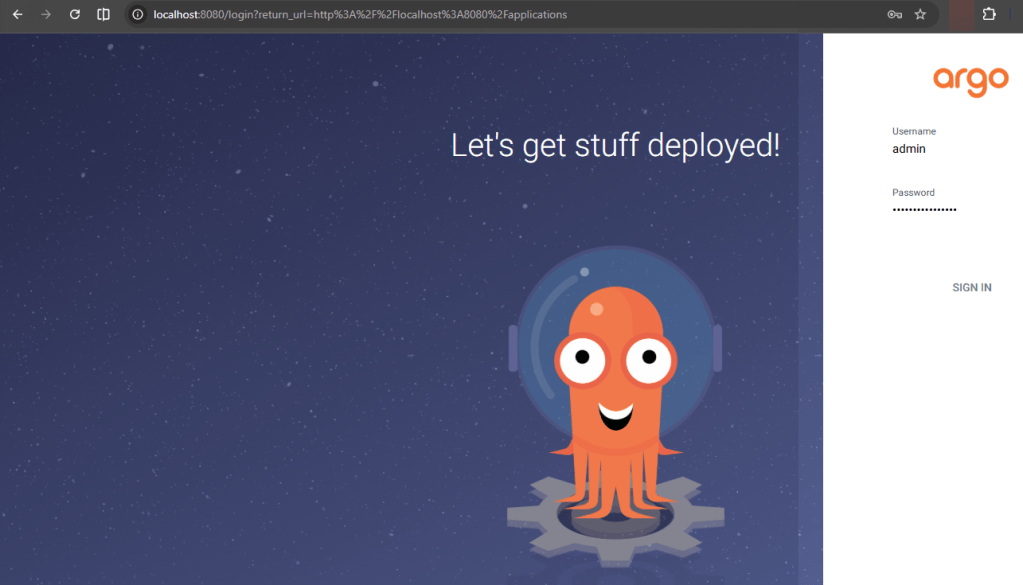
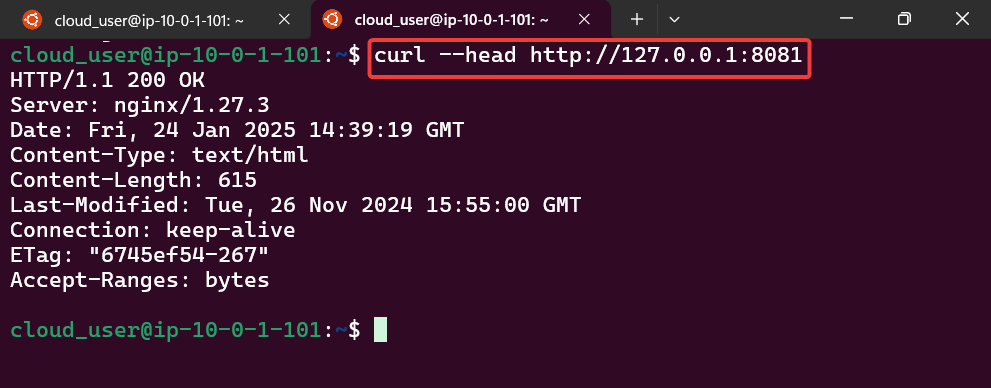
Remote Access works w/Port Forwarding:

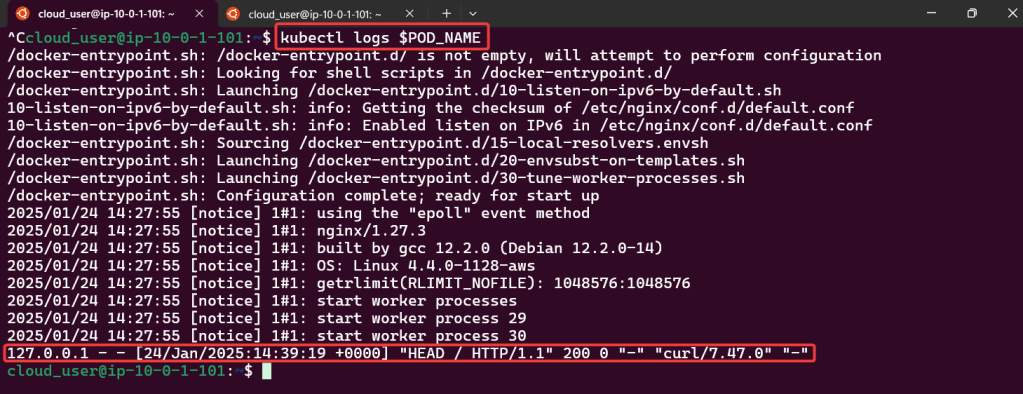
Access Container Logs w/Kubectl Logs:
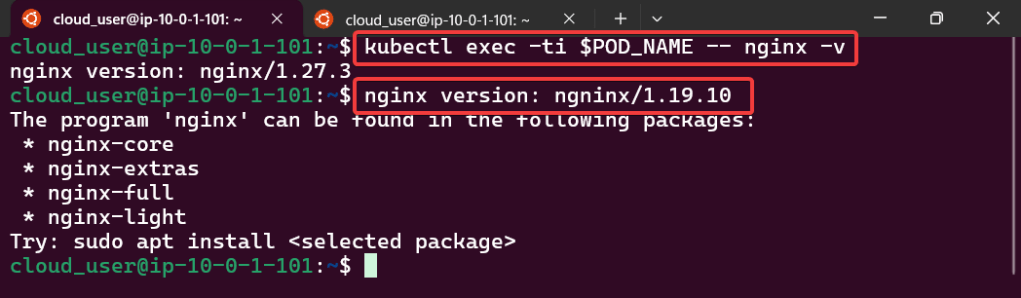
Execute Commands inside the Container
Services Work:

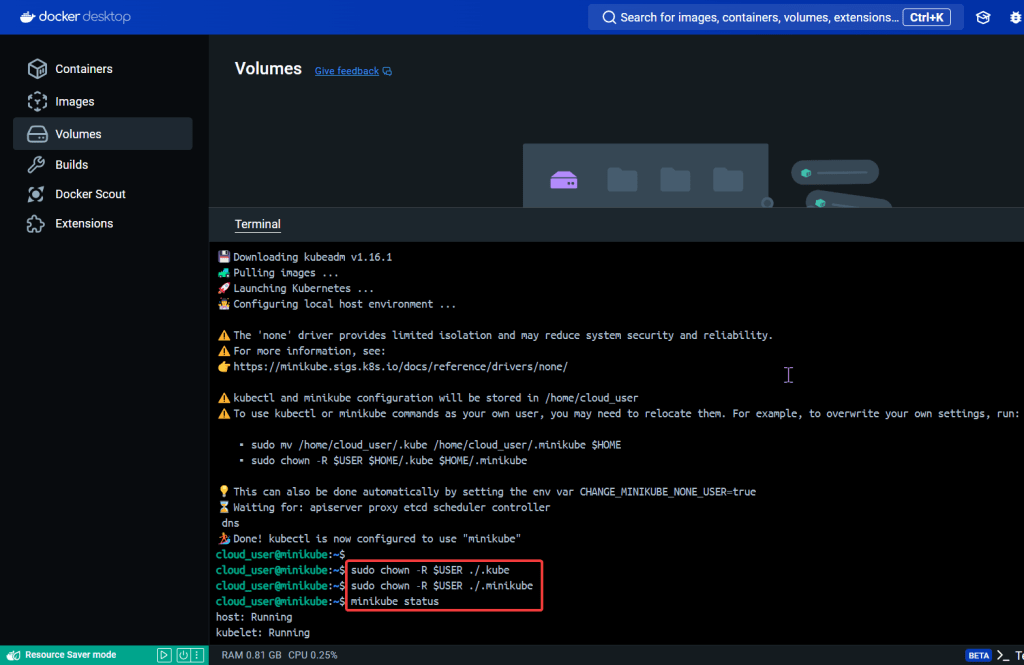
Goal:
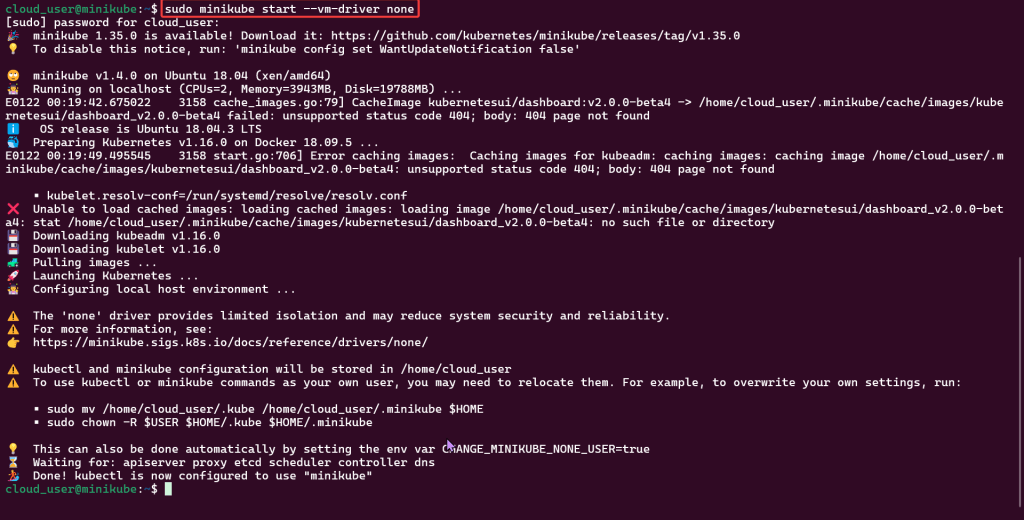
The Bat signal has been lit in the sky, its time to suit up, & don’t let the kryptonite divide us. Fix the broken Minikube cluster
Lessons Learned:
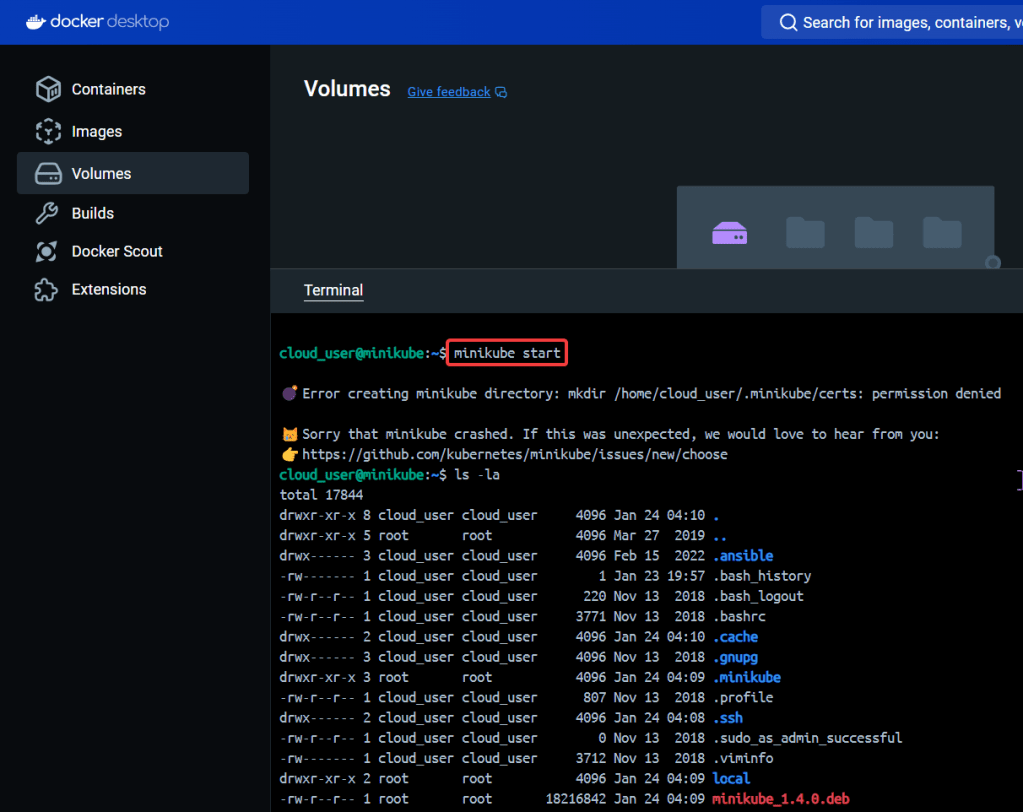
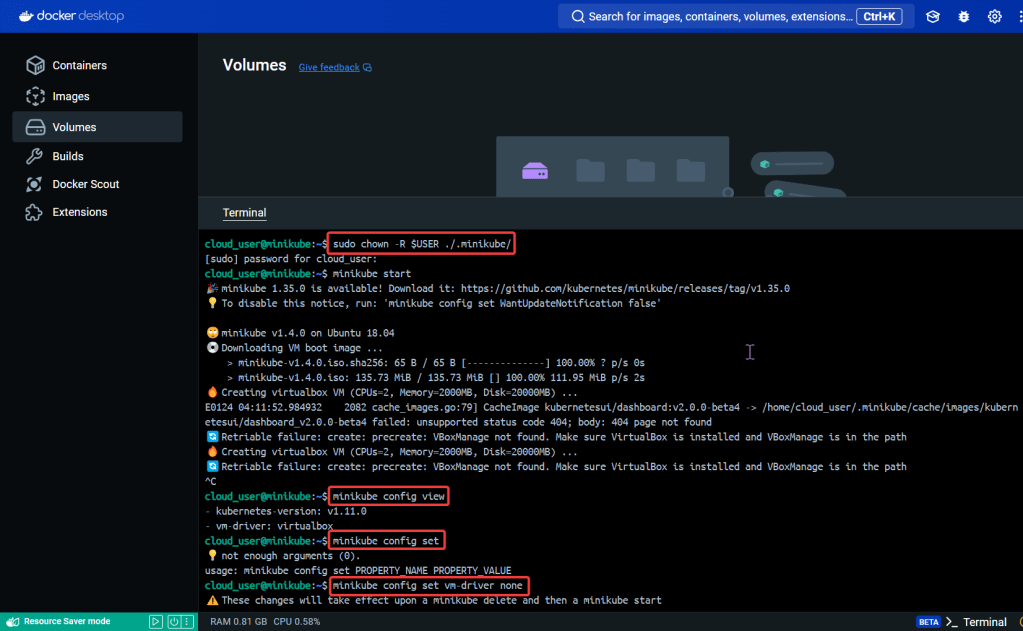
Start up the Bat Mobile (Minikube):
See screenshot for a whole slew of commands:
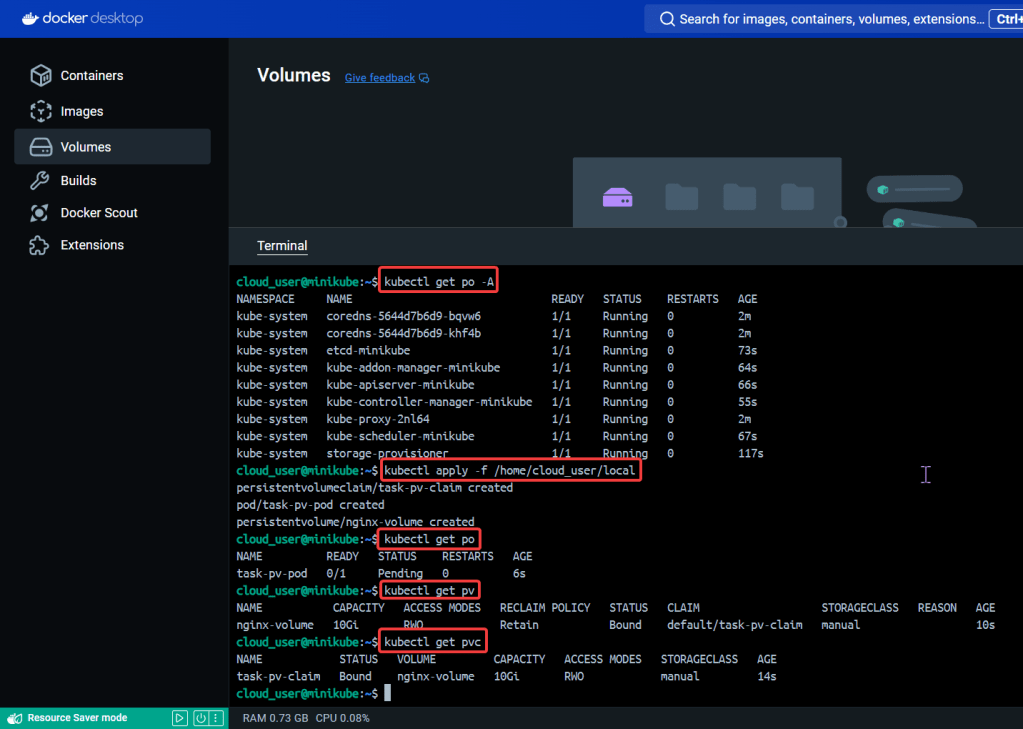
Create Object in YAML files to Confirm Cluster is up:

Goal:
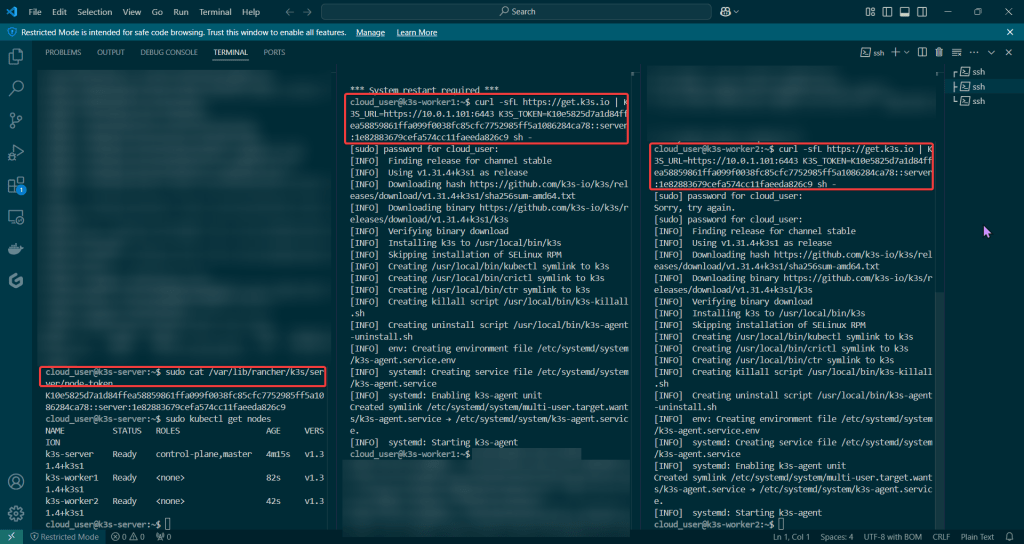
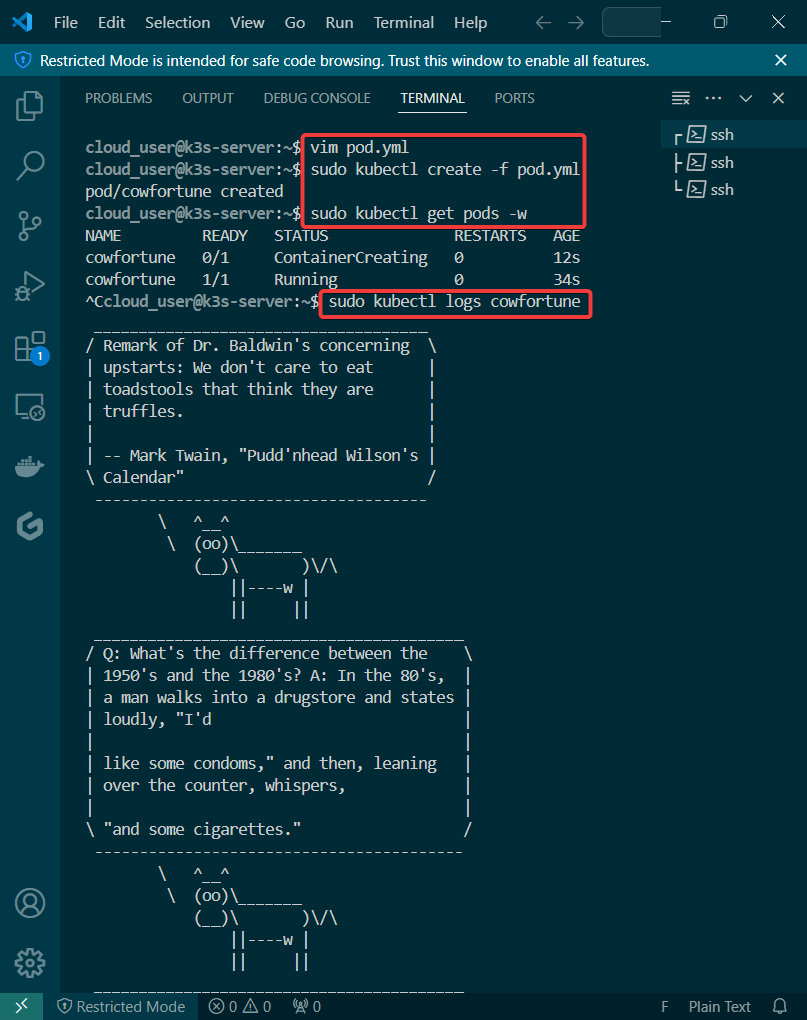
Wanna see how the sausage is made – – – K3 cluster. We’ll bootstrap a K3 cluster, install the K3 on multipler servers, & have it Frankenstein to form a multi-server cluster. Lets get cookin’
Lessons Learned:
Build that K3 server:

Build K3 worker nodes:
Install K3 on worker node w/private IP address & node tokens:
Run on New Cluster:
Create pod yaml file:
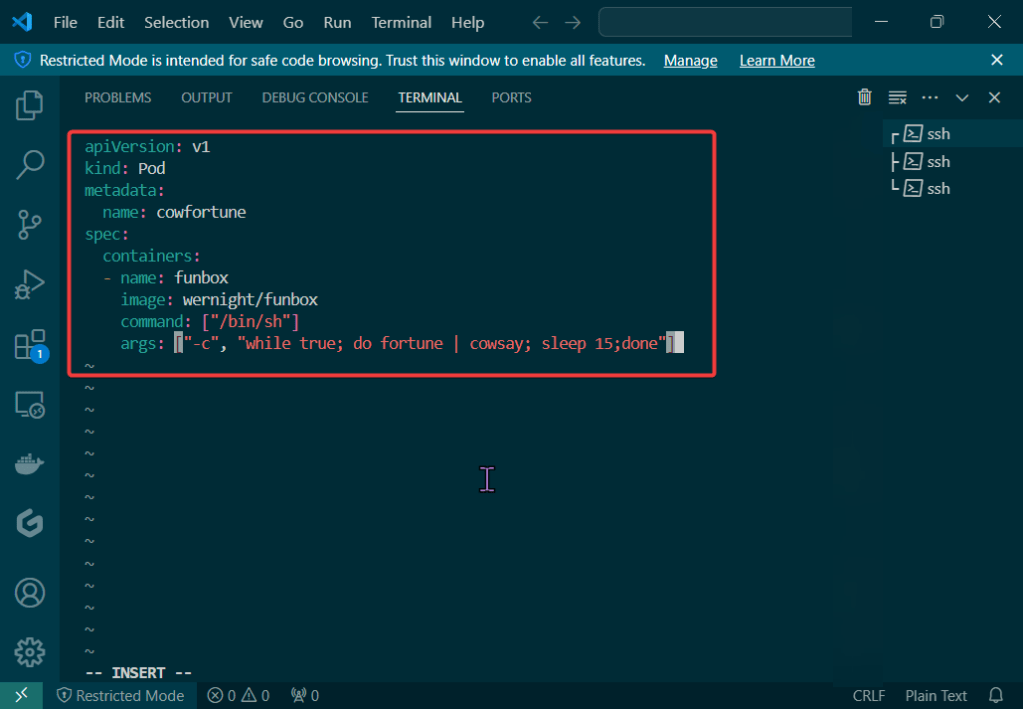
Create, check, & view pod:

Goal:
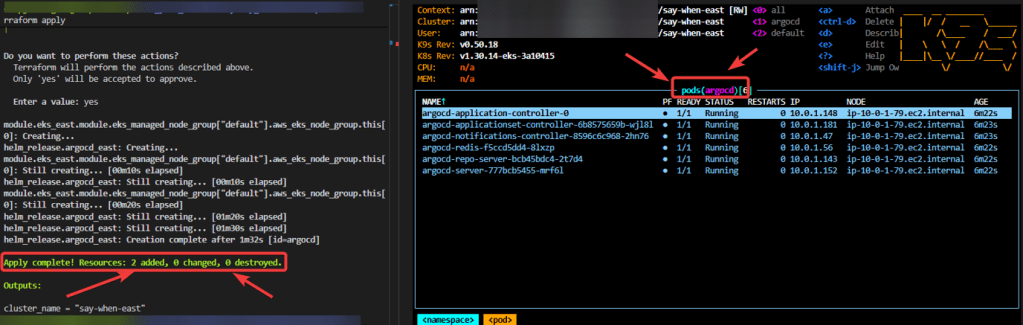
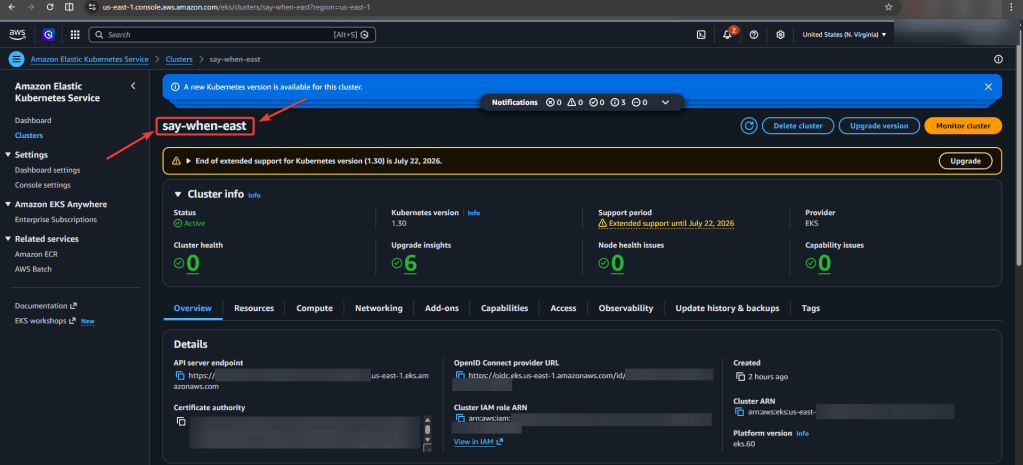
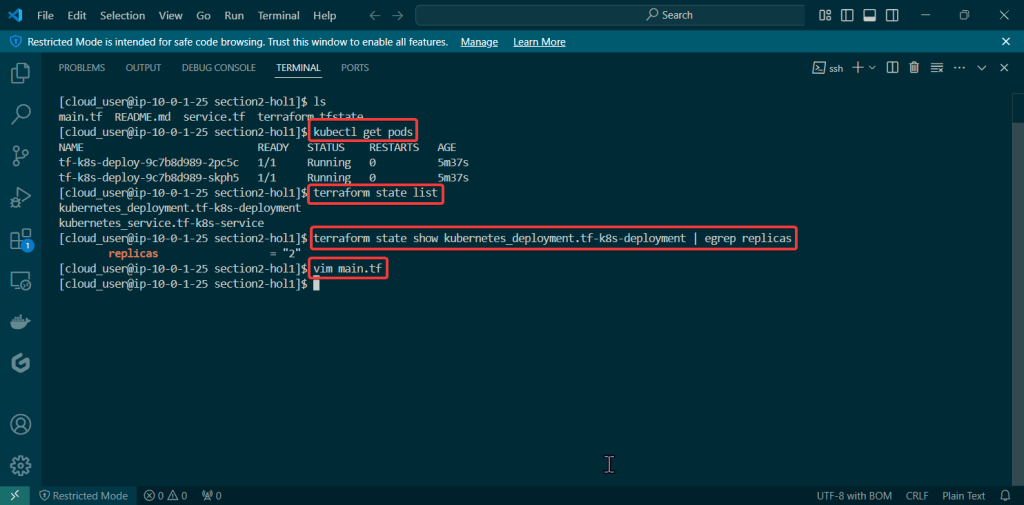
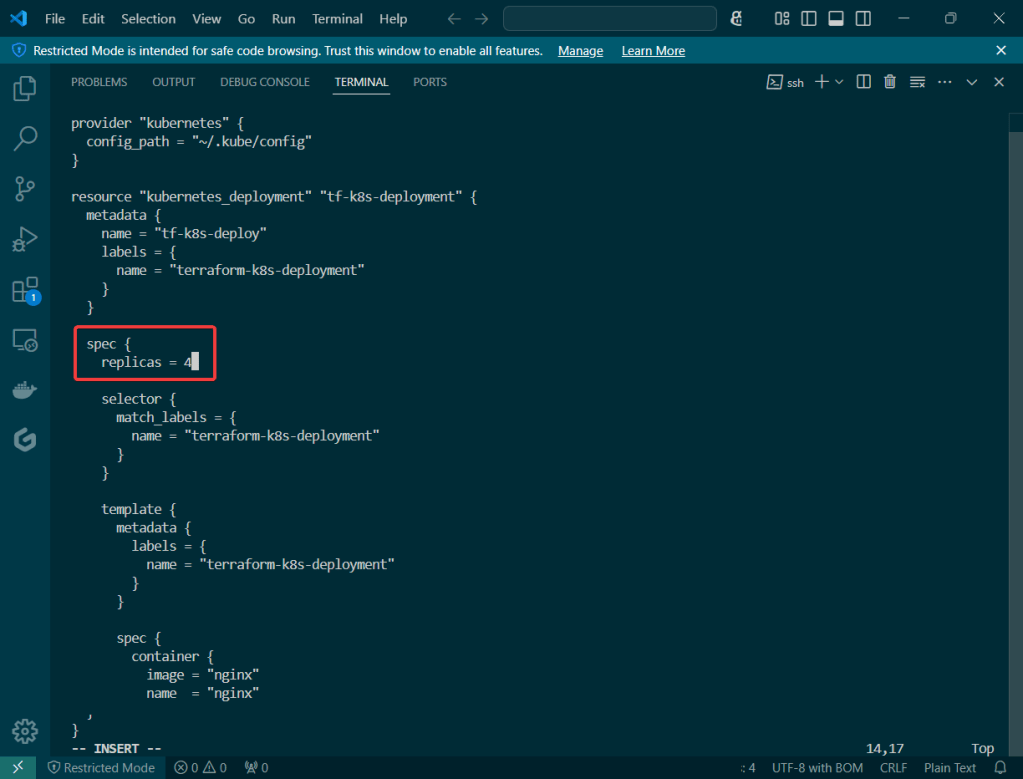
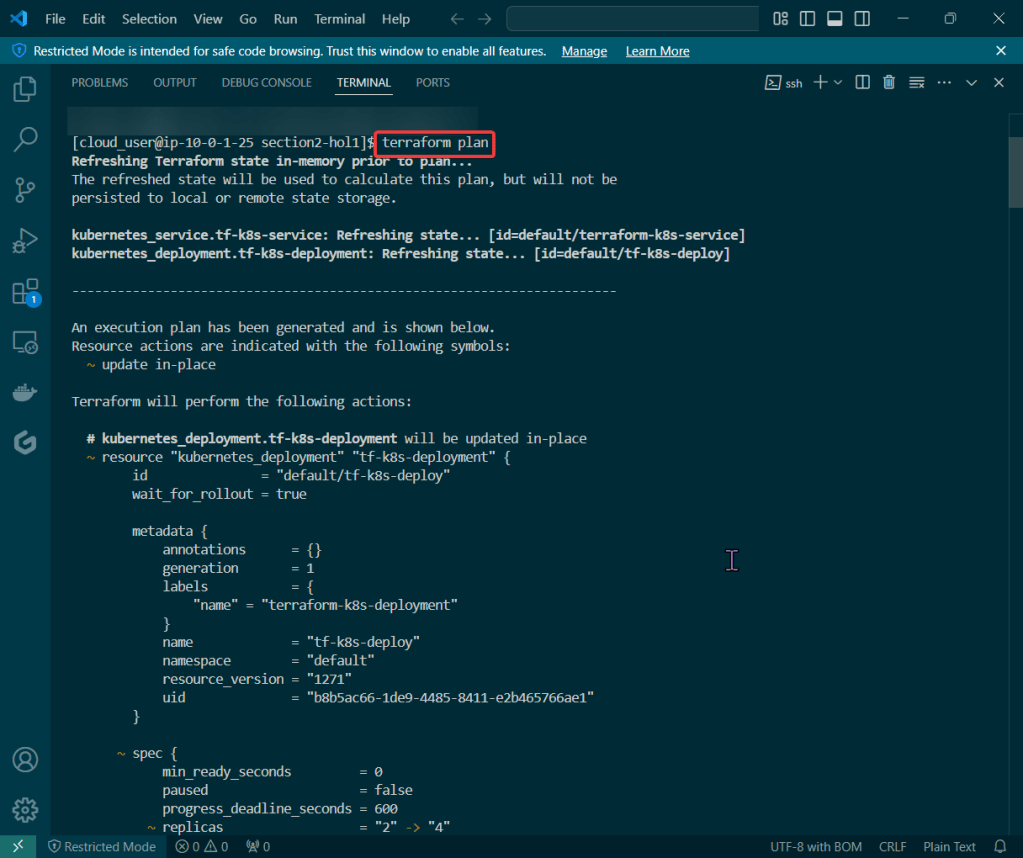
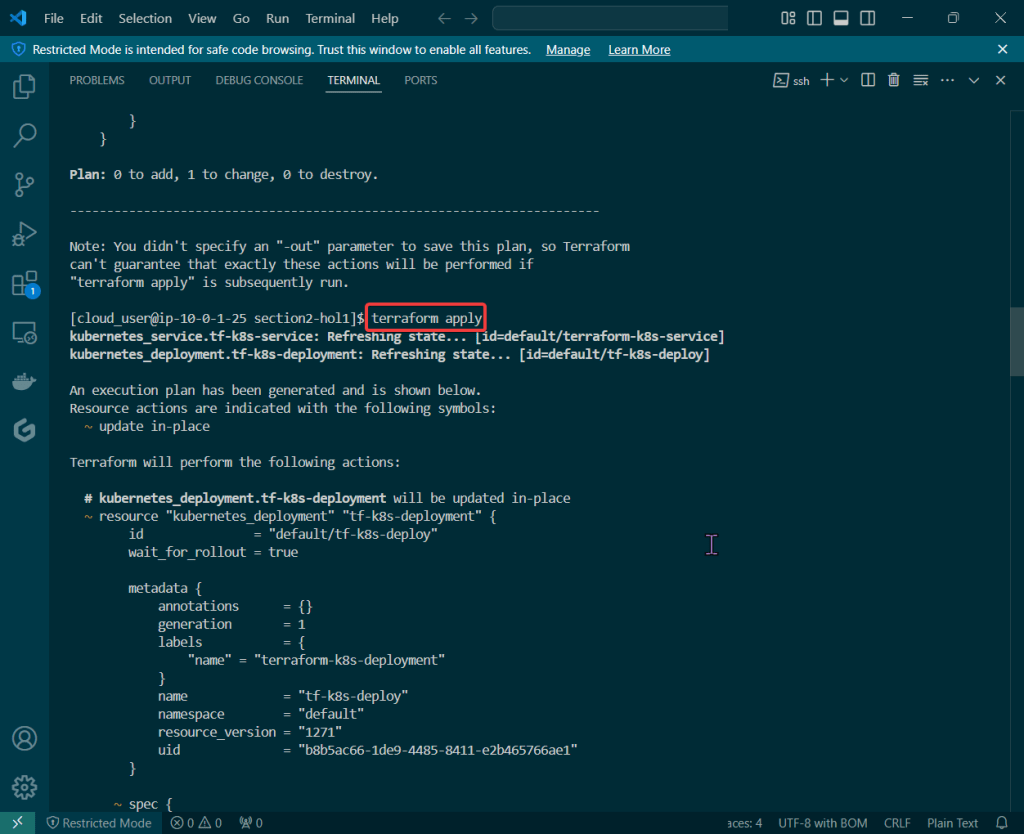
Let’s blend some pimp tools together & launch something into space – cyber space that is. Below is an example to show useful it is to understand Terraform state, deploy resources w/Kubernetes, & see how Terraform maintains the state file to track all your changes along w/deploying containers!
Lessons Learned:
Check Terraform & Minikube Status:

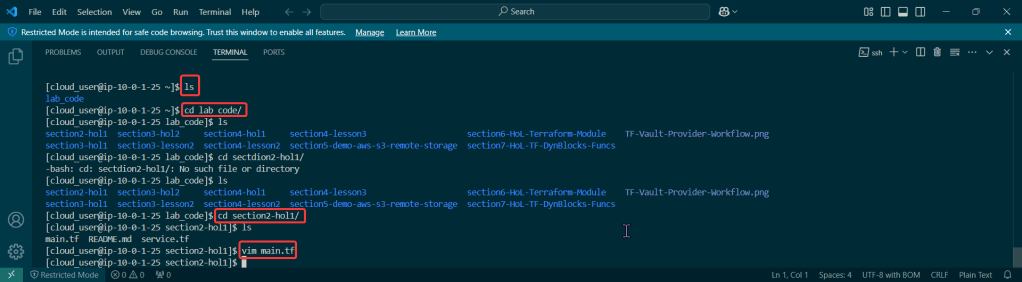
Clone Terraform Code & Switch Proper Directory:
Switch directories:

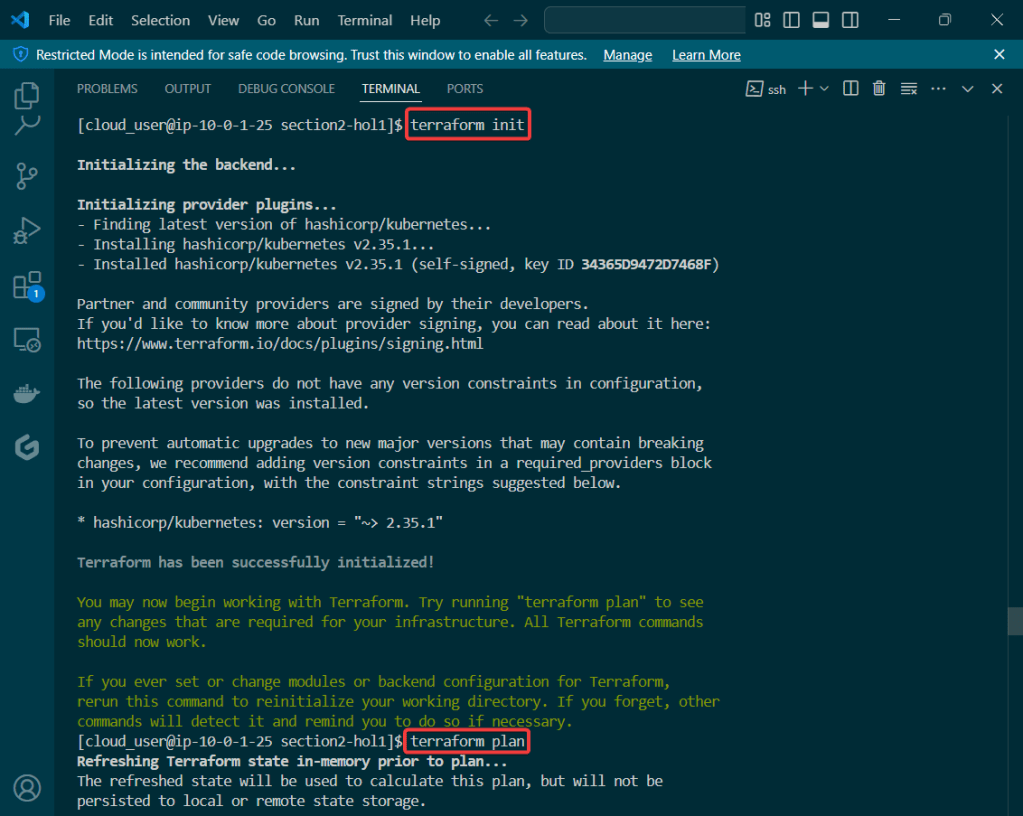
Deploy Terraform code & Observe State File:
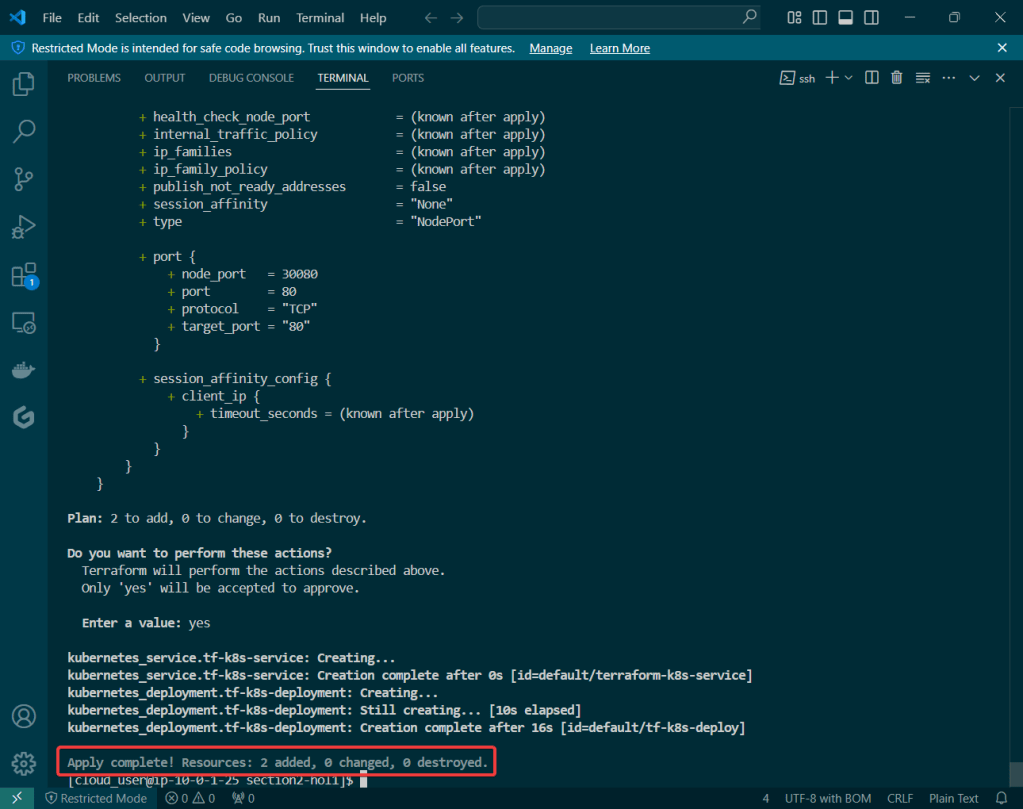
Terraform State File Tracks Resources:
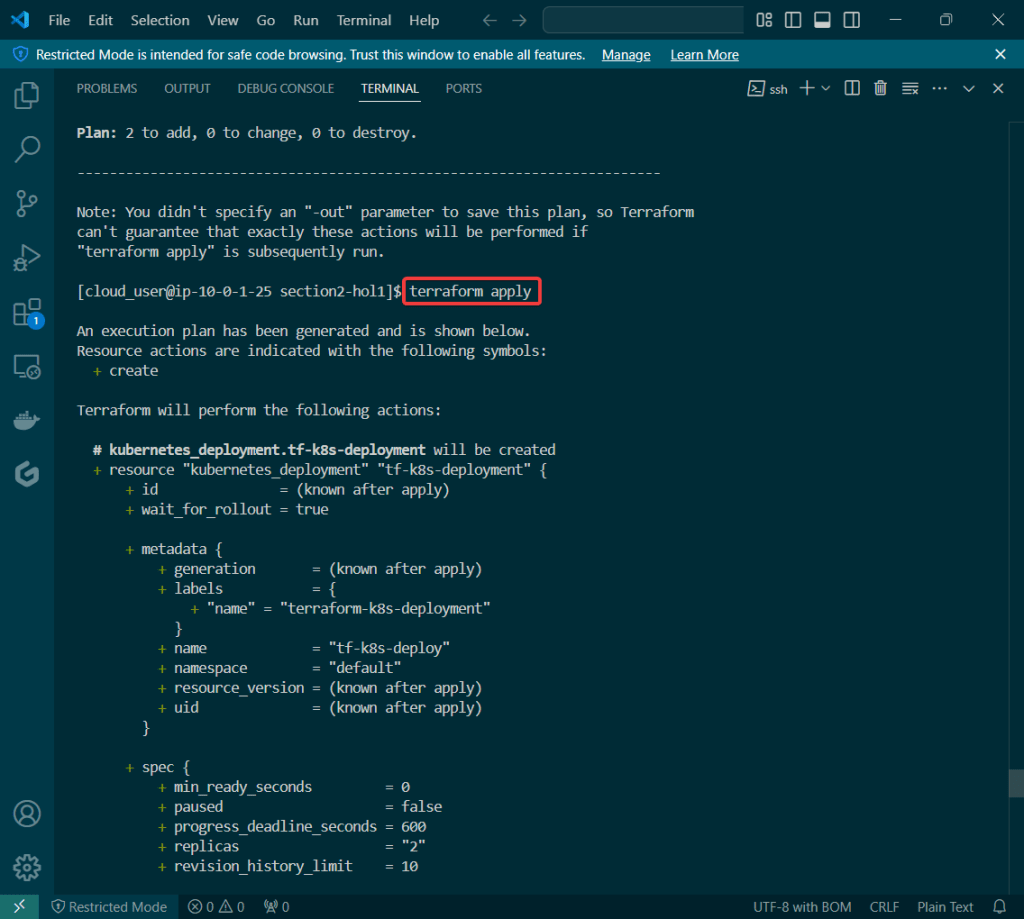
Terraform Plan:
Terraform Apply:
Terraform Destroy:


Goal:
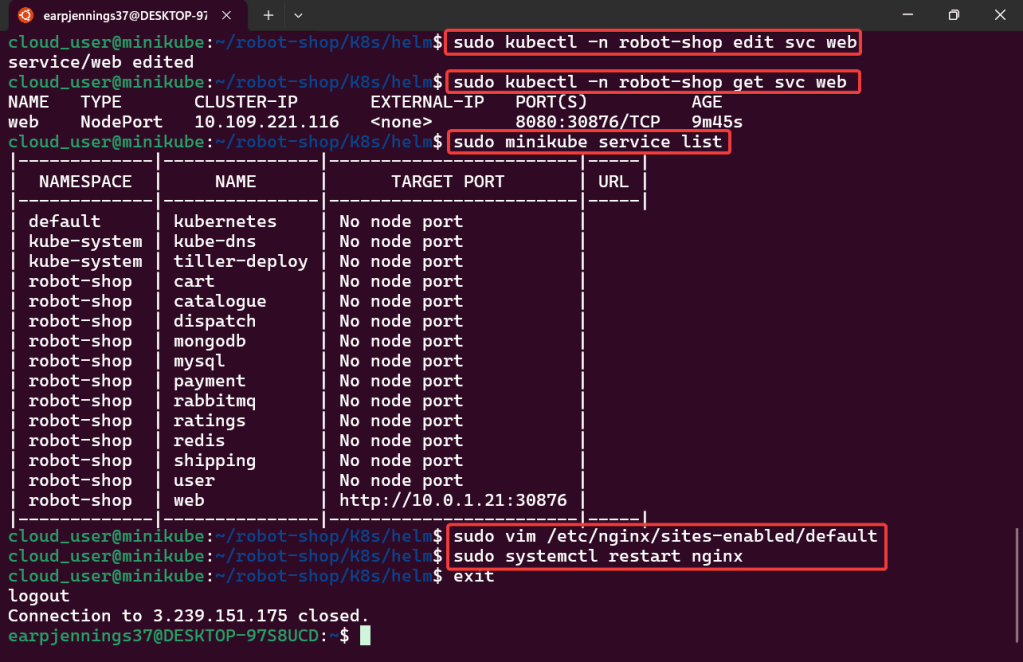
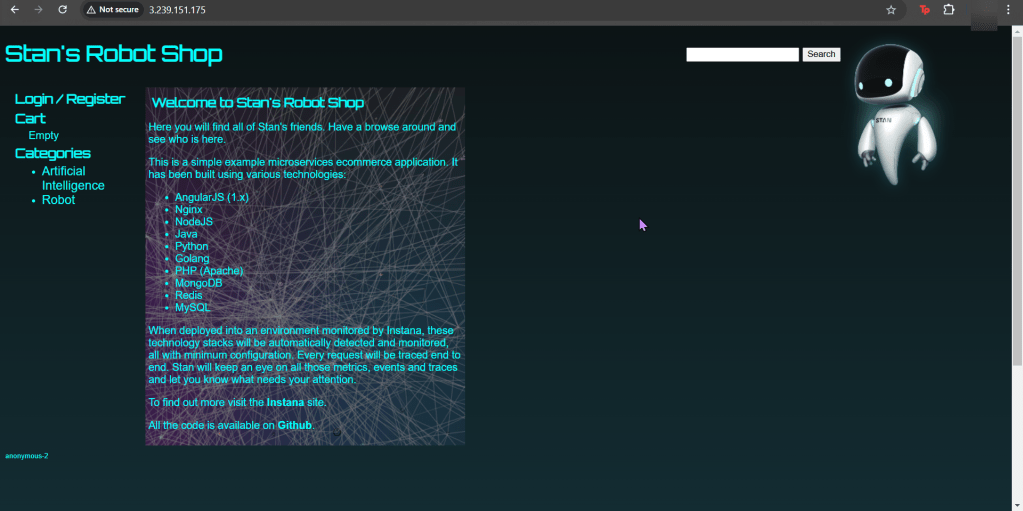
So you got a Minikube cluster right? Now lets use Helm to deploy a microservice stack!
Lessons Learned:
Start Minikube Cluster:
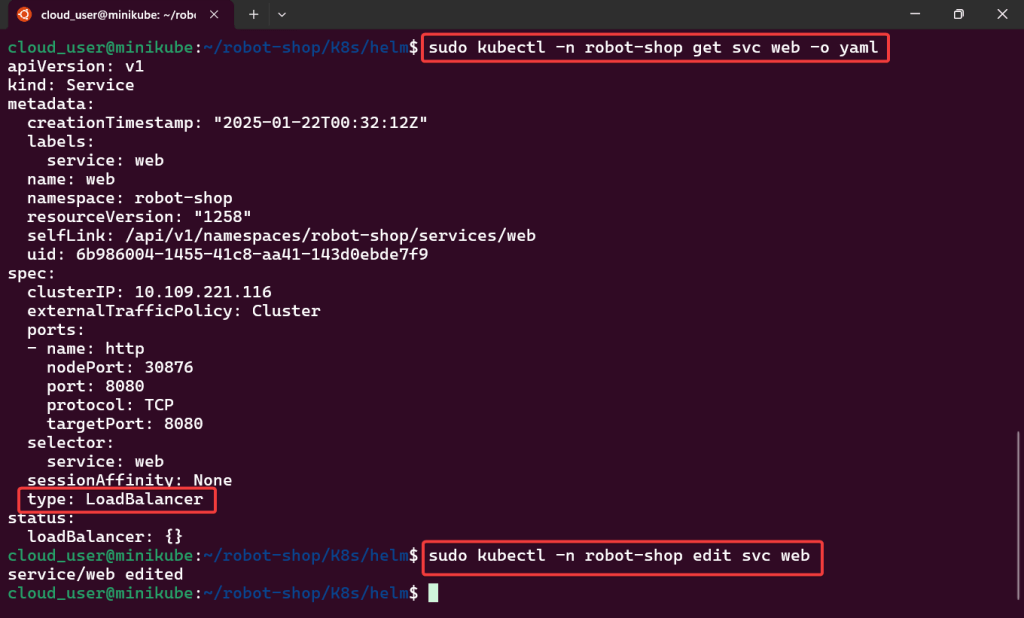
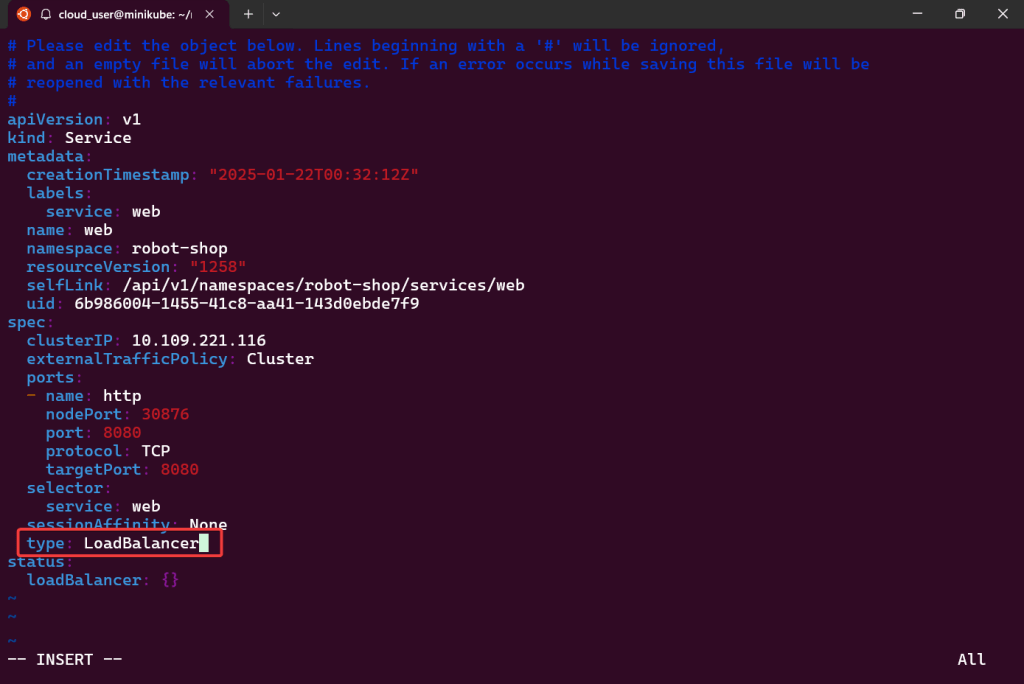
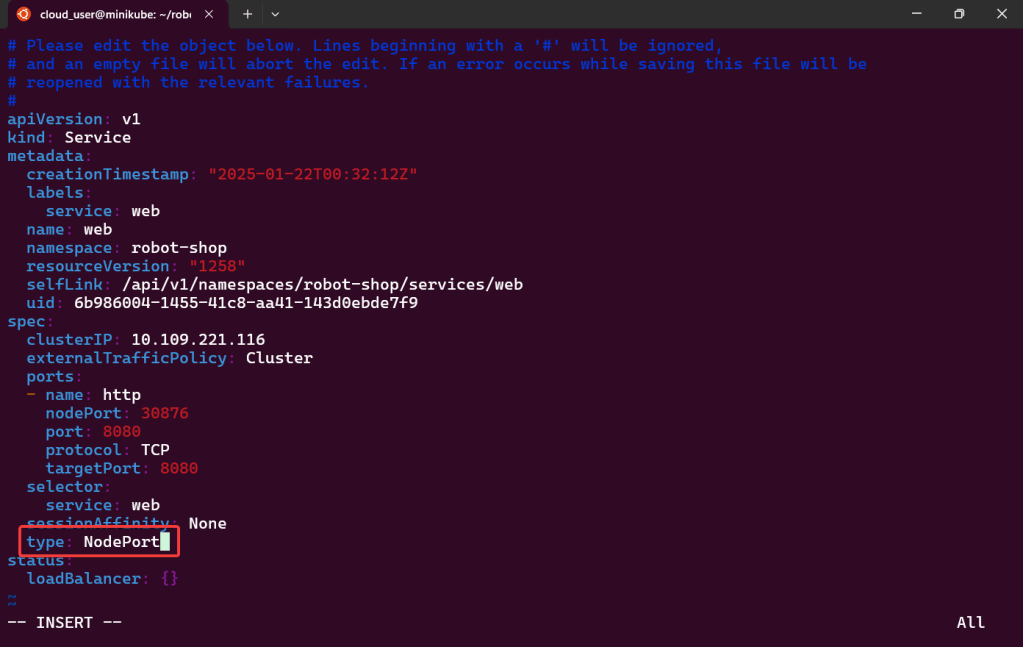
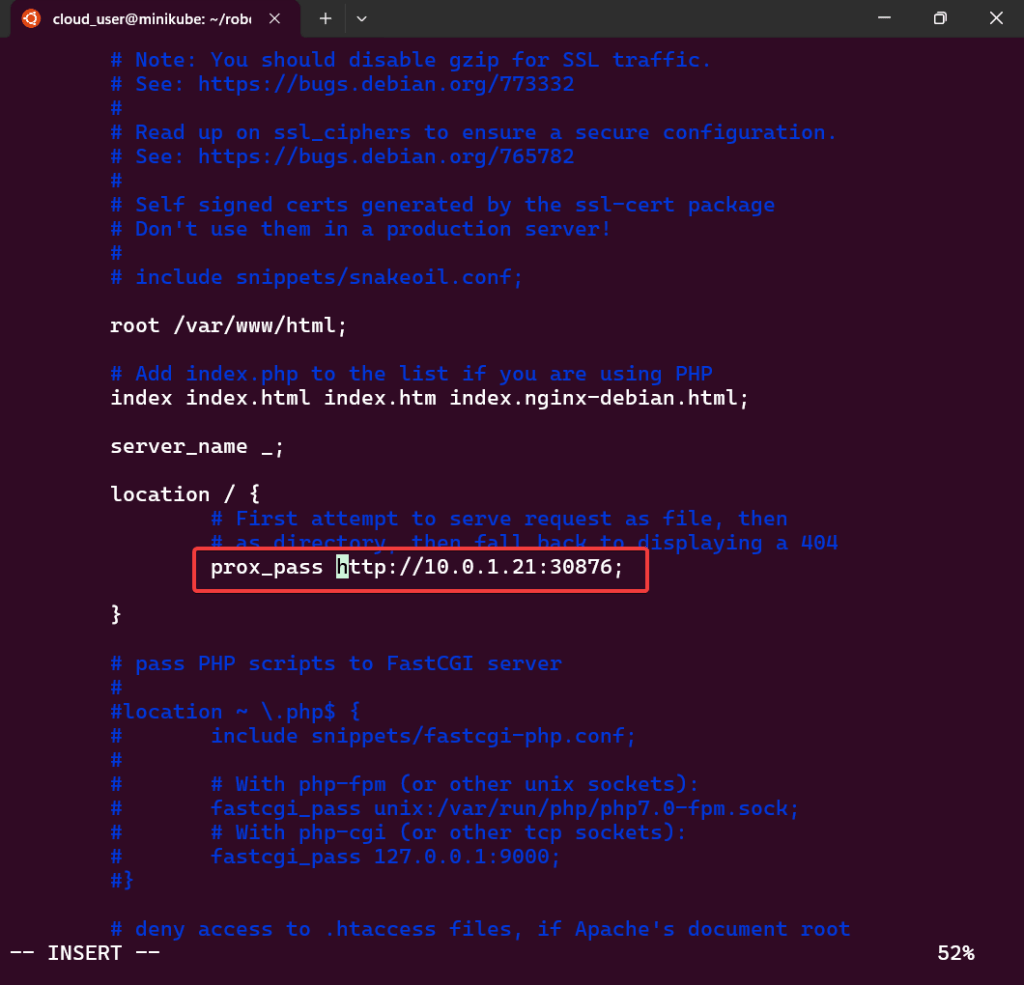
Edit to use Nodeport & Configure Nginx to Proxy:
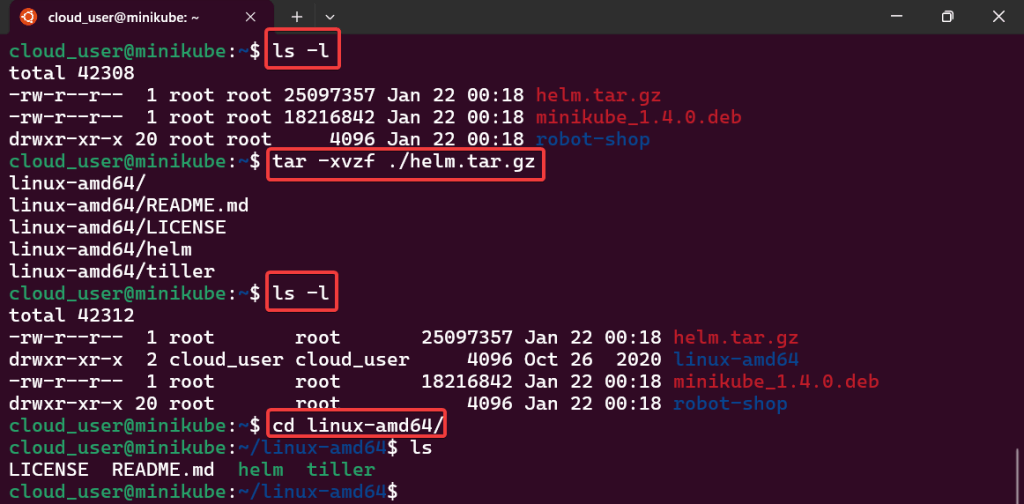
tar -xvzf ~/helm.tar.gz:
sudo mv:

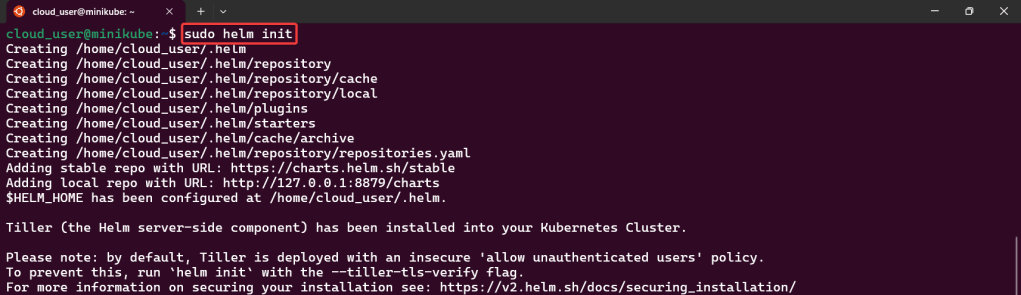
Sudo helm init:
Install Namespace w/Helm:
Sudo kubectl:

Sudo helm install:
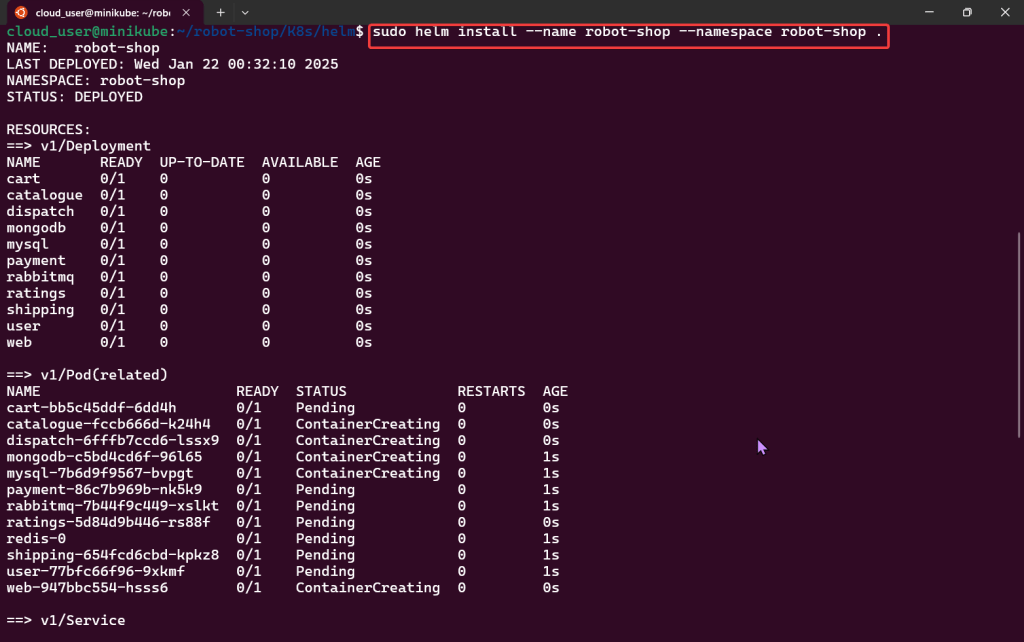
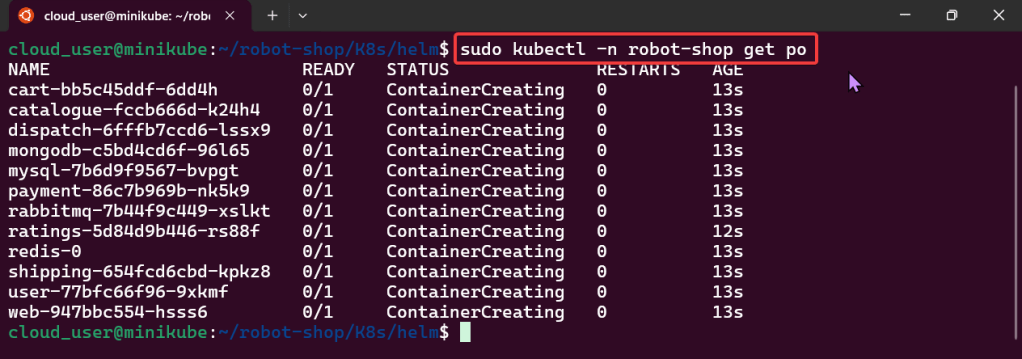
Sudo kubectl:
Edit to use Nodeport & Configure Nginx to Proxy:

Goal:
Humans aren’t constant, but Helm versions are! So this is an efficient way to release & clarify your versions of charts in Helm. Then for gigs we will rollback to the original state, cuz – why not?
Lessons Learned:
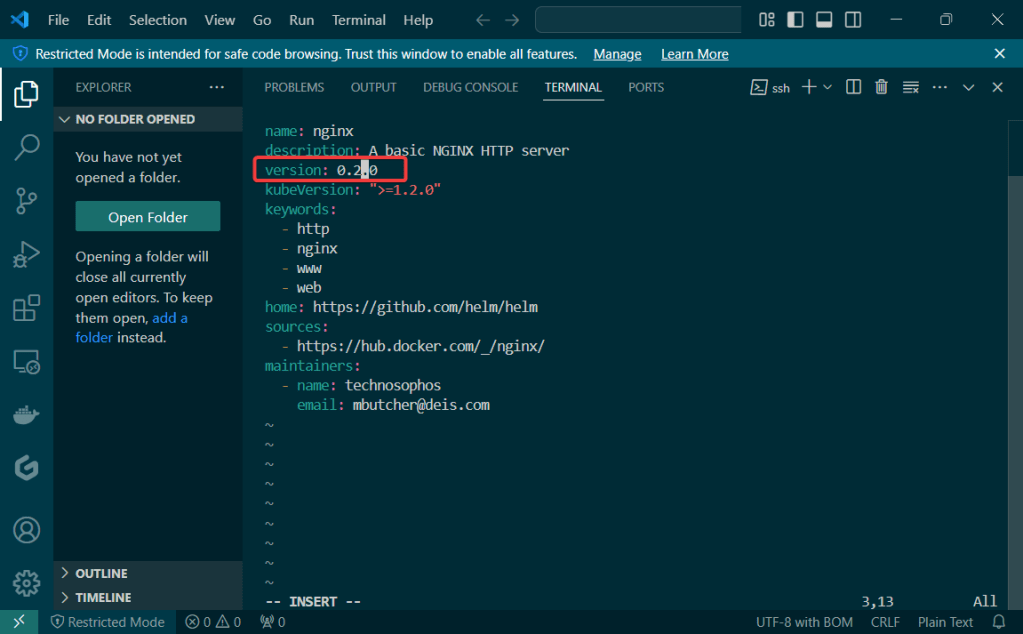
Update index & version #:
Update values.yaml:
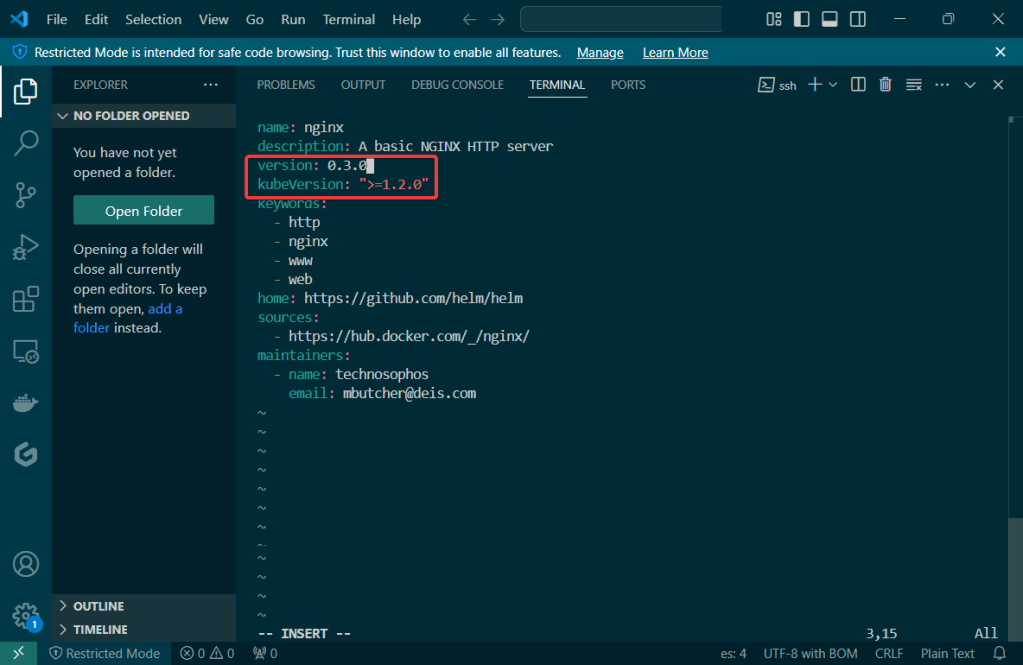
Update Chart.yaml:
Initialize & Patch Helm:
Helm install:

Release the chart & confirm version #:
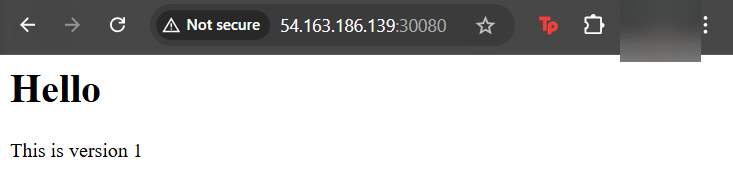
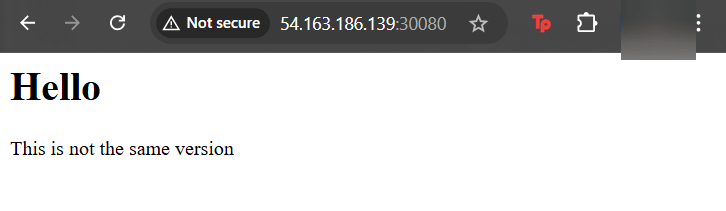
Check the node port & see it launched!

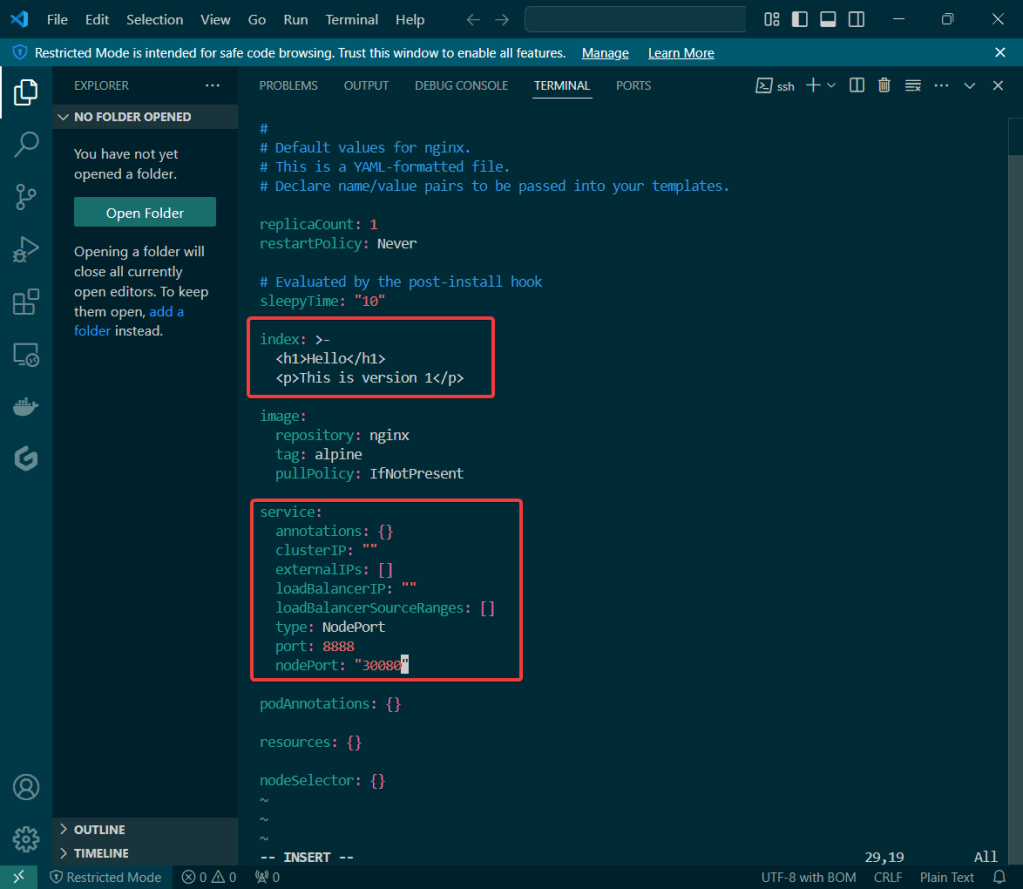
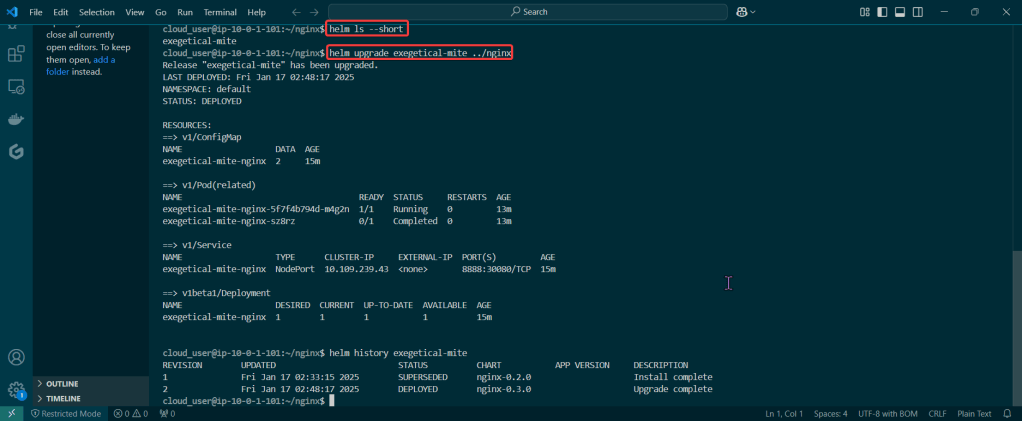
Update Index Data & Version #:
Update the files again:

Helm ls –short & upgrade the release
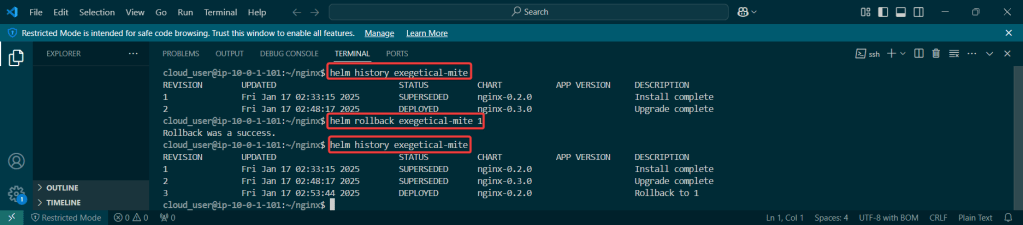
Rollback it on back now! – – – to Previous Version #:

Goal:
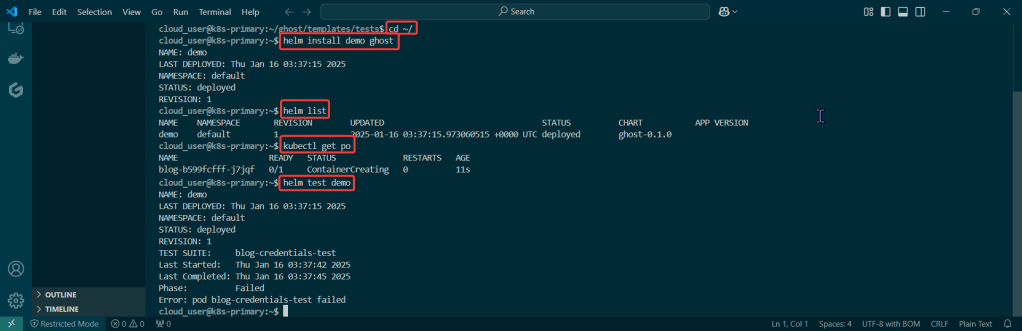
Hmmm I wish there was a way to validate the resources deployed in Kubernetes.. wait, I just had an epiphany, or was it a download from the universe? Either way, Helm can help w/creating a special hook deploy & operate.
Lessons Learned:
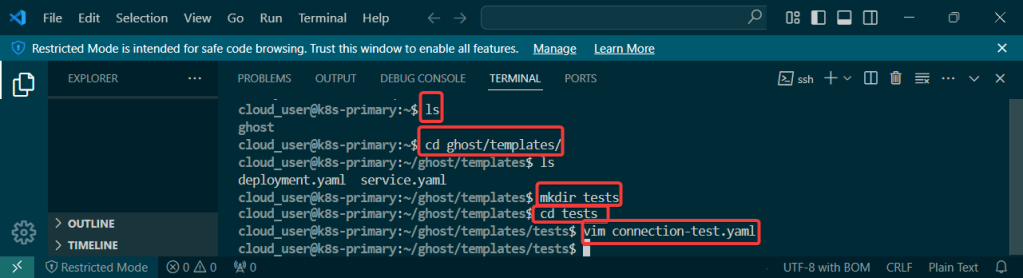
Create Manifest for test the Helm Charts Location:
Create directory along w/new manifest:

Validate, Release, & Test the App:
Cd into top directory & run Helm install & Kubectl:

Goal:
Everyone likes bread-n-butter, unless you physically cant cuz of some gluten thing or cuz your lactose intolerant.. BUT IF YOUR NOT, check this basic bread-n-butter stuff out homie..
First your gonna install Helm, k? Next configure the repository yah? Following that well release the chart to see what were rollin with, mmkay? Lastly we’ll clean up our messy cluster w/, you guessed it – HELMMMMMMMMMMMMM.
Lessons Learned:
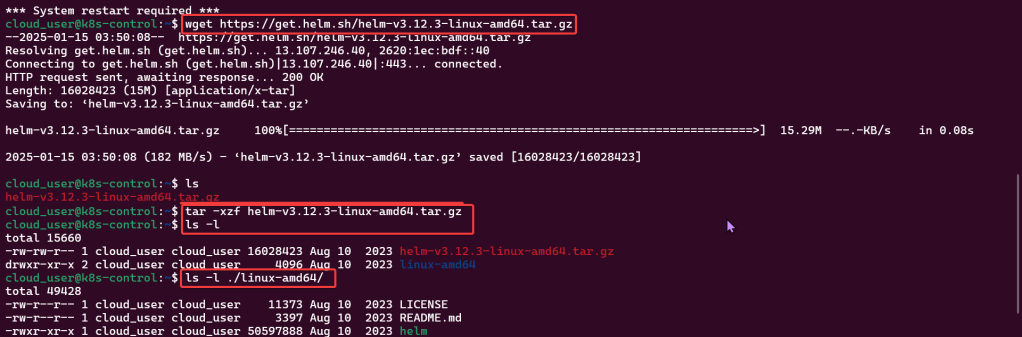
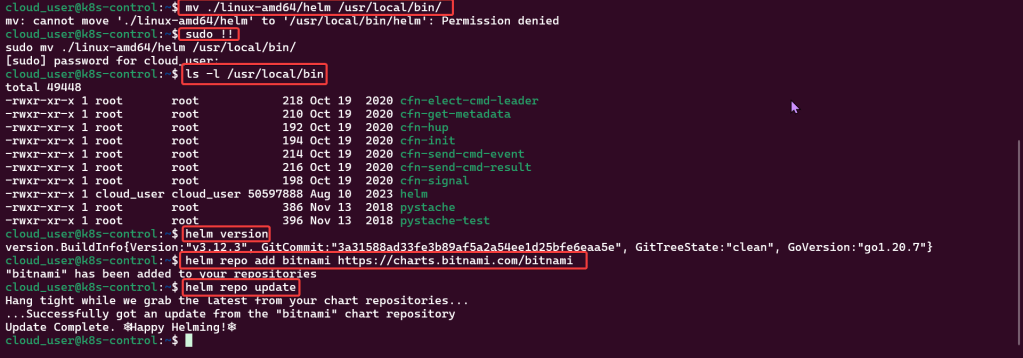
Install & Configure Helm:
Create a Helm Release:


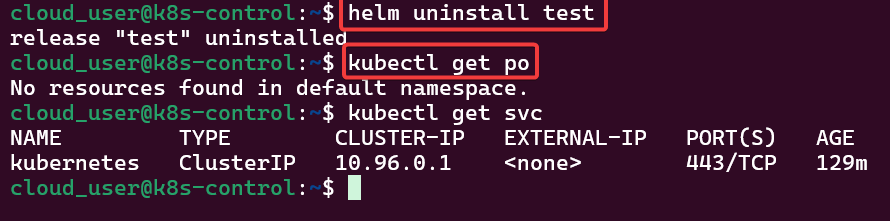
Verify the Release & Clean: