
Blog post includes covering Kubernetes Deep Dive in preparation for the KCNA.
- RBAC
- Stateful Sets
- Security
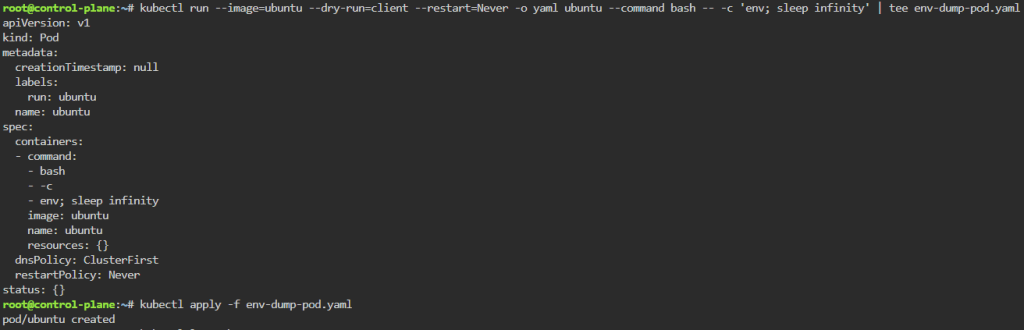
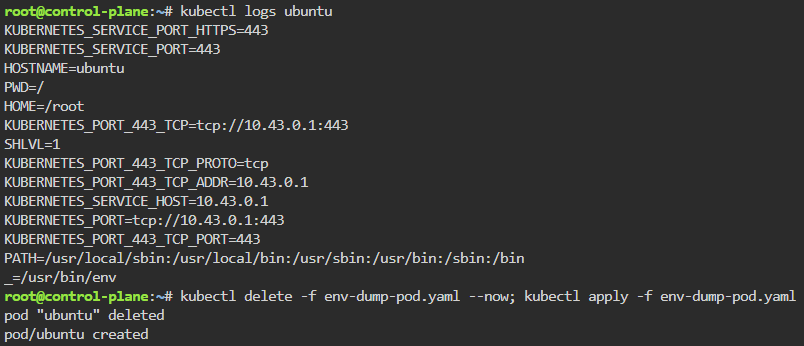
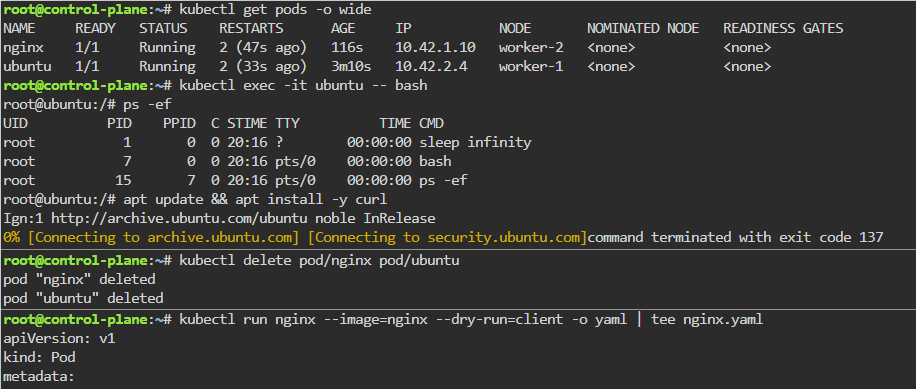
Security: 1st – create yaml file for ubuntu & can shell into root. 2nd – update spec for non-priv user & can escalate priv, 3rd – add spec to not allowed in escalating priv.
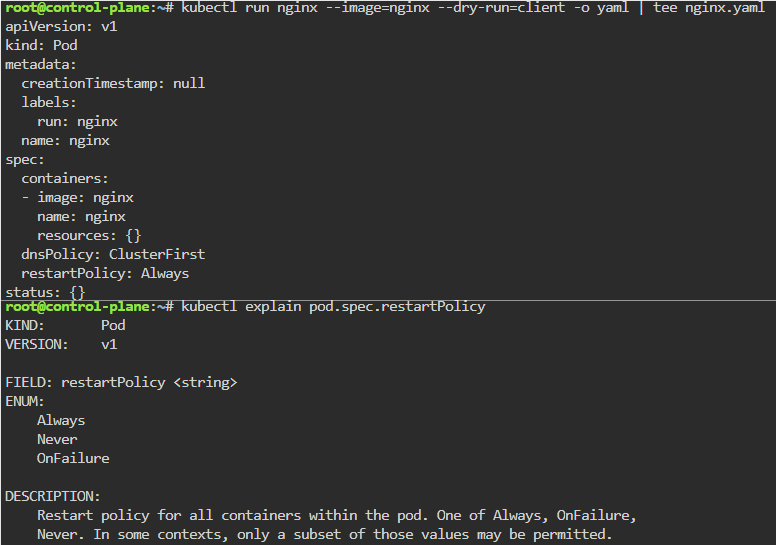
# kubectl run ubuntu --image=spurin/rootshell:latest -o yaml --dry-run=client -- sleep infinity | tee ubuntu_secure.yaml
# apiVersion: v1
kind: Pod
metadata:
  creationTimestamp: null
  labels:
    run: ubuntu
  name: ubuntu
spec:
  containers:
  - args:
    - sleep
    - infinity
    image: spurin/rootshell:latest
    name: ubuntu
    resources: {}
  dnsPolicy: ClusterFirst
  restartPolicy: Always
status: {}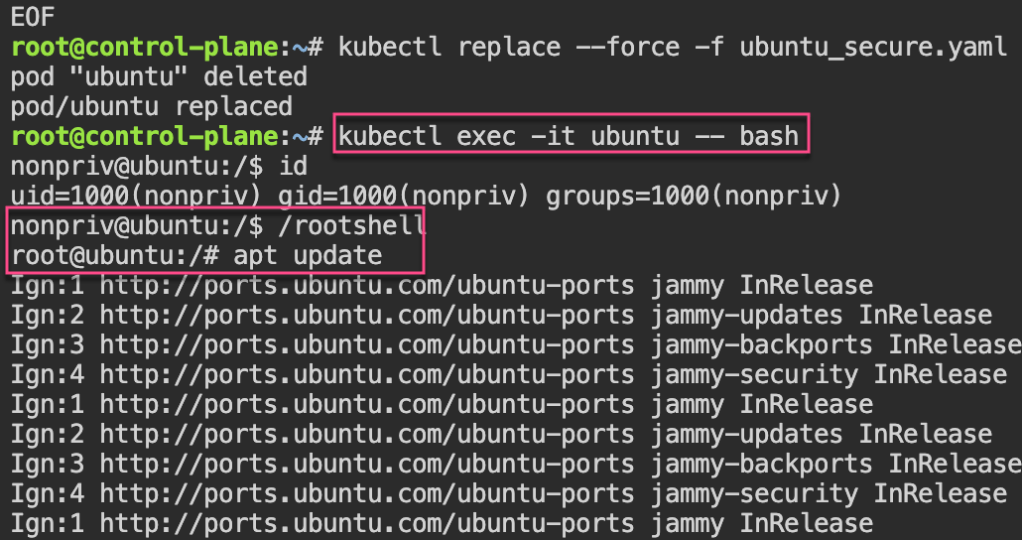
apiVersion: v1
kind: Pod
metadata:
  creationTimestamp: null
  labels:
    run: ubuntu
  name: ubuntu
spec:
  securityContext:
    runAsUser: 1000
    runAsGroup: 1000
  containers:
  - args:
    - sleep
    - infinity
    image: spurin/rootshell:latest
    name: ubuntu
    resources: {}
  dnsPolicy: ClusterFirst
  restartPolicy: Always
status: {}
EOF
cat <<EOF > ubuntu_secure.yaml
apiVersion: v1
kind: Pod
metadata:
creationTimestamp: null
labels:
run: ubuntu
name: ubuntu
spec:
securityContext:
runAsUser: 1000
runAsGroup: 1000
containers:
- args:
- sleep
- infinity
image: spurin/rootshell:latest
name: ubuntu
resources: {}
securityContext:
allowPrivilegeEscalation: false
dnsPolicy: ClusterFirst
restartPolicy: Always
status: {}
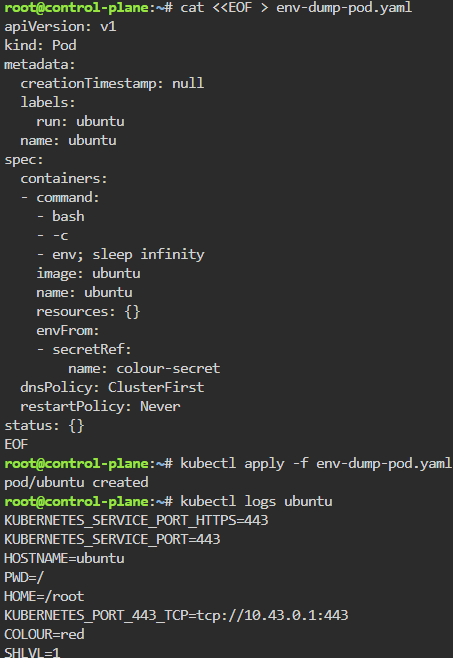
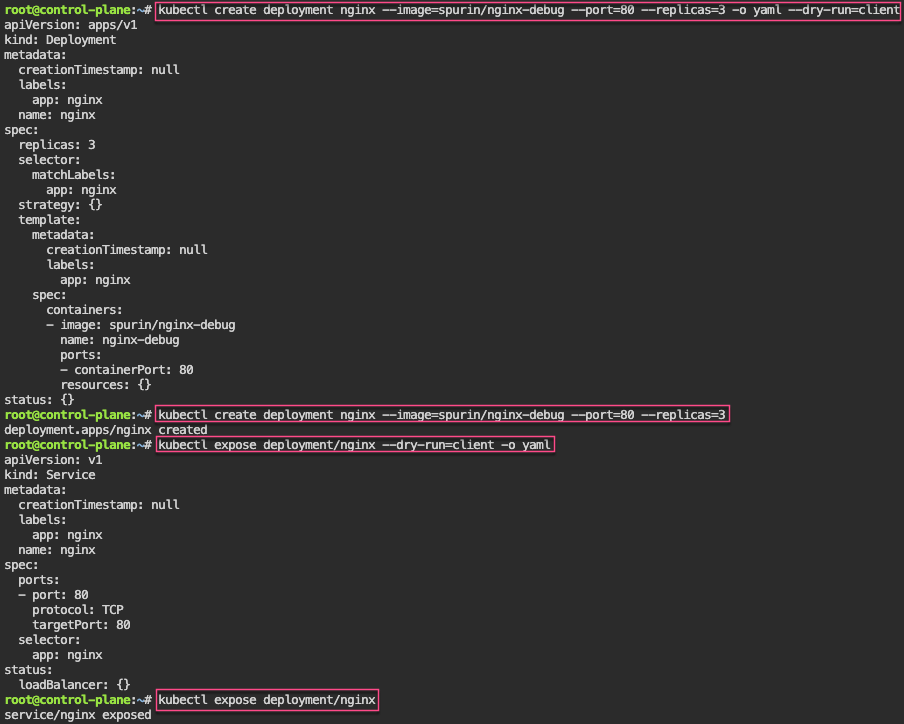
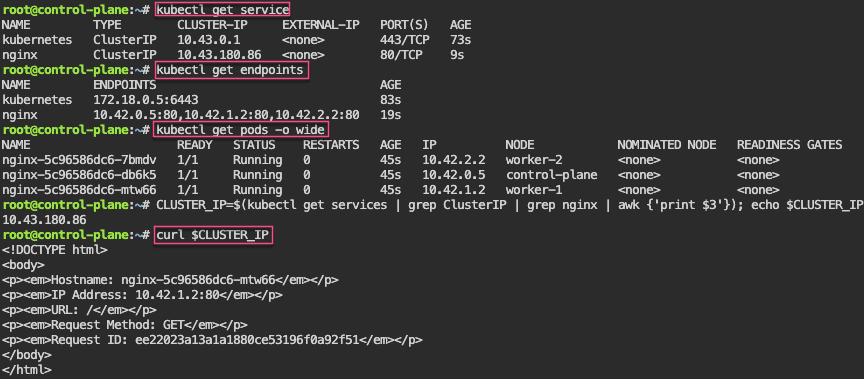
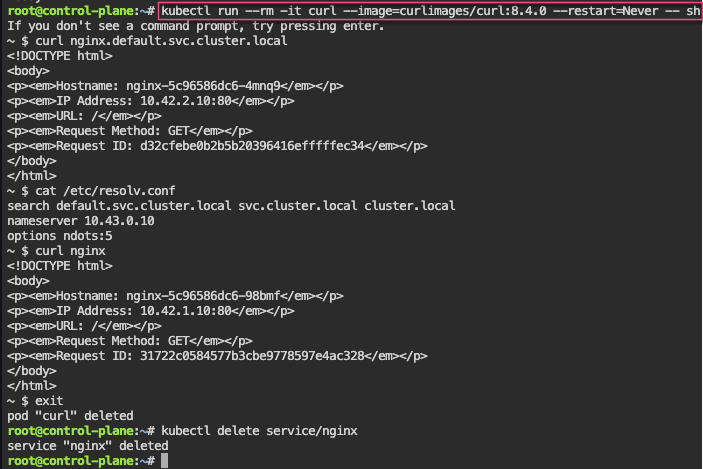
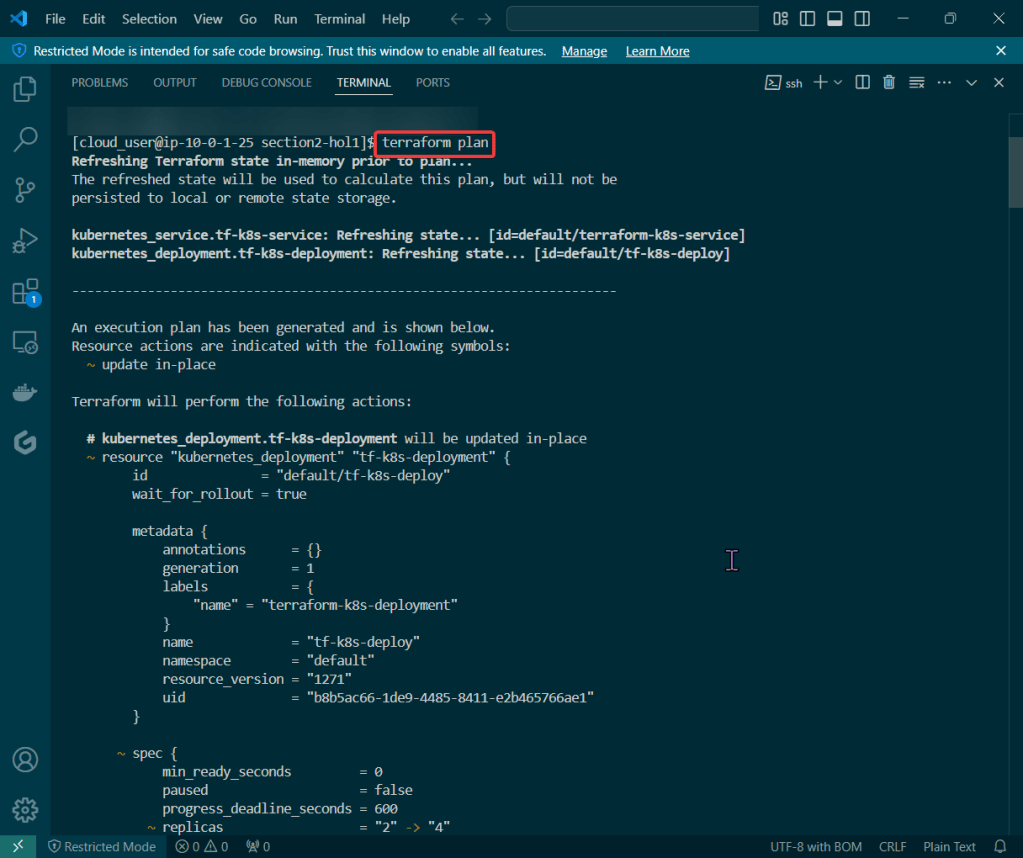
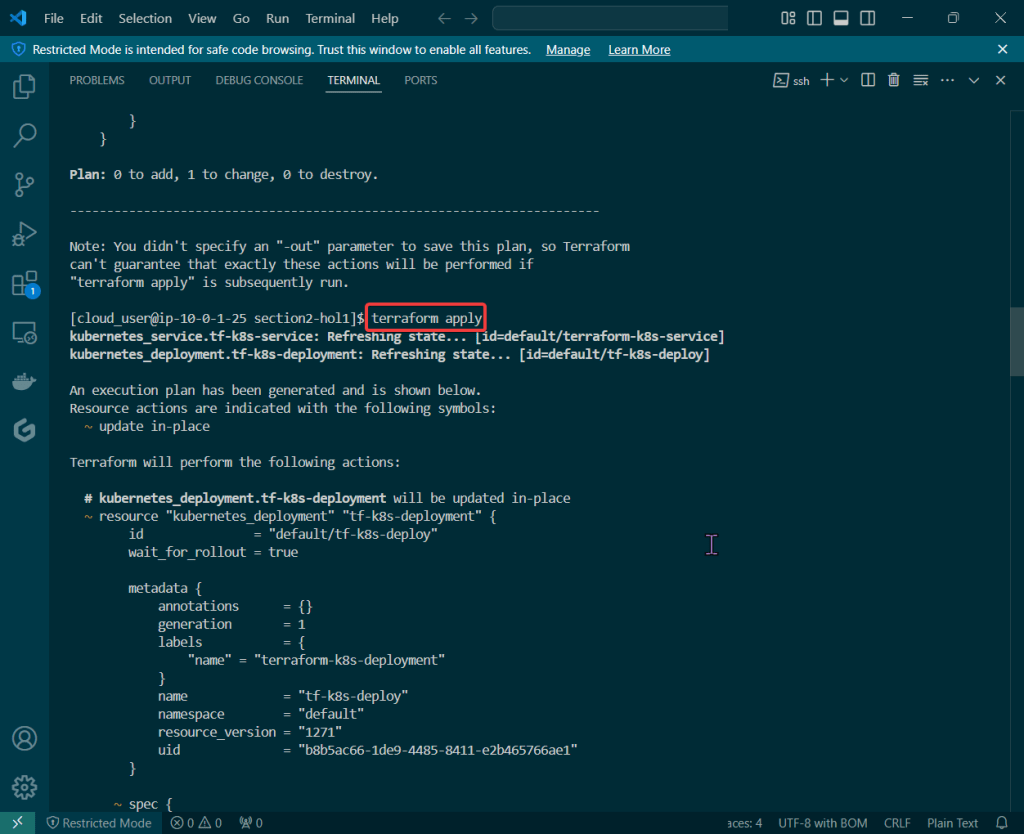
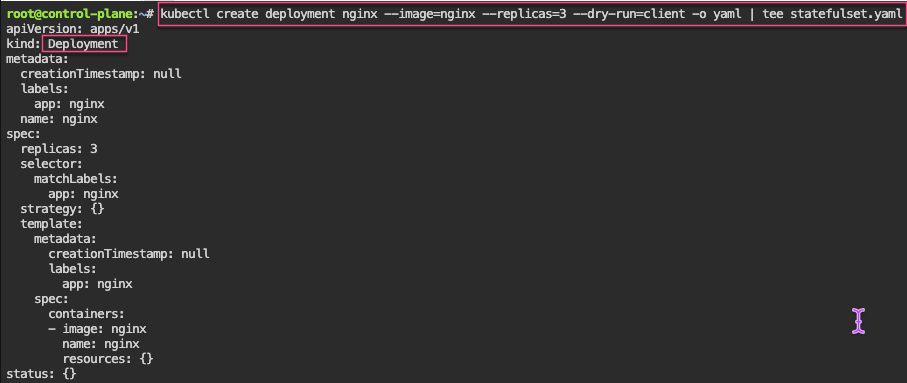
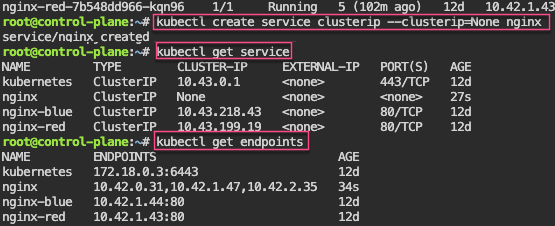
EOFStateful Sets: create yaml w/3 replicas, delete pod & watch magic to re-appear! 2nd – create clusterip service. 3rd – curl into shell & add rolling update.
# kubectl delete pod/nginx-2 --now
# kubectl get pods -o wide
# kubectl patch statefulset/nginx -p '{"spec":{"updateStrategy":{"rollingUpdate":{"partition":2}}}}'
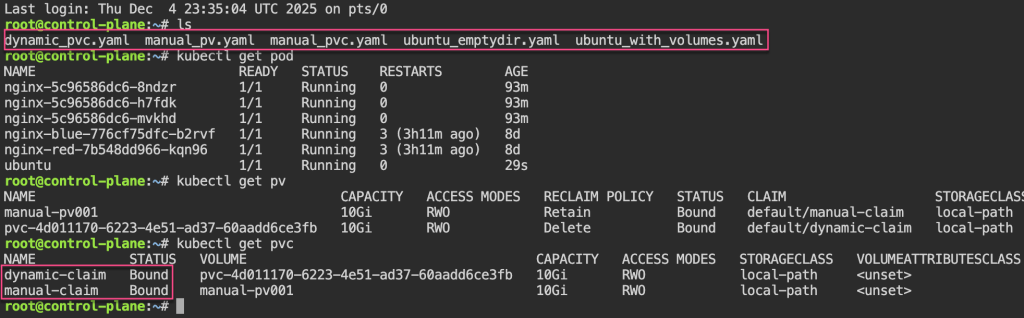
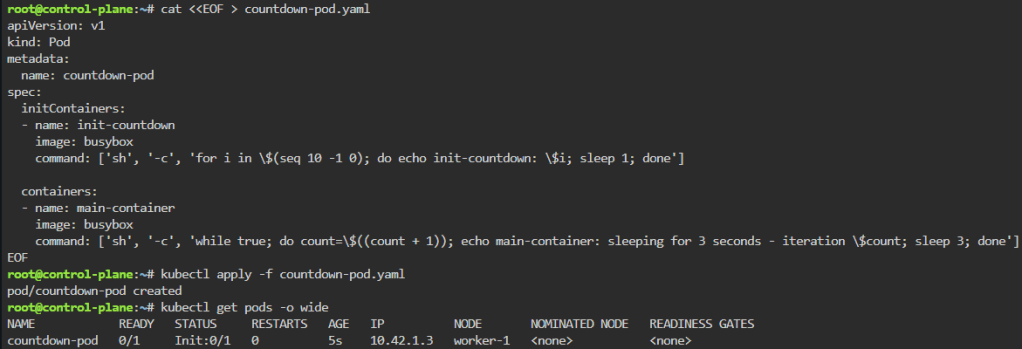
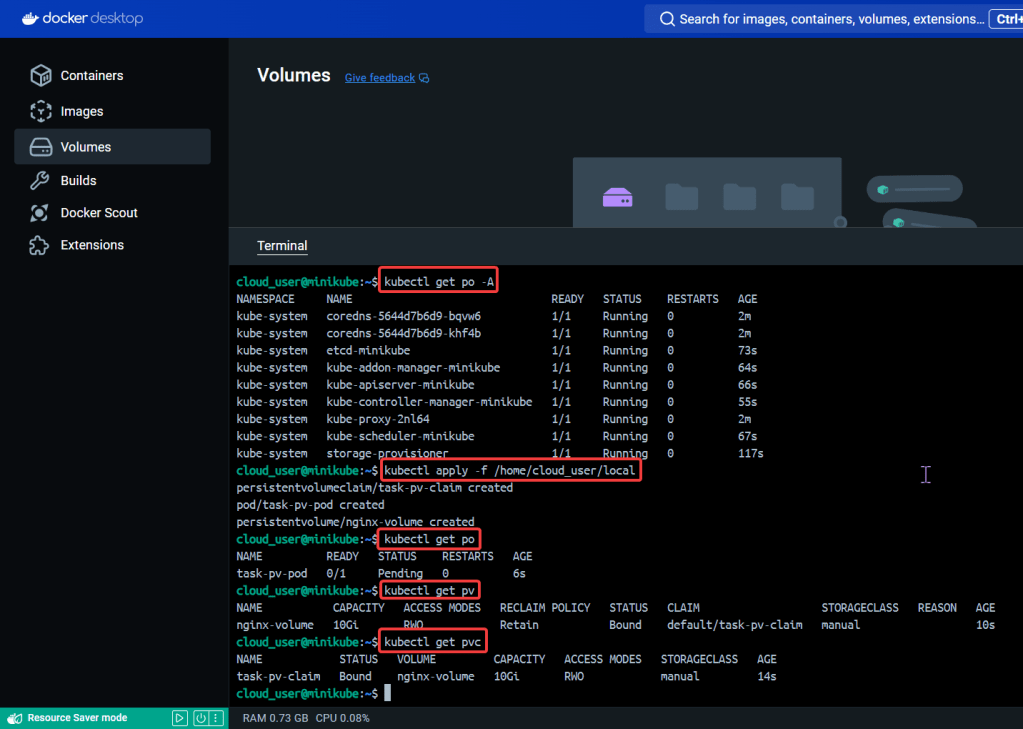
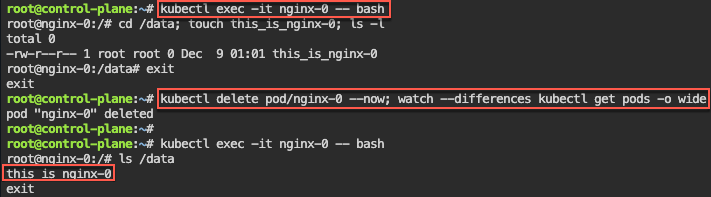
# kubectl set image statefulset/nginx nginx=nginx:alpine && kubectl rollout status statefulset/nginxPersistent Storage: 1st – update yaml spec for volume mount. 2nd – shell into pod, create a note. 3rd – delete the pod & watch to spin back up, shell back into see the note.
cat <<EOF > statefulset.yaml
apiVersion: apps/v1
kind: StatefulSet
metadata:
  labels:
    app: nginx
  name: nginx
spec:
  replicas: 3
  selector:
    matchLabels:
      app: nginx
  serviceName: nginx
  template:
    metadata:
      labels:
        app: nginx
    spec:
      containers:
      - image: nginx
        name: nginx
        volumeMounts:
        - name: nginx
          mountPath: /data
  volumeClaimTemplates:
  - metadata:
      name: nginx
    spec:
      accessModes: [ "ReadWriteOnce" ]
      storageClassName: "local-path"
      resources:
        requests:
          storage: 1Gi
EOF
# kubectl delete -f statefulset.yaml && kubectl apply -f statefulset.yaml
# watch --differences kubectl get pods -o wide
# kubectl get pvc
# kubectl get pv
# kubectl exec -it nginx-0 -- bash
# kubectl delete statefulset/nginx --now; for i in 0 1 2; do kubectl delete pvc/nginx-nginx-$i --now; done; kubectl delete service/nginx; rm statefulset.yamlRBAC: 1st variation of echo & base64 -d the CLIENT_KEY_DATA or CERTIFICATE_AUTHORITY_DATA.
RBAC – Cluster Role Binding: 1st – create own super user group by creating clusterrole & then bind together.
# kubectl get clusterrolebindings -o wide
# kubectl describe ClusterRole/cluster-admin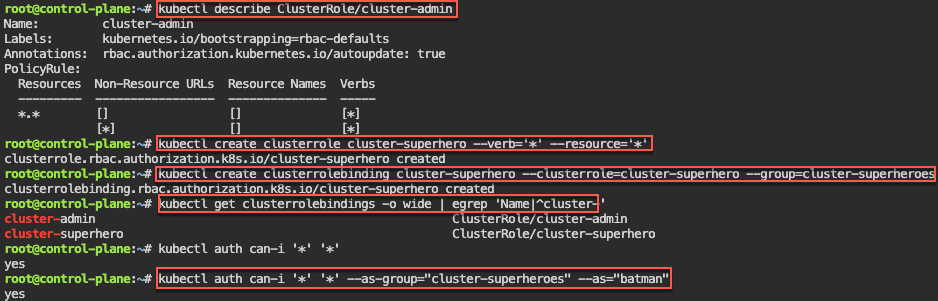
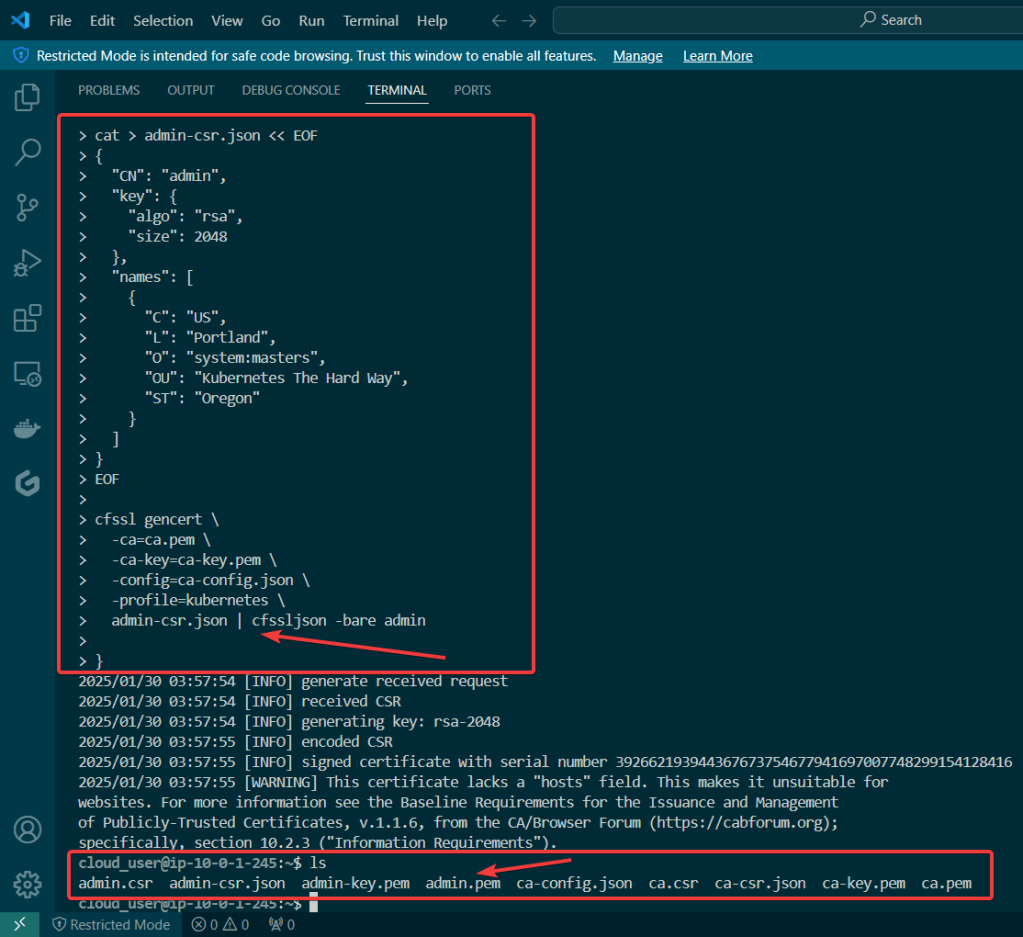
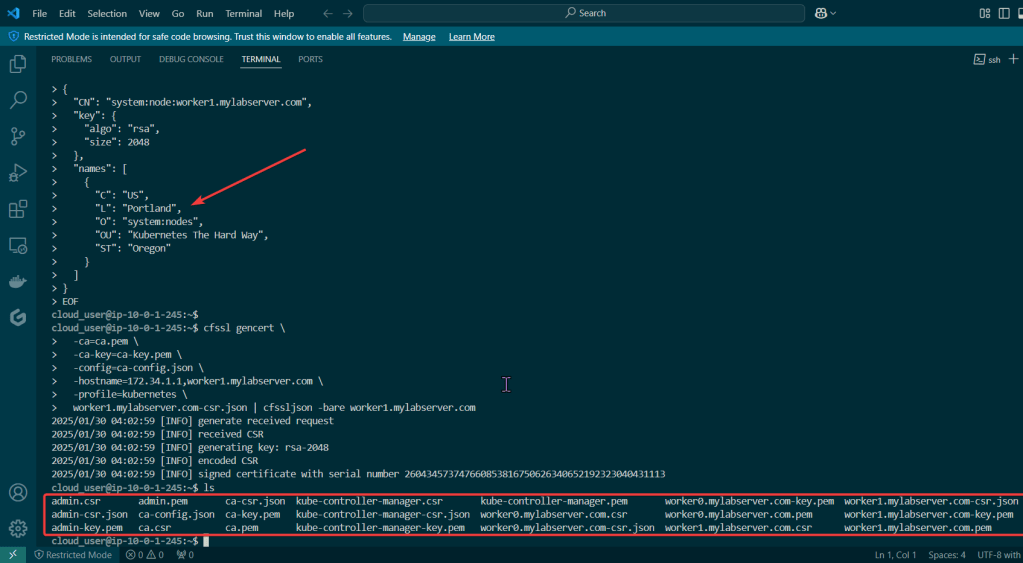
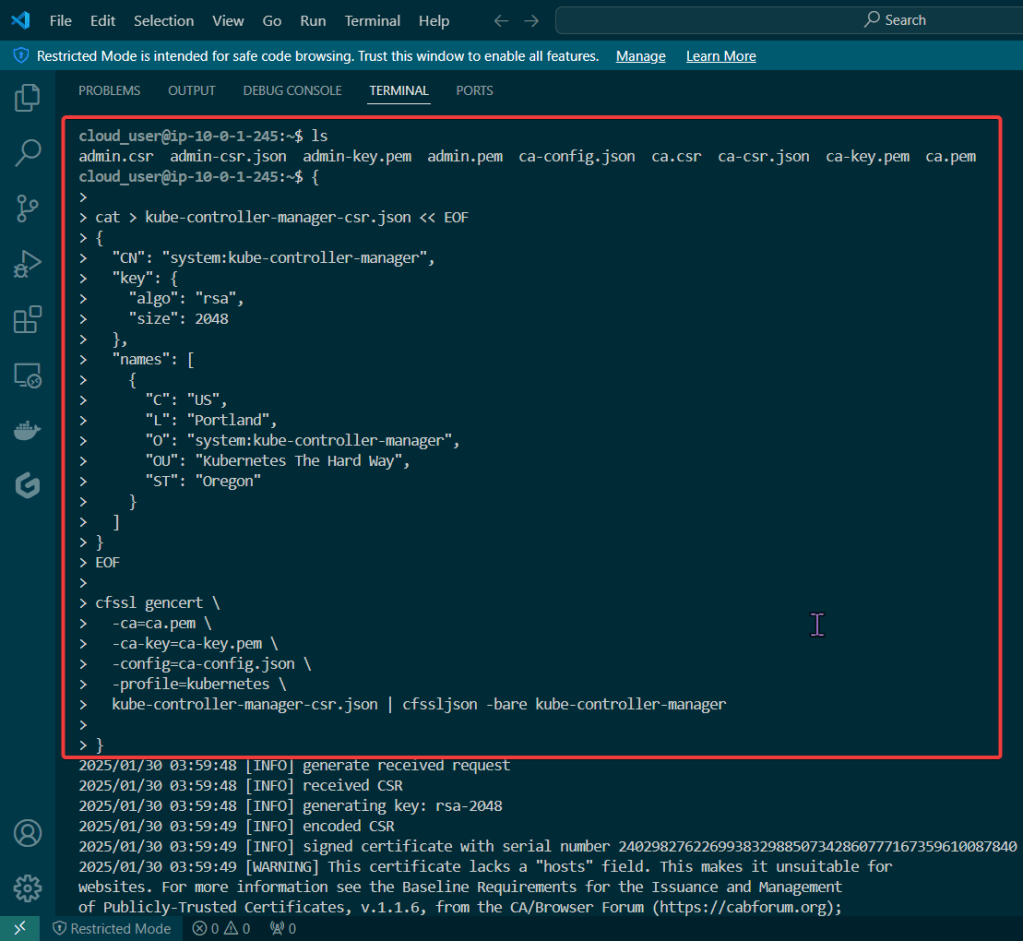
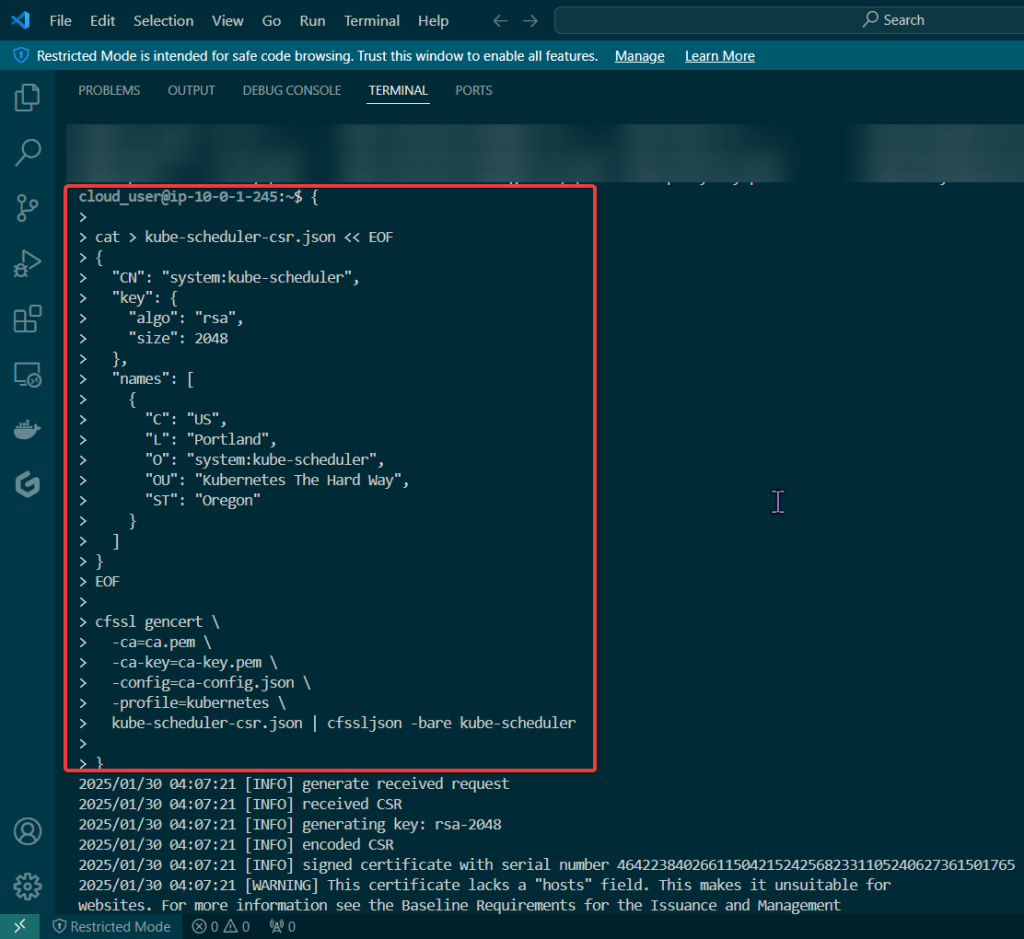
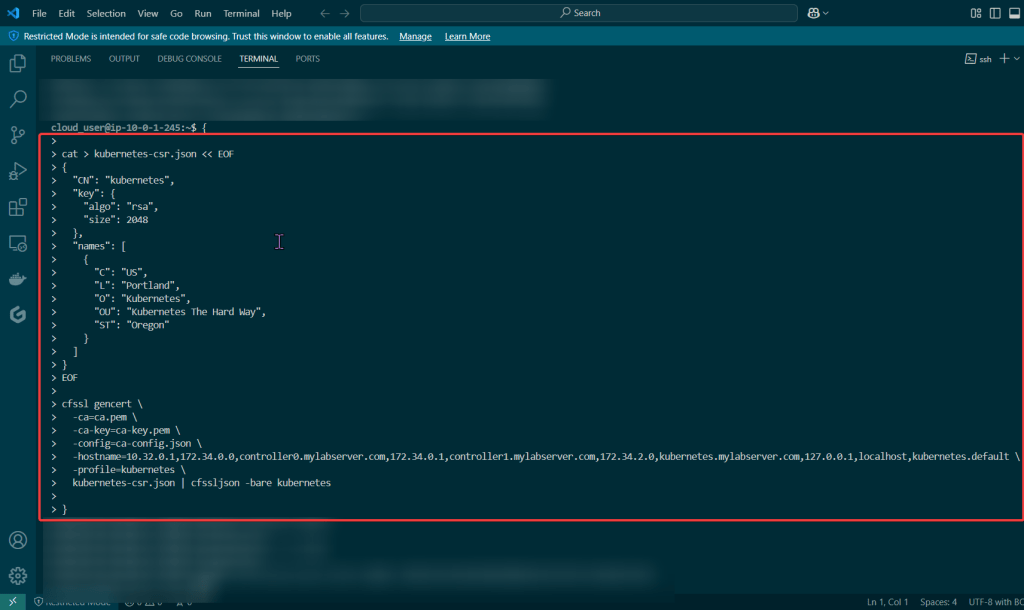
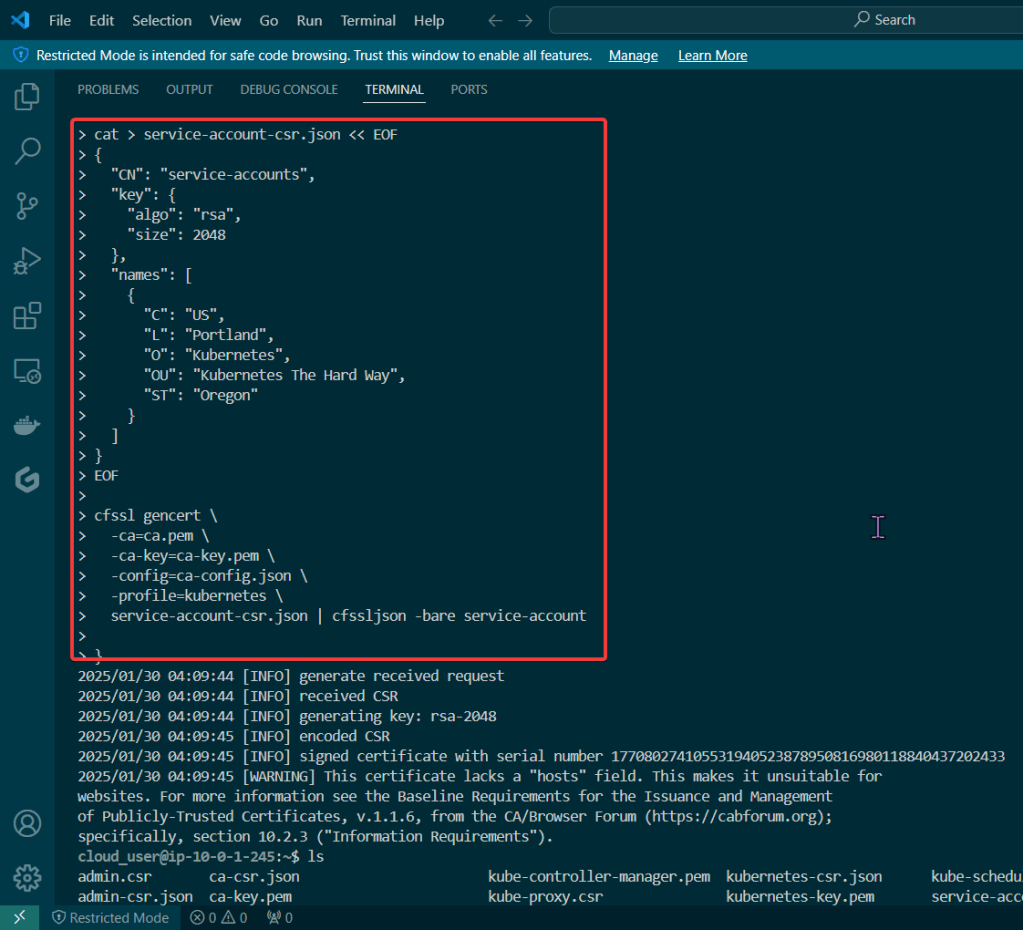
Manual – genrsa, key & csr, CSR_DATA & CSR_USER, yaml, apply, get csr base64 -d,
Automate RBAC Kubeconfig file: 1st – configure key & CSR, apply CSR, capture k8s info, create kubeconfig file, & cleanup k8s CSRs
# apt update && apt install -y git jq openssl
# git clone https://github.com/spurin/kubeconfig-creator.git
# 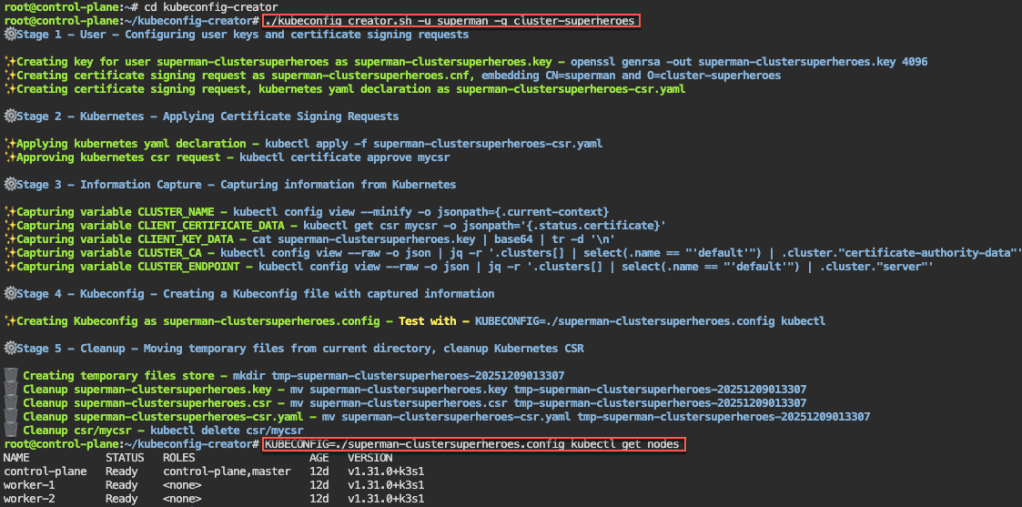
Watch-Only RBAC Group: 1st – create cluster role & clusterrolebinding. 2nd, – see if can access w/specific role. 3rd – run shell script & get nodes.
# ./kubeconfig_creator.sh -u uatu -g cluster-watchers
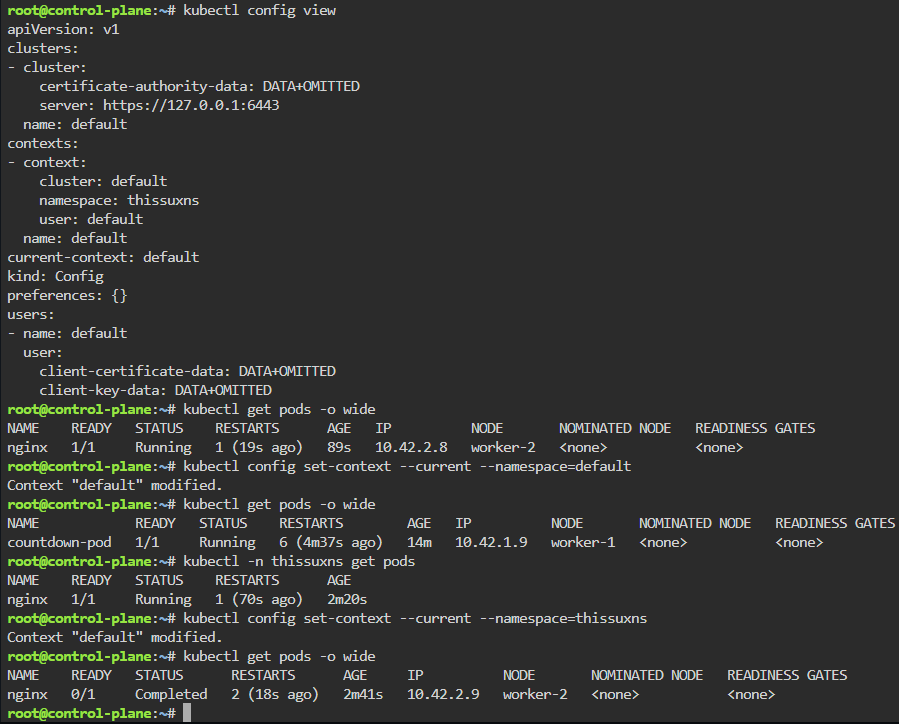
Roles & RoleBindings w/Namespaces: 1st create NS w/role & rolebinding. 2nd – see if user can access NS. 3rd – run shell to add more users.
# kubectl create namespace gryffindor
# kubectl -n gryffindor create role gryffindor-admin --verb='*' --resource='*'
# kubectl -n gryffindor create rolebinding gryffindor-admin --role=gryffindor-admin --group=gryffindor-admins
# kubectl -n gryffindor auth can-i '*' '*' --as-group="gryffindor-admins" --as="harry"
# ./kubeconfig_creator.sh -u harry -g gryffindor-admins -n gryffindor